Rv Leveling Guide: Easy Steps For A Stable Rig
A proper RV leveling guide helps you create a safe, stable, and comfortable campsite on almost any surface.
An uneven RV can make doors swing open, drains work poorly, and people sleep badly. This RV leveling guide explains how to level travel trailers, fifth wheels, motorhomes, and camper vans with clear steps, safe tools, and practical tips. You will learn how to read the site, choose the right leveling method, avoid common mistakes, and protect your RV from damage.
What Is RV Leveling?
RV leveling means adjusting your recreational vehicle until its main living floor is close to level from side to side and front to back. You may use leveling blocks, a tongue jack, hydraulic jacks, electric stabilizers, or an automatic leveling system.
Leveling is not only about comfort. A level RV helps:
• Keep doors, drawers, and cabinet hinges working correctly
• Help water flow toward drains
• Support safe use of slide outs
• Improve sleep and reduce body strain
• Keep appliances within their normal operating position
• Reduce stress on the frame, tires, jacks, and suspension
An RV does not need to be perfectly level like a laboratory table. A small variation is often acceptable. However, a noticeable slope can affect comfort and may create safety or equipment problems.
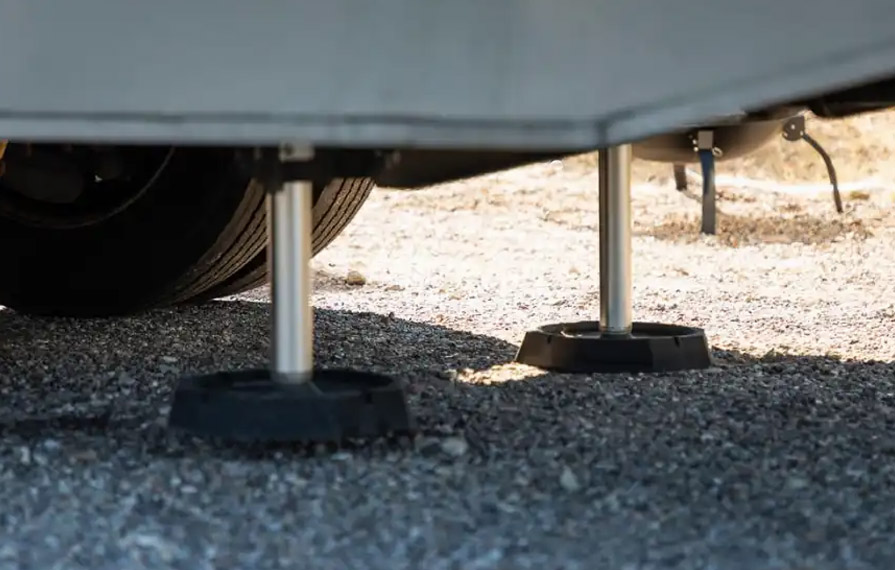
Many RV owners confuse leveling with stabilizing. Leveling changes the RV’s position. Stabilizing reduces movement after the RV is level. Stabilizer jacks are not designed to lift the full weight of most RVs.

Source: lippert.com
Why Proper RV Leveling Matters
An uneven RV can feel like a small problem at first. After a few hours, though, the slope becomes obvious. Cabinet doors may not stay shut, water may sit in a shower corner, and beds can feel tilted.
Some RV systems also need special care. Absorption refrigerators, often called propane or two way refrigerators, depend on correct installation and operation. The exact limits vary by model, so always follow the refrigerator maker’s instructions. If the RV is badly out of level, turn the refrigerator off until you correct the problem.
A level RV also creates a safer walking surface. This matters when children, older adults, or pets move inside. A stable entry step and a solid floor reduce the chance of trips.
There is another benefit that many new owners miss: leveling protects your routine. When your RV is stable, slide outs open more smoothly, your shower drains better, and your kitchen feels less like a moving boat.
Source: rvleveling.com
Tools You Need for RV Leveling
You do not need a large toolbox to follow this RV leveling guide. A few simple tools can make the process faster and safer.
• Bubble level or digital level: Use one on the floor, countertop, or another fixed surface.
• Leveling blocks: These spread weight and raise tires or jacks on low ground.
• Wheel chocks: These prevent the RV from rolling.
• Tire pressure gauge: Check tire pressure before travel and when the tires are cold.
• Tape measure: This can help estimate the height needed on a sloped site.
• Drill with a socket adapter: This may speed up manual stabilizer operation, but use it only if the jack maker allows it.
• Gloves and flashlight: These are useful for roadside stops or low light.
• Wood boards: Use solid boards only when approved for your jack system and site conditions.
Choose blocks that are wide enough for your tires or jack feet. Thin scraps of wood can crack, slide, or sink. Plastic leveling blocks are light and easy to clean, while heavy rubber or composite products may grip better on hard surfaces.
Never place a soft household item under a tire or jack. It can collapse without warning.

Source: lippert.com
How to Level an RV Step by Step
This basic process works for many travel trailers and motorhomes. Your owner’s manual always takes priority because jack locations and operating limits differ by RV.
1. Inspect the campsite
Walk around the site before driving into it. Look for holes, soft soil, tree roots, rocks, low branches, and drainage problems.
Check where your awning, slide outs, steps, sewer hose, and electrical cord will go. A site may look level near the road but slope sharply near the rear.
If the site is unsafe or too steep, ask for another space. No leveling system can turn a poor campsite into a safe one.
2. Choose the final parking position
Think about your exit before you park. Keep enough space for slide outs and awnings. Make sure the entry door opens toward a clear area.
For a trailer, try to keep the tow vehicle and trailer in a position that allows a clean, simple departure. Avoid parking with one side close to a deep ditch.
3. Measure the initial level
Place a small level inside the RV. Check it from side to side and from front to back.
Some owners attach a level near the hitch or front wall. That can save time, but confirm its reading with a level placed on the interior floor. A mounted level can shift or become inaccurate.
4. Level from side to side
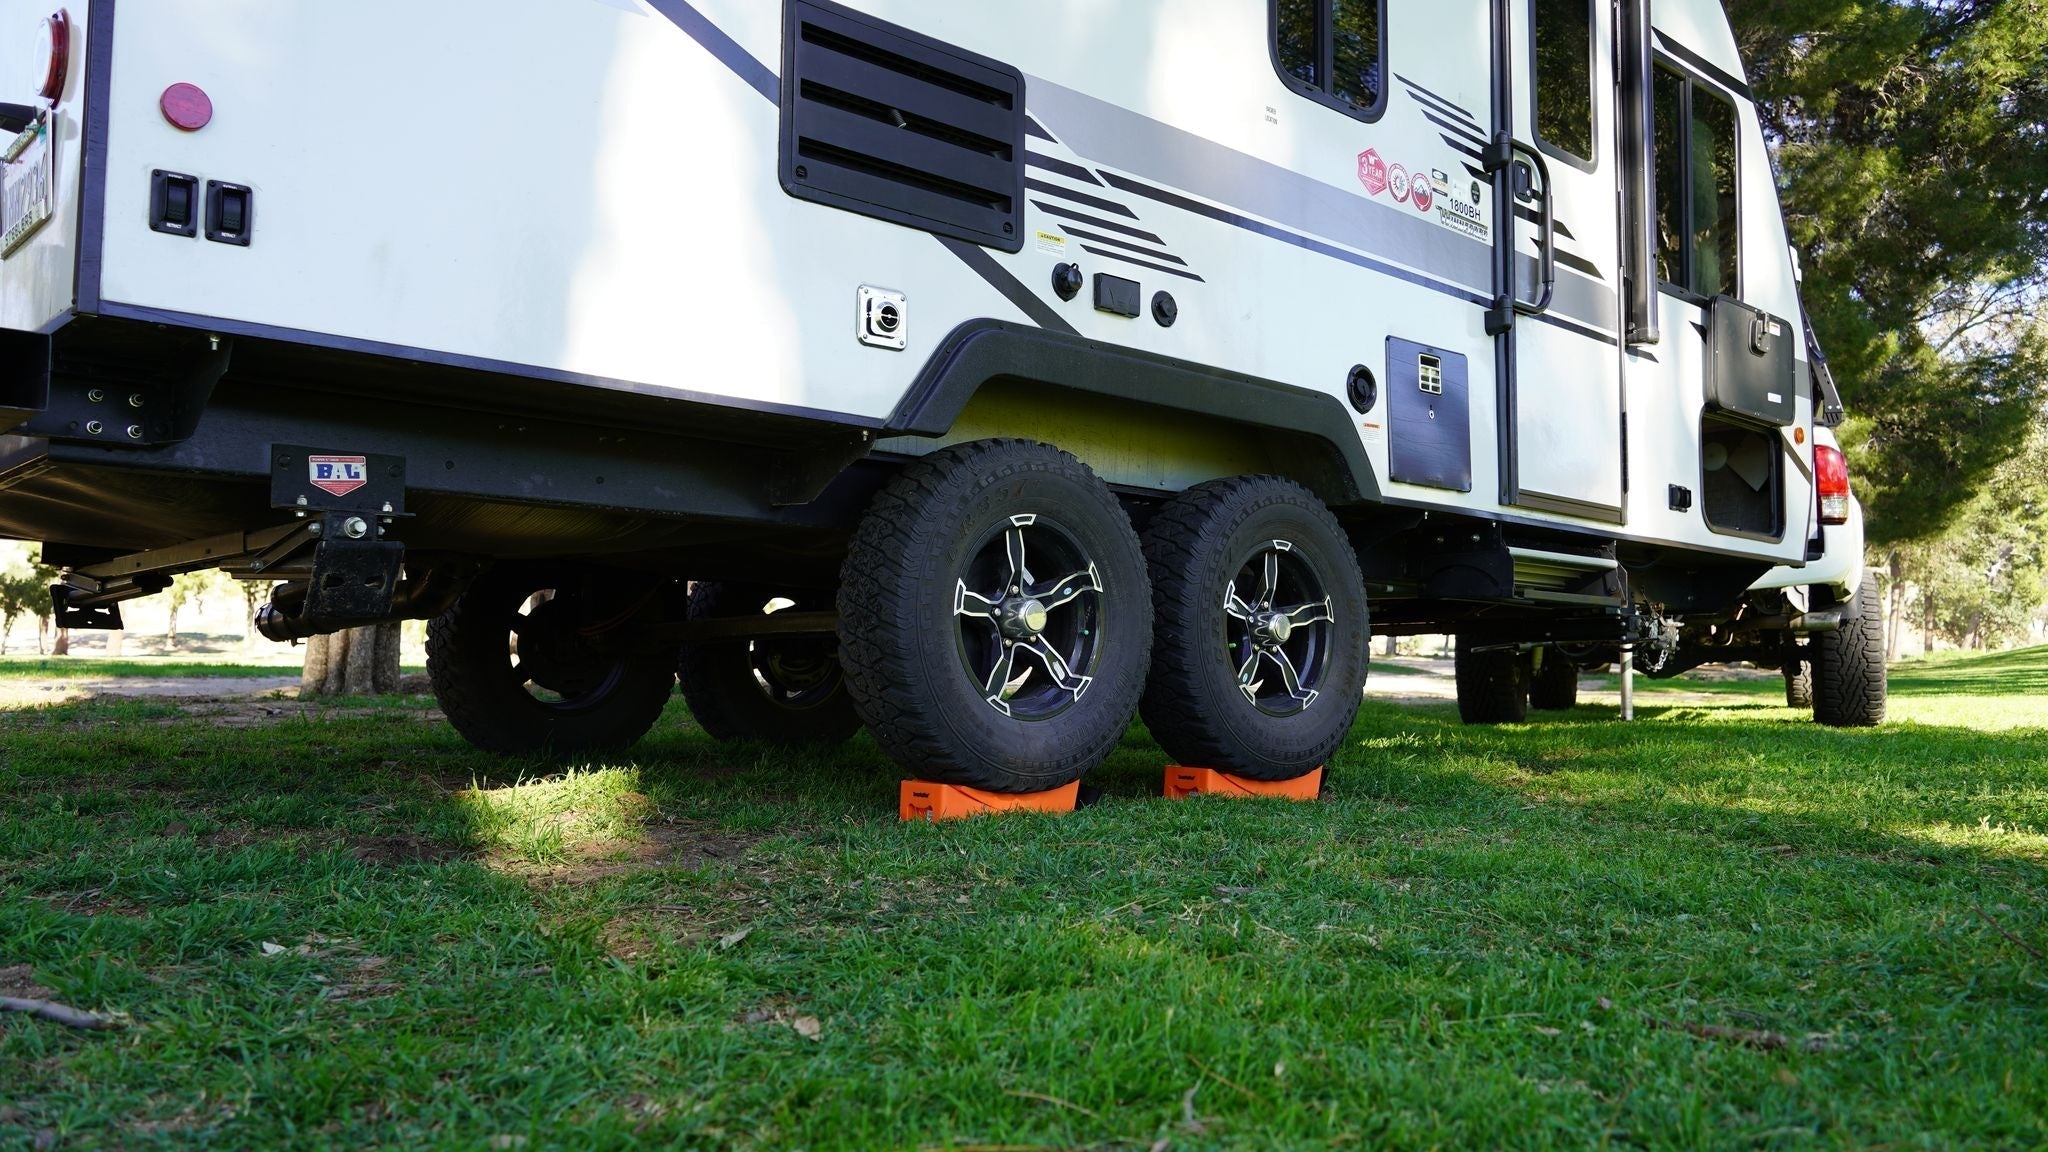
For a travel trailer, side to side is usually the first adjustment. If one side is low, drive that side onto leveling blocks.
Use a gradual ramp of blocks rather than a single tall step. Make the ramp wide and aligned with the tire. Then slowly pull onto it.
For a motorhome, use the leveling system or approved blocks as directed by the manufacturer. Do not drive onto loose blocks that may move under the tires.
5. Chock the wheels
Once the side to side position looks right, apply the parking brake if your vehicle has one. Place wheel chocks on both sides of the tires as soon as practical.
For a trailer, chock the wheels before disconnecting from the tow vehicle. This simple step prevents dangerous movement during unhitching.
6. Disconnect the trailer when appropriate
Lower the tongue jack until the coupler is clear of the hitch ball. Disconnect safety chains, wiring, and the breakaway cable according to your normal setup.
Keep the tow vehicle connected until the trailer is properly chocked. Never rely only on the tongue jack to stop a trailer from rolling.
7. Level from front to back
Use the tongue jack to raise or lower the front of a travel trailer. Check the interior level after each small adjustment.
Do not extend the jack farther than the manufacturer allows. If the jack foot needs more support, place an approved block beneath it before extending the jack.
For a fifth wheel, use the landing gear to adjust the front height. Keep the landing gear on firm support and avoid large, sudden movements.
8. Deploy stabilizer jacks
Lower the stabilizer jacks until they touch firm support. Apply only enough pressure to reduce movement.
Stabilizers should not lift the trailer’s wheels off the ground unless the system specifically allows that action. Lifting the trailer with stabilizers can bend jack parts, twist the frame, or create an unstable setup.
9. Recheck the level
Walk inside and check both directions again. Open a cabinet door and observe whether it moves. Check the shower floor and the main living area.
If the RV is still uneven, make small changes. Large corrections often create new problems at the opposite end.
When learning this process, I found that small adjustments saved more time than trying to fix everything at once. A slow, measured approach feels easier and usually protects the equipment.
Source: securitymaninc.com
RV Leveling for Different RV Types
The best RV leveling method depends on the vehicle. A lightweight pop up camper does not behave like a 40-foot diesel motorhome.
Travel trailers
Travel trailers usually need this order:
- Level side to side with tire blocks.
- Chock the tires firmly.
- Disconnect from the tow vehicle.
- Level front to back with the tongue jack.
- Lower the stabilizer jacks.
The tire blocks carry the trailer’s rolling weight. The tongue jack handles front to back adjustment. The stabilizers mainly reduce movement.
Fifth wheels
Fifth wheels use front landing gear instead of a traditional tongue jack. The usual process is:
- Position the trailer and inspect the site.
- Level side to side with tire blocks.
- Chock the wheels.
- Keep the truck connected while preparing to unhitch.
- Lower the landing gear enough to support the front.
- Unhitch the truck.
- Adjust the front and rear as directed.
- Lower stabilizers if equipped.
Avoid placing extreme side loads on landing gear. If the site slopes sharply, use approved blocks to reduce the amount of extension.
Class A, B, and C motorhomes
Many motorhomes use hydraulic or electric automatic leveling systems. Park with the transmission and parking brake set as directed by the manual.
Before pressing the automatic leveling button:
• Confirm that doors, storage bays, and slide outs have enough clearance.
• Remove or secure loose items around the jack pads.
• Place jack pads on firm ground.
• Check for soft soil, underground hazards, and steep drop offs.
After the system finishes, inspect each jack. Never crawl under a motorhome supported only by leveling jacks. Use properly rated jack stands and follow professional service procedures for under-vehicle work.
Small campers and vans
Small campers may use manual blocks and a compact bubble level. Their short wheelbase can make them seem level when the floor still has a slope.
Place the level on the floor where you sleep and where you cook. This gives a more useful reading than checking only the dashboard.

Source: securitymaninc.com
How to Level an RV Without an Automatic System
Manual RV leveling is simple when you work in the correct order. The key is to raise the low side rather than digging into the ground or forcing a jack to do too much work.
Start by finding the low side with your level. Place a stable ramp of blocks in front of that tire or tire group. Drive onto the blocks slowly, then check the level again.
If the RV needs a large correction, add height in small layers. Do not stack random boards in a tall, narrow tower. The base should be wide, stable, and aligned with the tire.
For front to back leveling, use the tongue jack or landing gear. A tongue jack block can reduce extension and improve stability. It must be strong enough for the load and large enough to keep the jack foot from sinking.
I once saw a camper use one small board under a jack on wet ground. The board tilted, the jack shifted, and the entire setup had to be reset. A wider support would have prevented the problem. The lesson is simple: ground support matters as much as jack strength.

Source: gopalmerpark.org
Using an Automatic RV Leveling System
Automatic systems save time, but they do not remove the need for judgment. The system can move jacks, yet it cannot see a hidden hole, soft soil, tree root, or low obstruction.
Park in the correct position first. Set the parking brake and follow the system’s instructions. Some systems require the engine to run, while others use house batteries. Never guess.
Watch the jacks during deployment. Stop if a foot slides, sinks, or contacts an object. After leveling, inspect the RV from outside and confirm that the tires remain supported as the manufacturer requires.
Automatic systems may also have limits on slope. If the display shows an error or the RV remains far from level, retract the jacks and choose a better site. Repeatedly forcing the system can damage motors, hydraulic parts, wiring, or the frame.
Keep the system maintained. Inspect hydraulic fluid levels, electrical connections, jack feet, and warning lights according to the service schedule.

Source: partsvia.com
Common RV Leveling Mistakes to Avoid
A clear RV leveling guide should explain what not to do. Most leveling problems come from rushing or using the wrong part for the job.
• Using stabilizer jacks to lift the whole RV: This can damage the frame and jacks.
• Forgetting wheel chocks: A trailer may roll when you disconnect the tow vehicle.
• Leveling only by eye: Small slopes are hard to judge without a level.
• Using loose objects under tires: Bricks, stones, and broken boards can shift or break.
• Extending jacks too far: Long extension reduces stability and may exceed the equipment rating.
• Opening slide outs before leveling: Some slide systems need the RV level first.
• Ignoring soft ground: A jack can sink after the RV appears stable.
• Leaving tires unsupported when the manual requires support: This may change the load on the suspension.
• Rechecking only outside: The inside floor is the place that matters for living comfort.
• Working under a raised RV without proper support: Leveling jacks are not a substitute for rated service stands.
One common mistake is trying to correct a steep campsite with extreme jack extension. If the RV needs a dramatic adjustment, the safest answer is often a different parking position.

Source: lippert.com
RV Leveling on Different Ground Types
The ground changes how well your leveling equipment works. Dry, firm gravel is often easier than wet grass, but every site needs inspection.
Concrete and asphalt
Hard surfaces provide a firm base, but they can be uneven. Use jack pads to protect the surface and spread the load. On hot asphalt, inspect the surface because heat can soften it.
Gravel
Gravel may shift under tire blocks and jack pads. Compact the blocks by applying pressure slowly. Recheck the setup after walking inside and extending slide outs.
Grass and soil
Grass can hide soft soil. Use large support pads under jacks and avoid parking near drainage channels. Rain can turn a stable-looking site into a weak one.
Sand
Sand needs wide support pads. Narrow jack feet can sink quickly. If the RV continues to settle, stop using the site or move to firmer ground.
Slopes
Always consider water flow and vehicle stability on a slope. Keep the RV’s low side away from unsafe edges, and do not rely on a steep angle corrected only by jacks.
RV Leveling and Slide Outs
Slide outs change the RV’s weight distribution. That is why leveling should happen before extending them unless the manufacturer states otherwise.
Read the slide out instructions for your exact RV. Some designs have special requirements, including limits on how far the RV may be out of level.
Before extending a slide:
• Confirm the slide path is clear.
• Check that the awning topper or roof area has no branches.
• Make sure interior furniture and cabinet doors are clear.
• Keep people and pets away from moving parts.
• Listen for unusual sounds.
If a slide binds, stop. Do not keep holding the switch. A jam may point to a leveling issue, an obstruction, a motor problem, or a damaged seal.
A Practical RV Leveling Checklist
Save this checklist on your phone until the steps become routine.
- Inspect the campsite.
- Choose the safest parking position.
- Check side to side and front to back.
- Place tire blocks on the low side.
- Drive onto the blocks slowly.
- Apply the parking brake when required.
- Chock all trailer wheels.
- Disconnect the tow vehicle if using a trailer.
- Level front to back.
- Lower stabilizers or operate the automatic system.
- Check jack feet and ground support.
- Recheck the interior level.
- Extend slide outs only after the manual allows it.
- Connect utilities and inspect for safe hose and cable paths.
- Recheck the RV after heavy rain, strong wind, or movement inside.
This RV leveling guide works best when you treat leveling as a short safety routine, not a race. With practice, most setups take only a few extra minutes.
How Accurate Does an RV Need to Be?
The exact answer depends on the RV and its appliances. Many owners use a small bubble level and aim for a nearly centered reading rather than perfect scientific accuracy.
A small difference may not affect daily use. A large tilt can affect doors, drains, slide outs, and some refrigerator designs.
Your appliance and RV manuals are the best authority for operating limits. If a refrigerator maker gives a specific level range, follow that range instead of using a general internet rule.
A useful test is practical: the floor should feel comfortable, cabinet doors should behave normally, water should drain as expected, and the RV should not rock when people walk inside.
Maintaining Your RV Leveling Equipment
Good tools still need care. Clean dirt from jack legs and inspect them for bends, cracks, or unusual wear.
Check leveling blocks for splits or crushed edges. Replace any block that has lost its shape. Inspect wheel chocks for sun damage and confirm that they still grip the ground.
For hydraulic systems, follow the fluid and filter schedule in the owner’s manual. Check for leaks, but never place your hand near a suspected high pressure leak. Hydraulic fluid can enter skin and cause serious injury.
For electric systems, inspect cables, switches, and battery condition. Low voltage can make a system act weak or fail to complete a cycle.
Have a qualified RV technician inspect damage after a jack slips, a frame twists, or a tire leaves its support. Hidden damage is not always visible from outside.
Frequently Asked Questions About RV Leveling
Should I level my RV before or after opening the slide outs?
In most cases, level the RV before opening the slide outs. However, follow the instructions for your specific RV because some manufacturers give different guidance.
Can I use stabilizer jacks to level my travel trailer?
Stabilizer jacks usually reduce movement after the trailer is level. They are not normally designed to lift or level the trailer’s full weight.
Do I need leveling blocks under every tire?
You need support under the tires that require elevation. Some setups also use blocks under the other tires for even support, but follow your equipment instructions and keep all blocks stable.
How do I know which side of my RV is low?
Place a level on the interior floor and check side to side. The side opposite the bubble’s high point is generally the low side, but confirm the reading with a second position if needed.
Can I level an RV on a steep campsite?
A mild slope may be manageable with approved blocks and jacks. A steep slope that requires extreme jack extension is unsafe, so choose a different site when possible.
Is a digital level better than a bubble level?
A digital level can give precise readings and may be easier to read. A bubble level is simple, inexpensive, and does not need batteries, so either can work well.
Should the tires come off the ground during leveling?
Usually, the tires should remain supported unless the RV manufacturer specifically allows otherwise. If a leveling system lifts a tire unexpectedly, stop and check the instructions.
Wait, user says don’t give CodeImg after FAQ. Remove. Need no placeholder. Good.
Conclusion
A safe RV leveling routine starts with a careful campsite check and ends with a stable, comfortable interior. Use tire blocks for side to side changes, jacks for front to back adjustment, and stabilizers only to reduce movement.
Follow your RV, jack, slide out, and appliance manuals. Work slowly, use solid support, chock trailer wheels, and stop when the site or equipment looks unsafe.
Keep this RV leveling guide with your camping checklist and practice the steps at home before a busy travel day. A few calm minutes at the campsite can prevent costly damage and make the rest of your trip far more relaxing. Share your best leveling tip or explore more RV maintenance guides before your next adventure.