

How To Reset RV Leveling System: Easy Step-By-Step Guide
Most RV leveling systems reset by retracting the jacks, cycling power, and recalibrating the level position.
Knowing how to reset an RV leveling system can save a camping trip when the control panel shows an error, the jacks stop moving, or the coach sits unevenly. The correct steps depend on the system brand, but safe parking, a full jack retraction, a power reset, and zero-point calibration solve many common faults. This guide explains each step in plain language and shows when a simple reset is not enough.

What an RV Leveling System Does
An RV leveling system uses electric motors, hydraulic pumps, jacks, sensors, and a control panel to level the coach. Some systems work fully by hand, while others use automatic leveling with a computer-controlled leveling module.
Common system brands include:
• Lippert Level Up and Ground Control
• Equalizer Systems
• HWH hydraulic leveling systems
• Bigfoot leveling systems
• Power Gear and older electric jack systems
The system may level the RV from front to back and side to side. It uses position sensors, pressure readings, or stored “zero point” data to decide when the RV is level.
Learning how to reset an RV leveling system starts with identifying the type of system installed on your coach. A hydraulic system may need fluid and pump checks, while an electric system may need battery, motor, or wiring checks.

Safety Checks Before You Reset the System
Leveling jacks can move with great force. A small mistake can damage the RV, injure someone, or cause the coach to shift. Take a few minutes to prepare before you begin.
Park the RV on firm, stable ground. Avoid soft soil, steep slopes, loose gravel, and areas near drop-offs. Keep people, pets, and tools away from the jack legs and tires.
Before you reset an RV leveling system, follow these basic safety steps:
• Set the transmission in Park, or use the proper gear for your RV.
• Apply the parking brake.
• Keep the engine running if the owner’s manual requires it for jack operation.
• Close slide-outs unless the manufacturer says otherwise.
• Make sure the jacks have enough room to extend.
• Never crawl under an RV supported only by leveling jacks.
• Use properly rated jack stands if you must work beneath the coach.
• Wear eye protection when checking hydraulic fluid or battery connections.
The leveling jacks are not a replacement for service stands. They support the RV during normal leveling, but they may not provide the stable protection needed for repairs.

How to Reset an RV Leveling System
The steps below work as a general reset method for many modern RV systems. Your owner’s manual remains the final authority because button names and reset sequences can differ.
1. Retract all leveling jacks
Start with the RV in a safe position. Turn on the leveling system and press the “Retract All,” “Store,” or “All Retract” button.
Watch each jack as it moves. A jack that stays down may point to a bent leg, damaged motor, low hydraulic pressure, or a failed limit switch.
Wait until the control panel confirms that the jacks are fully retracted. Some systems show a “Jacks Down” light until the sensors confirm a stored position.
2. Turn the leveling system off
Switch the control panel off after the jacks are fully stored. Turn off the ignition if your system allows it.
Wait for about 30 seconds. This gives the control module time to shut down and clear temporary communication errors.
3. Disconnect power when the manual allows it
Some RV leveling systems reset when you remove power from the control module. You may need to turn off the coach battery disconnect or remove the leveling system fuse.
Do not pull random fuses. Check the fuse label or wiring diagram first. Leave the power off for one to five minutes, then restore it.
4. Check the battery voltage
Low voltage causes many leveling problems. Electric motors need strong battery power, and hydraulic pumps also draw a high current when they start.
A fully charged 12-volt RV battery should usually read about 12.6 to 12.8 volts when it has rested. A reading near 12.0 volts shows a deeply discharged battery, while a reading below that level may indicate a serious problem.
Check:
• The house battery terminals
• The main leveling system fuse
• Ground cables
• Battery disconnect switches
• Corroded or loose connections
If the voltage drops sharply when you press a leveling button, the battery or cable connection may be weak.
5. Restore power and test the panel
Reconnect the battery or leveling fuse. Turn the ignition or control panel on as directed by the manual.
Look for warning lights, error codes, or a “Wait” message. Test the retract function first. If the panel responds normally, move to zero-point calibration.
This basic process explains how to reset an RV leveling system after a temporary software, voltage, or communication fault.

How to Calibrate the Zero Point
A reset and a recalibration are not the same thing. A reset clears or restarts the system. Calibration teaches the system what “level” means.
The zero point must be set when the RV is truly level. If the coach is tilted during calibration, the system may repeat that tilt every time you use automatic leveling.
General zero-point calibration steps
The exact button sequence depends on the manufacturer, but the process often follows this pattern:
-
Park the RV on a firm, level surface.
-
Confirm that all jacks are fully retracted.
-
Use a bubble level inside the coach and another level outside if possible.
-
Adjust the RV manually until it is level from side to side and front to back.
-
Turn on the leveling control panel.
-
Press and hold the calibration buttons listed in the owner’s manual.
-
Wait for the panel to beep or display a confirmation.
-
Turn the system off, then back on.
-
Run an automatic leveling cycle to test the new setting.
Many Lippert systems use a “front” and “rear” button combination for zero-point calibration. Equalizer, HWH, and Bigfoot systems may use a different sequence. Never guess the button combination if the manual is available.
If the RV levels correctly in manual mode but not in automatic mode, the zero-point setting is often the first thing to check.

Brand-Specific Reset Notes
The general process for how to reset an RV leveling system is similar across brands, but the controls can vary.
Lippert Level Up and Ground Control
Lippert systems commonly use a touchpad with buttons such as “Auto Level,” “Manual,” “Retract All,” and “Enter.” A low-voltage warning, jack error, or communication fault may require a full retract cycle and power reset.
After the jacks retract, check the touchpad display and the system fuse. If the RV is not level during automatic operation, follow the Lippert zero-point calibration procedure for your exact controller.
Some Lippert systems use a dedicated leveling controller, while others connect through a smart-home or multiplex network. That means a communication fault may involve more than the touchpad.
Equalizer Systems
Equalizer systems may use hydraulic pumps, electric jacks, or both. A reset may include retracting the jacks, cycling the ignition, and holding a control button according to the model instructions.
If the pump runs but a jack does not move, inspect hydraulic fluid, hoses, solenoids, and wiring. A reset will not repair a leaking hose or a failed hydraulic valve.
HWH systems
HWH systems often use hydraulic fluid, a pump motor, solenoid valves, and control electronics. The panel may show a “Not in Park” or “Jacks Down” warning if the system does not receive the correct signal.
Check the parking brake, transmission position, fluid level, and warning switches. HWH procedures can vary widely, so use the service manual for the specific control panel.
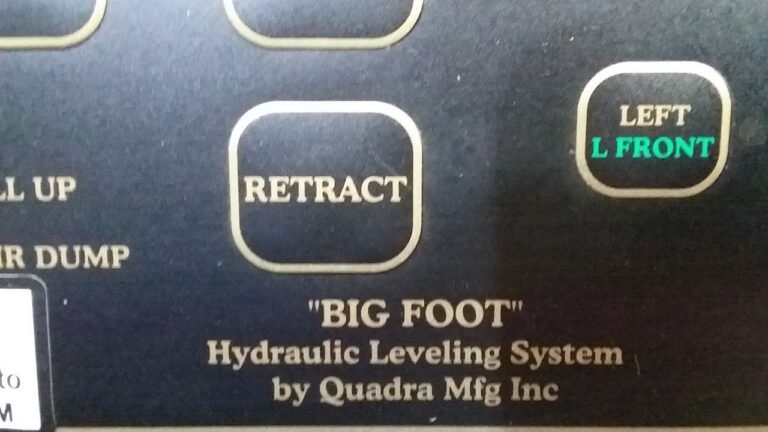
Bigfoot systems
Bigfoot systems may use hydraulic leveling with an automatic control panel. The panel can stop operation if it detects low voltage, a jack position problem, or a sensor fault.
Fully retract the jacks, turn the system off, confirm battery voltage, and perform the manufacturer’s calibration process. Do not keep holding a button if the pump runs but the jack does not respond.

Common Reasons an RV Leveling System Needs a Reset
A leveling system may need a reset for several reasons. Not every error means the control board has failed.
Low battery voltage
This is one of the most common causes. A weak battery may power the control panel but fail when the jack motors or hydraulic pump start.
Check the battery with a multimeter. Also check the voltage while the system is operating because a resting battery reading can look normal even when the battery is failing under load.
Blown fuse or tripped breaker
A leveling system can draw high current. A shorted motor, damaged wire, or overloaded pump may blow a fuse or trip a breaker.
Replace a fuse only with the same rating. If the new fuse blows again, stop testing and find the short.
Poor ground connection
A loose ground can create strange symptoms. The panel may light up, but the jacks may move slowly or stop without warning.
Clean corroded battery terminals and ground points. Tighten the connections, but do not overtighten small electronic terminals.
Bad jack or position sensor
The control module needs accurate jack position data. A faulty sensor may tell the system that a jack is still down or out of range.
Inspect the sensor wires near each jack. Look for pinched insulation, broken connectors, water damage, or wires rubbing against moving parts.
Hydraulic fluid problems
Low fluid, air in the lines, a clogged filter, or a leaking hose can prevent proper movement. Use only the fluid type listed by the manufacturer.
Do not open a hydraulic line while the system is pressurized. Hydraulic fluid can cause serious injury if it enters the skin.
Incorrect zero-point calibration
If automatic leveling repeatedly leaves the RV nose-high, nose-low, or tilted to one side, the zero point may be wrong.
Recalibrate only on a surface that is known to be level. A parking lot may look flat but still have enough slope to affect the setting.
Communication failure
Modern RVs may use data cables between the touchpad, control module, and sensors. A loose connector can produce an error that feels like a software failure.
Inspect connectors for moisture and corrosion. Do not bypass safety circuits or connect wires without a wiring diagram.
What to Do When the Jacks Will Not Retract
A jack that will not retract needs careful attention. Do not drive away until every jack is safely stored or the RV is professionally secured.
First, confirm that the system has adequate battery voltage. Then check the “Store,” “Retract All,” or “All Up” command.
If one jack remains extended:
• Try the manual retract function.
• Check for a blown fuse or tripped breaker.
• Inspect the motor or hydraulic line.
• Look for mud, ice, or an object blocking the jack.
• Check whether the jack is bent.
• Listen for motor or pump activity.
A motor that clicks but does not turn may have a poor connection, worn brushes, or a failed motor. A hydraulic pump that runs without movement may have low fluid, air, a valve problem, or a leak.
Some systems have a manufacturer-approved emergency retraction method. This may involve a manual release valve or hand tool. Use that method only when the service manual explains it. Improvising around hydraulic pressure can be dangerous.
What to Do When the System Shows an Error Code
Write down the exact error before switching the system off. The code may disappear after a reset, but that information helps with diagnosis.
Check the manual for the error meaning. Typical messages include:
• Low voltage
• Jacks down
• Out of stroke
• Excessive slope
• Sensor error
• Communication error
• Park brake fault
• Retract timeout
A reset may clear a temporary error, but the same code returning usually points to a real fault. For example, an “excessive slope” message may be accurate if the RV cannot safely level on that site.
Avoid repeatedly resetting the system without finding the cause. It is like turning a warning light off without checking the engine. The problem may become more expensive or unsafe.
Mistakes to Avoid When Resetting an RV Leveling System
Many leveling problems become worse because the reset is rushed. These mistakes are easy to avoid.
• Do not reset the system while people are under the RV.
• Do not drive with a jack partly extended.
• Do not use a higher-rated fuse to stop repeated fuse failures.
• Do not calibrate the zero point on sloped ground.
• Do not ignore low battery voltage.
• Do not mix hydraulic fluids unless the manufacturer approves it.
• Do not force a jack with a truck, pry bar, or impact tool.
• Do not bypass the parking brake or transmission safety switch.
• Do not keep running the pump when it sounds strained or the fluid is leaking.
One lesson I have seen repeatedly in RV troubleshooting is that owners often blame the control panel first. In many cases, the real cause is a weak battery, poor ground, or damaged connector. Start with simple checks before replacing expensive electronics.
How to Prevent Future Leveling Problems
Good maintenance makes how to reset an RV leveling system less important because many faults can be prevented.
Inspect the jacks before and after each trip. Remove dirt and road salt from the exposed jack legs. Follow the manufacturer’s instructions for lubrication because some systems require special grease, while others should not be lubricated in the same way.
Keep the house batteries charged. Check battery water if you use serviceable flooded batteries, and inspect terminals for corrosion. Store the RV with the battery system maintained according to the battery maker’s instructions.
Also include these habits:
• Check for hydraulic leaks during routine walkarounds.
• Keep the control panel dry.
• Inspect wiring near the jacks.
• Test automatic leveling before a long trip.
• Carry the owner’s manual and fuse information.
• Know the location of the main leveling fuse and battery disconnect.
• Use wooden or composite jack pads when recommended.
Jack pads can reduce sinking on soft ground, but they do not make an unsafe site safe. Choose a stable surface first.
When to Call an RV Technician
Call a qualified RV technician when the system has a hydraulic leak, a bent jack, repeated electrical faults, or a control board error that returns after a proper reset.
Professional help is also wise when the RV is stuck with a jack extended. A technician can secure the coach, release pressure safely, and test the motor, solenoids, sensors, and wiring.
Stop using the system if you smell burning insulation, see sparks, hear grinding, or notice the RV shifting. These signs may indicate a serious electrical or mechanical problem.
A reset is useful for temporary faults. It cannot fix damaged hardware. Knowing that limit is an important part of safe RV ownership.
Frequently Asked Questions About How to Reset an RV Leveling System
How do I reset an RV leveling system?
Fully retract all jacks, turn the leveling panel off, disconnect system power if the manual allows it, and restore power after a short wait. Then test the system and recalibrate the zero point if automatic leveling is still inaccurate.
Why is my RV leveling system beeping?
Beeping often indicates low voltage, a jack-down warning, a parking brake problem, an uneven site, or a sensor fault. Read the control panel message and check the battery, jack position, and safety conditions before resetting the system.
Can I reset my RV leveling system without disconnecting the battery?
Often, yes. Turning the panel off and completing a full retract cycle may clear a temporary fault, but some systems require the leveling fuse or battery disconnect to be turned off briefly.
Why does my RV level incorrectly after a reset?
The zero-point calibration may be wrong, or the ground may not be truly level. Recalibrate the system on a firm, level surface using a reliable bubble level and the procedure for your exact system.
What should I do if one RV leveling jack will not retract?
Check battery voltage, fuses, wiring, and the jack for physical damage or blockage. Do not drive until the jack is fully secured, and use the manufacturer’s emergency retraction method or call an RV technician.
Is it safe to work under an RV supported by leveling jacks?
No. Leveling jacks are not a substitute for properly rated jack stands or service equipment. Never place your body under the RV unless it is secured according to professional safety practices.
How often should I inspect my RV leveling system?
Inspect the jacks, wiring, battery connections, and hydraulic components before trips and during regular RV maintenance. A quick walkaround can reveal leaks, loose cables, corrosion, or a jack that is not fully retracting.
Conclusion
Resetting an RV leveling system usually begins with safe parking, full jack retraction, a power cycle, battery checks, and zero-point calibration. The exact button sequence varies by brand, so use the manual for your Lippert, Equalizer, HWH, Bigfoot, or other system.
Treat repeated errors, leaks, bent jacks, and low-voltage problems as warning signs rather than annoyances. Follow these steps carefully before your next trip, keep the system maintained, and consult a qualified RV technician when a reset does not solve the fault. Share your experience or leveling system model in the comments to help other RV owners troubleshoot with confidence.


One Comment