Lippert RV Leveling System: Easy Setup Guide
Introduction
A Lippert RV leveling system helps many U.S. RV owners level a fifth wheel, travel trailer, or motorhome at a campground, driveway, or seasonal site. The system may use electric jacks, hydraulic jacks, or both. A control panel or app commands the jacks to raise and lower the RV.
The basic process is simple: park on a firm site, secure the RV, extend the correct jacks, and confirm that the RV is stable. The exact steps depend on the Lippert system installed, such as Ground Control, Ground Control 3.0, Ground Control 4.0, Level Up, or OneControl.
This guide explains how Lippert leveling systems work, how to use them safely, and how to find common faults without guessing or replacing parts too soon.
What Is a Lippert RV Leveling System?
A Lippert RV leveling system is a powered jack system that helps reduce side-to-side and front-to-back tilt after you park. Lippert Components, Inc. is also known as LCI. Its systems are widely used on fifth wheels, travel trailers, and motorhomes sold in the United States.
A typical system has these parts:
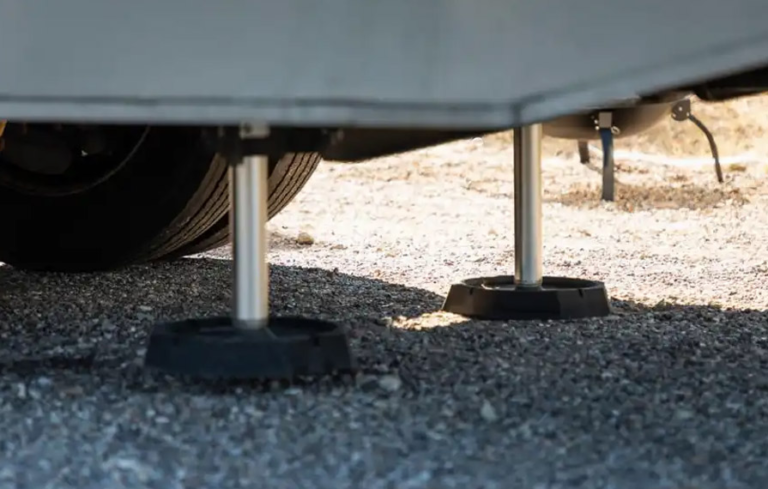
- Front landing gear: Supports the front of a fifth wheel.
- Rear leveling or stabilizer jacks: Support the rear part of the RV.
- Controller: Reads commands and controls the jack motors or hydraulic valves.
- Touchpad or control panel: Lets you select manual or automatic operation.
- Electric motors or hydraulic pump: Creates the force that moves the jacks.
- Position sensors: Help the controller track jack movement on some systems.
- Wiring, fuses, breakers, and grounds: Supply power and control signals.
- Optional OneControl app or remote: Provides wireless control on compatible setups.
Leveling is not the same as stabilizing
Leveling changes the RV’s position so the floor, appliances, and living space sit more evenly. Stabilizing reduces movement after the RV is parked.
The jacks are not a substitute for:
- Wheel chocks
- A parking brake
- A properly rated hitch or pin connection
- Jack stands for repair work
- A stable parking surface
Do not use the leveling jacks to lift the RV high enough to work beneath it. The jacks can move, lose pressure, or fail. Use equipment rated for the RV’s weight and follow the chassis or vehicle manufacturer’s service instructions.
Electric versus hydraulic Lippert systems
| System type | How it moves | Common benefit | Common concern |
|---|---|---|---|
| Electric | Individual motors turn screw-driven jacks | Simple control and no hydraulic fluid | Motor, gear, wiring, or ground faults |
| Hydraulic | A pump sends fluid to cylinders | High lifting force and fast movement on some RVs | Fluid leaks, valves, pump, and battery issues |
| Hybrid | Uses more than one jack or drive type | Fits certain RV layouts | Diagnosis varies by component |
The model name matters. A Ground Control electric system does not use the same service steps as a Level Up hydraulic system. Find the model number before ordering a motor, controller, fuse, remote, or replacement jack.
Before You Use the Leveling System
Prepare the RV before pressing Auto Level. Most leveling problems begin with poor site selection, weak power, an unsecured RV, or a control panel that does not know the correct zero point.
1. Pick a firm, suitable site
Choose a site that is as level as practical. Avoid soft shoulders, deep gravel, unstable soil, broken pavement, and areas where water may collect.
Place blocks or pads under the jacks if the owner’s manual allows them. A wider, solid pad can reduce sinking on soft ground. Do not use loose objects that can crack, slide, or collapse.
2. Keep the RV connected as required
For a fifth wheel, keep the tow vehicle connected until the front landing gear is down and the hitch is properly released. Some systems use the front landing gear during unhitching. Follow the RV manufacturer’s hitch procedure.
For a travel trailer, keep the trailer attached until the trailer is secured with the parking brake, wheel chocks, and the correct tongue support procedure.
3. Chock the wheels
Chock the wheels on both sides before you disconnect from the tow vehicle. Chocks must contact the tires firmly. Do not rely on the powered jacks to stop the RV from rolling.
4. Check battery power
A weak house battery can cause:
- Slow jack movement
- Clicking motors
- Controller resets
- An error message
- A system that works in one direction but not another
Many Lippert systems need stable 12-volt DC power. Shore power does not always correct a weak or damaged battery. Check the battery condition, terminals, main fuse, and ground connection.
5. Clear the jack path
Look beneath and around each jack. Remove rocks, cords, hoses, blocks, and other objects that could stop movement.
Keep people, pets, and body parts away from moving jacks. The system can create strong crushing forces.
How to Operate a Lippert RV Leveling System
The safest operation method is the one in the manual for your exact system. The sequence below describes the general process used by many Lippert installations.
Manual leveling and automatic leveling
Manual mode lets you control each jack or jack group. It is useful when:
- The site has a steep slope.
- One side needs a small correction.
- The automatic system stops before the RV is level.
- You need to retract a specific jack.
- You are diagnosing a motor, sensor, or controller issue.
Automatic mode uses the controller’s programmed zero point. The system tries to return the RV to that position. Auto level is convenient, but it cannot remove every problem caused by a sloped or weak site.
General setup sequence
- Park the RV. Set the parking brake or place the tow vehicle in park.
- Chock the wheels.
- Connect power as directed. Use the required battery and ignition settings for your model.
- Disconnect or release the tow vehicle only after the RV is secured.
- Turn on the Lippert control panel.
- Check the display for error messages.
- Select Auto Level or the manual controls.
- Watch every jack while it moves.
- Stop the process if a jack bends, slips, twists, or contacts an obstacle.
- Check the RV after the system stops. Doors, floors, refrigerator position, and visible jack contact can reveal a problem.
Some systems begin with front landing gear, while others extend rear jacks or use a programmed sequence. Do not assume that two Lippert systems use the same order.
How to tell if the RV is level
Use a small bubble level on a solid interior surface or compare several surfaces. A refrigerator floor, countertop, or frame area may not perfectly match the ground.
Check both directions:
- Side to side: Place the level across the RV.
- Front to back: Place the level along the RV.
A level reading confirms position. It does not confirm that the RV is safe or stable. Inspect the tires, chocks, hitch, jacks, and ground after leveling.
Setting or resetting the zero point
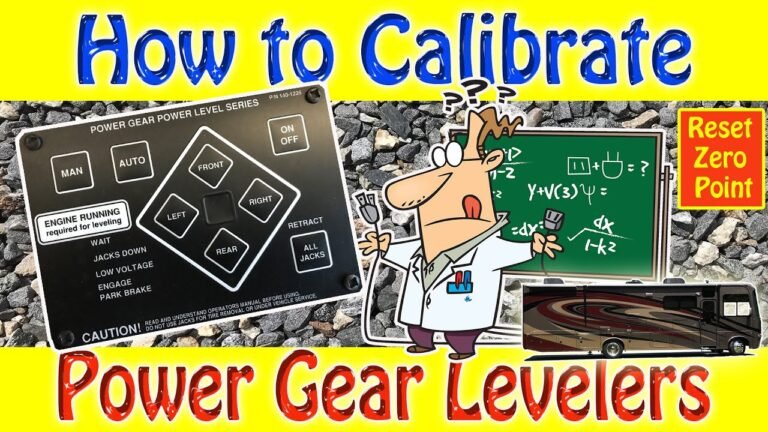
The zero point is the position the controller treats as level. If the RV repeatedly stops with a visible tilt, the zero point may be wrong. A zero-point procedure normally requires manual adjustment until the RV is level, followed by a button sequence on the touchpad.
The exact button combination differs by Lippert model and controller version. Use the model-specific Lippert manual. Do not guess the sequence, because the wrong command may retract or extend the jacks.
Lippert RV Leveling System Troubleshooting
Start with simple, safe checks. Do not remove a jack, open a hydraulic line, or bypass a safety circuit while the RV is supported by the system.
The system has no power
Possible causes include:
- Dead or weak house battery
- Loose battery terminal
- Blown fuse
- Tripped circuit breaker
- Poor frame ground
- Damaged control-panel connection
- Ignition or parking-brake condition not met
Check in this order:
- Confirm battery voltage using the RV manufacturer’s recommended method.
- Inspect the positive and negative battery connections.
- Look for corrosion or a loose frame ground.
- Check the labeled fuses and breakers.
- Confirm that the required ignition, park, or brake condition is met.
- Inspect visible wiring for cuts, crushed insulation, or loose plugs.
Do not replace a fuse with a larger fuse. If the replacement fails again, stop and find the short or overloaded circuit.
A jack moves slowly or only clicks
A clicking sound often points to low voltage, a poor connection, a motor problem, or excessive mechanical load. It does not prove that the motor is bad.
Check:
- Battery condition
- Battery and ground cables
- Motor wiring
- Jack alignment
- Dirt or damage around the jack
- Whether other jacks show the same symptom
If all jacks move slowly, suspect power or a system-wide connection first. If one jack is slow, suspect that jack, its motor, its wiring, or its mechanical load.
One jack does not move
A single inactive jack may have:
- A failed motor
- A loose connector
- A damaged wire
- A failed relay or controller output
- A seized or damaged jack
- A position-sensor fault on systems that use sensors
Do not repeatedly hold the switch while the motor only clicks. That can heat the motor and wiring.
Inspect the jack while a helper uses the control. Keep hands clear. If the motor runs but the jack does not move, the drive mechanism may be stripped, jammed, or disconnected.
The RV is not level after Auto Level
The most likely causes are:
- Incorrect zero-point calibration
- A site that exceeds the system’s practical range
- A jack pad that sank
- A jack that did not fully extend
- A sensor, wiring, or controller fault
- A change in load inside the RV
First, confirm that all jacks made firm contact. Then measure the RV in both directions. If the jacks appear to work normally, recalibrate the zero point using the correct manual.
Do not keep extending one jack to force the RV level on a soft or sloped site. A large correction can reduce stability or overload the jack.
The system shows an error code
Write down the exact code and the conditions when it appeared. Note whether the RV was connected to shore power, whether the battery was charged, and which jack was moving.
Then check the manual for the exact controller and system. An error code can point to:
- Low voltage
- A communication fault
- A jack position problem
- A motor or sensor issue
- A timeout
- An out-of-range condition
Avoid clearing the code before recording it. The code may help a service technician find an intermittent fault.
A hydraulic Lippert system leaks or will not retract
Hydraulic systems need extra caution. Look for fluid around:
- Hoses
- Fittings
- Cylinders
- The pump
- The reservoir
- Valve blocks
Do not place your fingers near a suspected hydraulic leak. Pressurized fluid can injure skin. Do not loosen a fitting to release pressure unless the service procedure specifically requires it and you have the proper training.
A low reservoir, air in the system, a failed pump, a stuck valve, or a damaged cylinder can prevent normal movement. A qualified RV technician should inspect a system that leaks, drops under load, or cannot retract after basic power checks.
Quick symptom table
| Symptom | First checks | Stop and seek service when |
|---|---|---|
| No display or response | Battery, fuse, breaker, ground | Power returns and fails again |
| One jack is silent | Connector, motor wire, controller output | Wire is damaged or motor overheats |
| All jacks are slow | Battery voltage and main cables | Battery is good but voltage drops under load |
| RV stops out of level | Jack contact, site, zero point | A jack twists, sinks, or bends |
| Hydraulic fluid appears | Reservoir and visible leak location | Fluid sprays, a hose is damaged, or pressure remains |
| Jack will not retract | Obstruction, power, manual procedure | RV cannot be safely moved |
Maintenance and Care
Routine checks can prevent many Lippert leveling failures. Perform them when the RV is parked safely and the jacks are not carrying an unsafe load.
Electric jack care
Inspect electric jacks for:
- Bent tubes or mounting brackets
- Damaged wiring
- Loose bolts
- Corrosion
- Dirt around moving parts
- Unusual noise
- Uneven movement
Lubricate only where the model manual permits. Some components require a specific grease or lubricant. Extra lubricant can attract grit or reach electrical parts.
Hydraulic system care
For hydraulic systems:
- Check the fluid level as directed.
- Inspect hoses and fittings for leaks.
- Look for wet areas around cylinders and the pump.
- Keep the reservoir cap and surrounding area clean.
- Use only the fluid type specified by Lippert or the RV manufacturer.
Do not mix fluids unless the service documentation allows it.
Battery and electrical care
A leveling system depends on sound power connections. At routine service intervals:
- Clean corrosion from battery terminals.
- Check cable tightness.
- Inspect the main ground.
- Look for rubbed or pinched wires.
- Confirm that fuse ratings match the documentation.
- Charge and test the battery before a long trip.
A battery can show a normal resting voltage and still fail under load. If the system slows sharply during operation, have the battery and charging system tested.
Storage
Before long-term storage:
- Retract the jacks fully unless the manual says otherwise.
- Clean dirt and moisture from exposed parts.
- Protect the RV from water intrusion.
- Disconnect power only as the RV manual recommends.
- Keep the control panel and remote dry.
- Inspect the jacks again before the next trip.
When to Repair, Replace, or Call an RV Technician
A small wiring repair may be reasonable for an owner who can safely identify the circuit and follow the wiring diagram. A jack replacement, hydraulic repair, controller diagnosis, or structural repair needs more care.
Call a qualified RV technician when:
- A jack is bent or pulling away from its mount.
- The RV shifts while supported.
- Hydraulic fluid is leaking.
- The system repeatedly blows fuses.
- The controller shows a persistent fault.
- The jack will not retract.
- The RV cannot be moved safely.
- The problem involves a frame, axle, hitch, or structural part.
Before buying parts, record:
- RV year, make, and model
- Fifth wheel, travel trailer, or motorhome type
- Lippert system name
- Controller or touchpad model
- Jack label and part number
- Error code
- Photos of the jack, wiring, and controller
- Whether the fault affects one jack or the whole system
The correct replacement part depends on the exact system and revision. A similar-looking motor or controller may not communicate correctly or may have a different gear ratio, connector, or mounting pattern.
Common Mistakes to Avoid
Using the jacks without wheel chocks
Jacks can support part of the RV, but they are not designed to prevent rolling. Chock first.
Raising the wheels off the ground
Most leveling systems are intended to level and stabilize the RV, not lift the tires clear of the surface. Follow the manual and keep the wheels supported unless the manufacturer provides a specific procedure.
Making large corrections on a bad site
A very uneven site can push the jacks near their travel limit. Choosing a better parking position is often safer than forcing the system to correct a major slope.
Ignoring the battery
A shore-power connection does not guarantee that the battery, cables, or ground can deliver the current the jacks need.
Calibrating on an unlevel surface
If you set the zero point while the RV is tilted, the automatic system may repeat that tilt each time.
Working beneath the RV
Never place your body beneath an RV supported only by powered leveling jacks. Use properly rated supports and follow safe service procedures.
Frequently Asked Questions
How do I reset a Lippert RV leveling system?
The reset method depends on the controller and system. Some procedures involve turning the panel off and on, while zero-point calibration uses a specific button sequence. Check the manual for the exact Lippert model before pressing a reset combination.
Can I manually level an RV with a Lippert system?
Usually, yes, if the control panel provides manual jack controls. Manual mode is useful for small corrections and troubleshooting. Move one jack or jack group at a time while watching the RV and keeping clear of pinch points.
Why does my Lippert leveling system say “out of stroke”?
The system may believe a jack has reached its travel limit, or a sensor may be reporting an incorrect position. A short site, poor jack contact, low voltage, wiring fault, or mechanical problem can also cause the message. Do not force the jack. Inspect the site and consult the model manual.
Can I use blocks under Lippert leveling jacks?
Many RV owners use solid jack pads or blocks to reduce the extension needed and limit sinking. Use only stable materials and follow the RV and Lippert instructions. Never use cracked, loose, or unstable objects.
How long should Lippert leveling jacks last?
There is no single service life for every Lippert jack. Life depends on load, weather, maintenance, storage, alignment, and use. Unusual noise, uneven travel, leaks, bent parts, and repeated faults matter more than age alone.
Can I drive with the Lippert jacks partly extended?
No. Retract the jacks fully and confirm the control panel shows the proper status before moving. Walk around the RV and inspect the clearance. A partly extended jack can strike the road or damage the system.
Key Takeaways
- Identify the exact Lippert system before troubleshooting or buying parts.
- Use wheel chocks and a firm site before operating the jacks.
- Check battery power, grounds, fuses, and wiring before blaming the controller.
- Leveling and stabilizing are related but different jobs.
- Do not lift the RV for service with the leveling jacks alone.
- Record error codes and inspect the affected jack before clearing faults.
- Use the model-specific manual for zero-point calibration and hydraulic service.
- Call an RV technician for bent jacks, hydraulic leaks, structural damage, persistent electrical faults, or unsafe movement.
Conclusion
A Lippert RV leveling system works best when the RV starts on a firm site with good battery power, secure wheel chocks, and the correct zero-point setting. Auto Level can save time, but it cannot replace site selection, inspection, or safe judgment.
If the system fails, begin with power and visual checks. Then separate a single-jack fault from a system-wide fault. Stop using the system if the RV shifts, a jack bends, a fuse keeps blowing, or hydraulic fluid leaks.
The next useful step is to find the Lippert system name and controller model, download the matching manual, and record any error code before attempting a repair.
Official information to verify before service
- Lippert Support: https://support.lci1.com/
- Lippert RV leveling and leveling-control documentation: https://support.lci1.com/leveling
- Lippert OneControl support: https://support.lci1.com/onecontrol
- The RV manufacturer’s owner’s manual and chassis service documentation
These resources should be checked against the exact RV year, system version, and controller installed on the vehicle.