How To Use RV Leveling Blocks: Easy Setup Guide
Use RV leveling blocks beneath the low-side tires, then adjust front-to-back with the trailer jack.
Learning how to use RV leveling blocks makes campsite setup safer, faster, and far more comfortable. The right method protects your tires, reduces trailer movement, and helps appliances such as refrigerators work as designed. This guide explains block types, setup steps, safety checks, common mistakes, and practical tips for different RVs.
What Are RV Leveling Blocks?
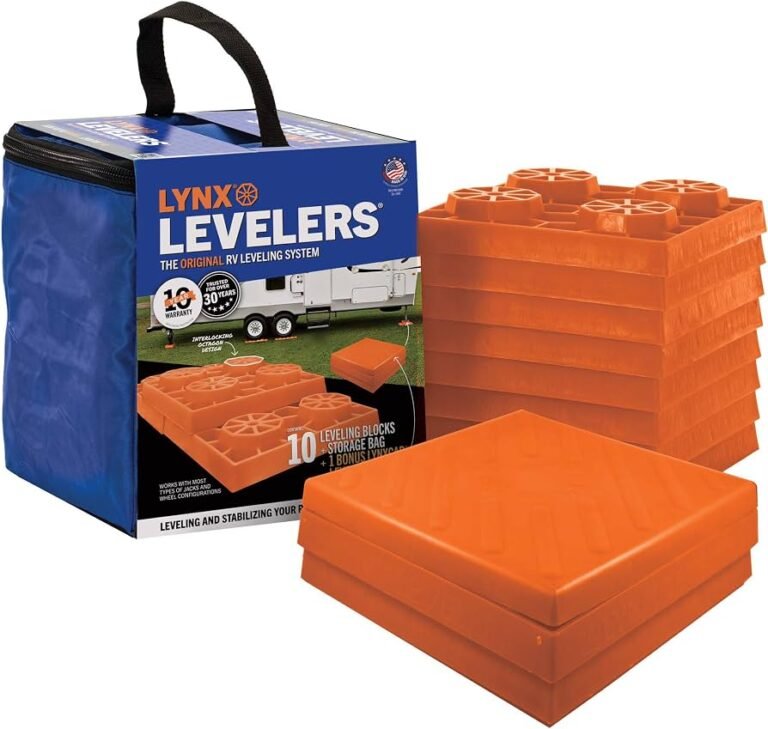
RV leveling blocks are portable supports that raise one or more RV tires to create a level parking surface. They are often made from strong plastic, molded resin, or heavy-duty composite material. Some look like interlocking pads, while others resemble small ramps or thick square platforms.
These blocks are mainly used to correct side-to-side tilt. For example, if the left side of your travel trailer sits lower than the right side, you place blocks under the left-side tires and drive onto them.
RV leveling blocks are not the same as:
• Wheel chocks, which stop tires from rolling
• Stabilizer jack pads, which support extended stabilizer feet
• Hydraulic jack stands, which support a vehicle during service
• Drive-on ramps designed for cars or trucks
A level surface improves comfort and helps doors, drawers, beds, and water systems work as expected. Some RV owners also prefer to keep a refrigerator close to level, especially when using an absorption refrigerator. Always follow the appliance maker’s instructions because acceptable leveling limits vary.
Why Proper RV Leveling Matters
An RV does not need to be perfectly level in every direction, but a severe slope can create real problems. People may feel as if they are sleeping on an incline, cabinet doors may swing open, and water can collect in the wrong part of a sink or shower.
Leveling also matters for some RV refrigerators. Absorption refrigerators use a heat-based cooling process that depends on proper operation within the manufacturer’s leveling range. Running one far out of level for long periods can reduce cooling performance and may damage the cooling unit.
A stable RV also feels safer. When the coach rocks each time someone walks inside, daily tasks become tiring. Good leveling blocks create a firm base, but they do not replace proper chocking or stabilizing.
Experienced RV travelers usually follow three basic rules:
• Level side-to-side with blocks under the tires
• Level front-to-back with the tongue jack or landing gear
• Stabilize the RV only after the tires are secure and the RV is level
The goal is not to lift the entire RV high into the air. The goal is to make small, controlled adjustments while keeping as much tire contact with the ground as possible.

What You Need Before You Begin
Before learning how to use RV leveling blocks, gather the correct equipment. A simple setup may need only blocks, chocks, and a level. Larger motorhomes and fifth wheels may need extra tools.
Prepare these items:
• RV leveling blocks rated for your RV’s weight
• Heavy-duty wheel chocks
• A small bubble level or electronic RV level
• A measuring tape or marker for block placement
• A flashlight for evening arrivals
• Gloves for handling dirty blocks
• A tire pressure gauge
Check your RV’s gross vehicle weight rating and axle ratings. Choose blocks with a safety rating that exceeds the load placed on them. The vehicle’s weight is not always shared evenly between axles or sides, so avoid using products with a rating that barely meets your RV’s total weight.
Inspect each block before use. Do not use one that is cracked, badly warped, crushed, or slippery from oil. Clean blocks can grip the ground better and are easier to inspect.
I also recommend keeping blocks in a dedicated storage bin. Wet or muddy blocks stored loose in a cargo bay can spread dirt and may damage other equipment.
How to Use RV Leveling Blocks Step by Step
The process is simple once you know which direction needs correction. Take your time, especially when the campsite is narrow or crowded.
1. Choose the best parking position
Look for the firmest and most level part of the campsite. Avoid soft mud, deep sand, loose gravel, tree roots, and sharp rocks when possible.
Position the RV so the slides, awning, steps, and hookups have enough room. Check for low branches and overhead obstacles before you begin.
2. Check the side-to-side level
Place a level inside the RV or use an exterior leveling system. Check the RV before placing blocks under the tires.
Many RVers use a small bubble level near the refrigerator or on the floor. The exact location matters less than using the same reference point each time.
If the left side is low, the left-side tires need to climb onto blocks. If the right side is low, place blocks on the right side.
3. Build a short, wide ramp
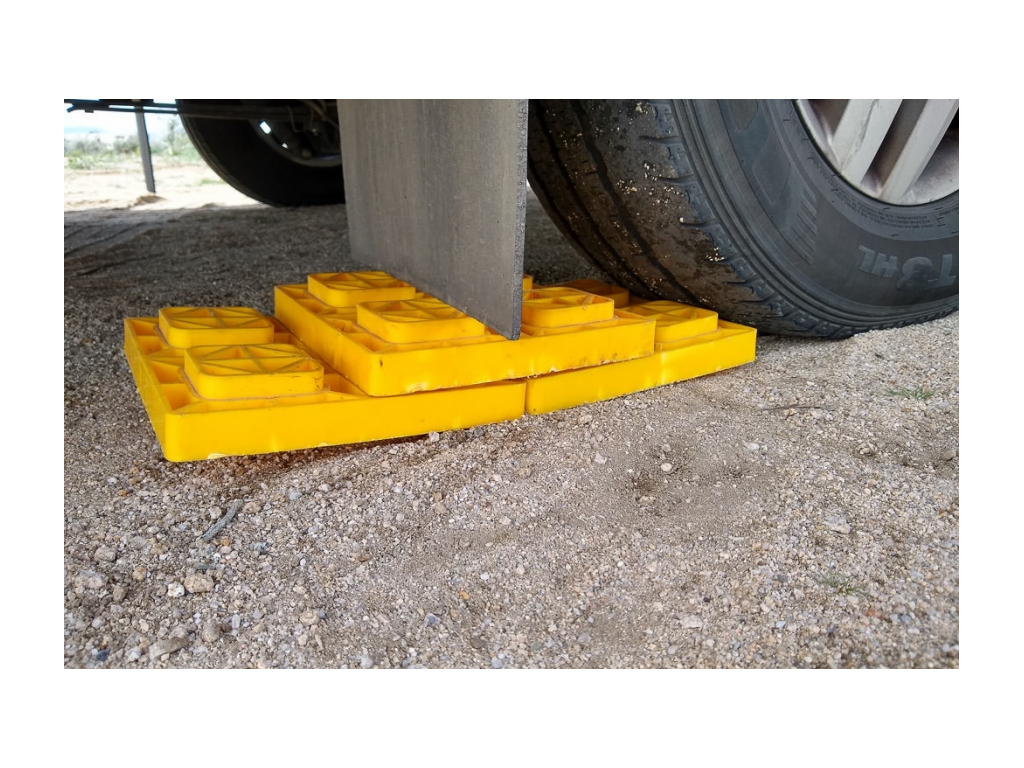
Create a ramp that matches the number of tires on that side. For a tandem-axle trailer, both tires on the low side should be supported.
Arrange the blocks in a straight line with no gaps. Use the manufacturer’s approved pattern. Some blocks interlock, while others should be stacked in a specific way.
Do not build a tall, narrow tower. A low and wide platform is more stable than a high stack.
4. Drive onto the blocks slowly
Ask a spotter to stand where you can see them clearly. Drive straight and slowly onto the blocks.
Stop when the tires are centered on the platform. Avoid turning the steering wheel while climbing onto blocks in a motorhome, because turning can push the blocks out of place.
If the RV needs another inch or two of height, reposition the blocks and try again. Do not accelerate hard to climb a steep pile.
5. Set the parking brake and chock the wheels
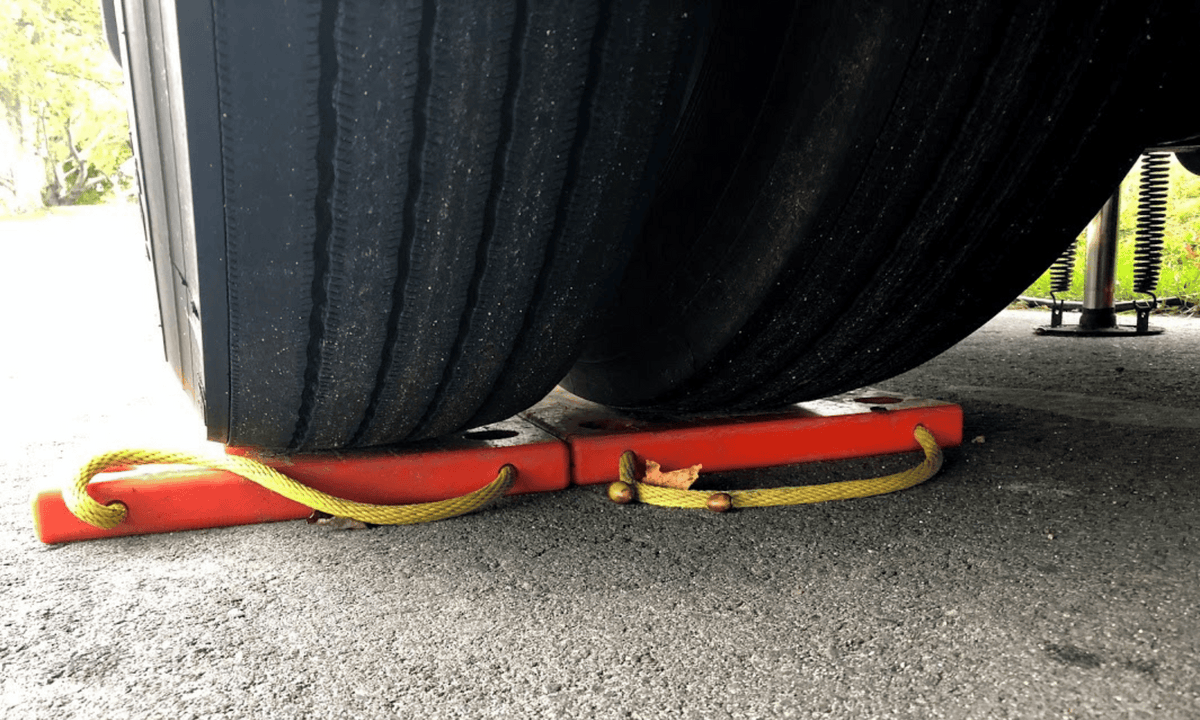
Once the RV is in position, set the parking brake if your vehicle has one. Place wheel chocks tightly against the tires on both sides.
For a trailer, chock the wheels before disconnecting from the tow vehicle. On a slope, use extra chocks and follow the trailer maker’s instructions.
Chocks are essential. Leveling blocks raise the tires, but they do not stop the RV from rolling.
6. Level front-to-back
After correcting side-to-side tilt, use the trailer tongue jack, fifth-wheel landing gear, or motorhome leveling system to correct front-to-back tilt.
For a travel trailer, disconnect from the tow vehicle only after the wheels are firmly chocked. Lower the tongue jack until the trailer reaches the desired level.
For a fifth wheel, use the landing gear after the trailer is correctly positioned. Do not place a fifth-wheel landing gear leg on unstable soil without a suitable pad.
7. Lower stabilizers without lifting the RV
Extend stabilizer jacks until they touch firm pads and reduce movement. Stabilizers are designed to limit sway, not to raise the RV or correct major leveling errors.
If a stabilizer starts lifting a tire, stop and retract it slightly. A lifted tire reduces stability and can place extra stress on the frame.
8. Recheck the level
Check side-to-side and front-to-back level again. Opening a slide can change the balance of some RVs, especially smaller travel trailers.
If the RV is no longer level, make small corrections. Never crawl beneath an RV supported only by leveling blocks, stabilizers, or a jack.
This step-by-step method is the safest answer to how to use RV leveling blocks for most travel trailers and fifth wheels.

How to Use RV Leveling Blocks on Different RV Types
The basic method is similar, but each RV type has different needs.
Travel trailers
Travel trailers often require blocks under one side before unhitching. Tandem-axle trailers need a long, even ramp so both tires on the low side are supported.
After leveling side-to-side, chock the wheels, disconnect the tow vehicle, and level front-to-back with the tongue jack.
Fifth wheels
Fifth wheels use landing gear at the front and stabilizers at the rear. Level the trailer side-to-side with tire blocks first, then adjust front-to-back with the landing gear.
Keep the landing gear on firm ground. Use large pads if the campsite is soft.
Class A, Class B, and Class C motorhomes
Motorhomes may use hydraulic or electric leveling jacks. Read the chassis and leveling-system instructions before combining jacks with RV leveling blocks.
Blocks can help when the jacks would otherwise need to extend too far. However, they must be rated for the load and approved for that purpose. Never place ordinary tire blocks beneath a jack foot unless the block maker specifically allows it.
Pop-up campers
Pop-up campers are light, but their small tires can still require careful support. Level the camper before raising the roof, and use chocks before disconnecting from the tow vehicle.

How Many RV Leveling Blocks Do You Need?
The number depends on your RV, tire layout, campsite slope, and block design. A single-axle trailer may need a short ramp under two tires. A tandem-axle trailer often needs a longer ramp under four tires on one side.
Buy enough blocks to make a stable ramp, plus a few spare pieces for jack pads or replacements. Avoid stacking random blocks from different brands unless both manufacturers allow it.
A useful setup may include:
• Eight to 12 interlocking blocks for a tandem-axle trailer
• Four to eight blocks for a smaller single-axle trailer
• Extra pads for tongue jacks and stabilizers
• Separate heavy-duty pads for motorhome leveling jacks
These numbers are only general examples. Always follow the load rating and stacking instructions printed by the manufacturer.

Common Mistakes to Avoid
Small mistakes can make an RV unstable or damage the equipment. These are the errors I see most often in campsite setups.
• Using leveling blocks as wheel chocks: Blocks raise tires but may not prevent rolling.
• Leveling front-to-back first: Side-to-side correction usually requires tire movement, so do it before unhitching.
• Stacking too high: Tall stacks can shift or collapse.
• Supporting only one tire on a tandem axle: This can create uneven stress and poor stability.
• Driving too fast: Speed can scatter blocks and damage tires.
• Using cracked blocks: A damaged block may fail under load.
• Lifting tires with stabilizers: Stabilizers should reduce movement, not carry the RV.
• Ignoring soft ground: Blocks can sink into wet soil and change the level.
• Forgetting slide weight: A slide may alter the RV’s balance after opening.
• Skipping the final check: Always recheck level after the full setup is complete.
One lesson from repeated campsite setups is that rushing creates more work. A careful two-minute inspection often prevents a frustrating reset later.

Tips for Soft, Sandy, or Uneven Campsites
Hard ground is ideal, but RV parks do not always provide it. In sand, mud, or loose gravel, blocks can sink or tilt.
Use larger base pads when the manufacturer allows them. Place the blocks on the firmest area you can find, and clear away sharp stones before driving over them.
Do not bury blocks deep in mud and assume they will hold. If the ground continues to shift, move the RV or ask the campground for a safer site.
In very uneven terrain, leveling blocks may not be enough. A commercial leveling system, properly rated jack pads, or a different parking position may be safer.
Avoid making extreme corrections. If one side must be raised several inches, the campsite may not be suitable for that parking direction.

How to Store and Maintain RV Leveling Blocks
Good storage extends the life of your blocks. Rinse off mud and gravel, then let the blocks dry before placing them in a sealed container.
Inspect them at the start of every camping season. Look for:
• Cracks or splits
• Bent or warped sections
• Faded plastic that feels brittle
• Damaged locking tabs
• Oil, fuel, or chemical contamination
Keep the blocks away from direct sunlight when possible. Long exposure to ultraviolet light can weaken some plastics over time.
Label the storage bin and keep it easy to reach. Leveling gear is often needed before other camping equipment, especially when arriving after dark.

Safety Guidance and Manufacturer Limits
Always read the RV owner’s manual, tire instructions, jack instructions, and block manufacturer’s load limits. The safest setup depends on the exact vehicle and equipment.
Never work underneath an RV that is supported only by leveling blocks, stabilizers, or hydraulic jacks. If service work is required, use properly rated jack stands and follow professional repair procedures.
Keep hands and feet away from tires while the RV is moving. Use a spotter, agree on clear signals, and stop immediately if communication is lost.
The National Highway Traffic Safety Administration recommends regular tire inspection and correct inflation. Leveling blocks do not fix overloaded, underinflated, or damaged tires. Check tire condition before every trip and follow the inflation data for your RV.
Frequently Asked Questions About How to Use RV Leveling Blocks
Do you put RV leveling blocks under all the tires?
Place blocks under the tires on the low side when correcting side-to-side tilt. On a tandem-axle trailer, support all tires on that side with a stable, connected ramp.
Do you use leveling blocks before or after unhitching?
Use blocks to level side-to-side before unhitching a travel trailer or fifth wheel. Chock the wheels securely before disconnecting from the tow vehicle.
Can RV leveling blocks be used under stabilizer jacks?
Only use them under stabilizer jacks if the product is specifically rated and approved for that purpose. Ordinary tire leveling blocks may crack or shift under concentrated jack loads.
How high can you stack RV leveling blocks?
Follow the block manufacturer’s stacking limit. In general, use the lowest, widest setup possible and avoid tall stacks that can shift.
Do RV leveling blocks replace wheel chocks?
No. Leveling blocks raise tires, while wheel chocks help prevent movement. Use both when the RV is parked and disconnected.
Should the RV refrigerator be perfectly level?
It should remain within the leveling range stated in the refrigerator manual. A slightly imperfect reading may be acceptable, but extended operation far out of level can reduce performance or cause damage.
Can I drive onto RV leveling blocks alone?
You can, but a spotter makes the process safer. Drive slowly, keep the wheels straight, and stop if the blocks move or the tires do not center correctly.
Conclusion
Knowing how to use RV leveling blocks helps you create a safer, steadier, and more comfortable campsite. Correct the low side first, build a wide and stable ramp, chock the tires, adjust front-to-back with the proper jack, and finish with a careful level check.
Choose blocks that match your RV’s weight, inspect them often, and never use them as a substitute for chocks or approved jack stands. Practice the process at home before your next trip, then share your best leveling tips or explore more RV setup guides for smoother camping adventures.