How To Use RV Leveling Jacks: Easy Step-By-Step Guide
Use RV leveling jacks on firm ground, raise the coach slowly, and confirm stability before walking inside.
Learning how to use RV leveling jacks safely can protect your motorhome, your passengers, and your campsite. This guide explains the process in clear steps, from parking and leveling to avoiding common mistakes, with practical tips drawn from real RV setup experience and manufacturer safety guidance.
What RV leveling jacks do
RV leveling jacks are support devices that help reduce the rocking and tilt of a parked recreational vehicle. They are not meant to lift every RV tire off the ground or replace a vehicle jack during repairs.
When you park, the campsite may slope from side to side or from front to back. Leveling jacks extend from the RV frame and press against the ground to create a more stable platform. They also help doors, drawers, refrigerators, and slide-outs work as intended.
Most RVs use one of these systems:
- Hydraulic leveling jacks use fluid pressure and are common on larger motorhomes.
- Electric leveling jacks use motors and are often found on smaller motorhomes and travel trailers.
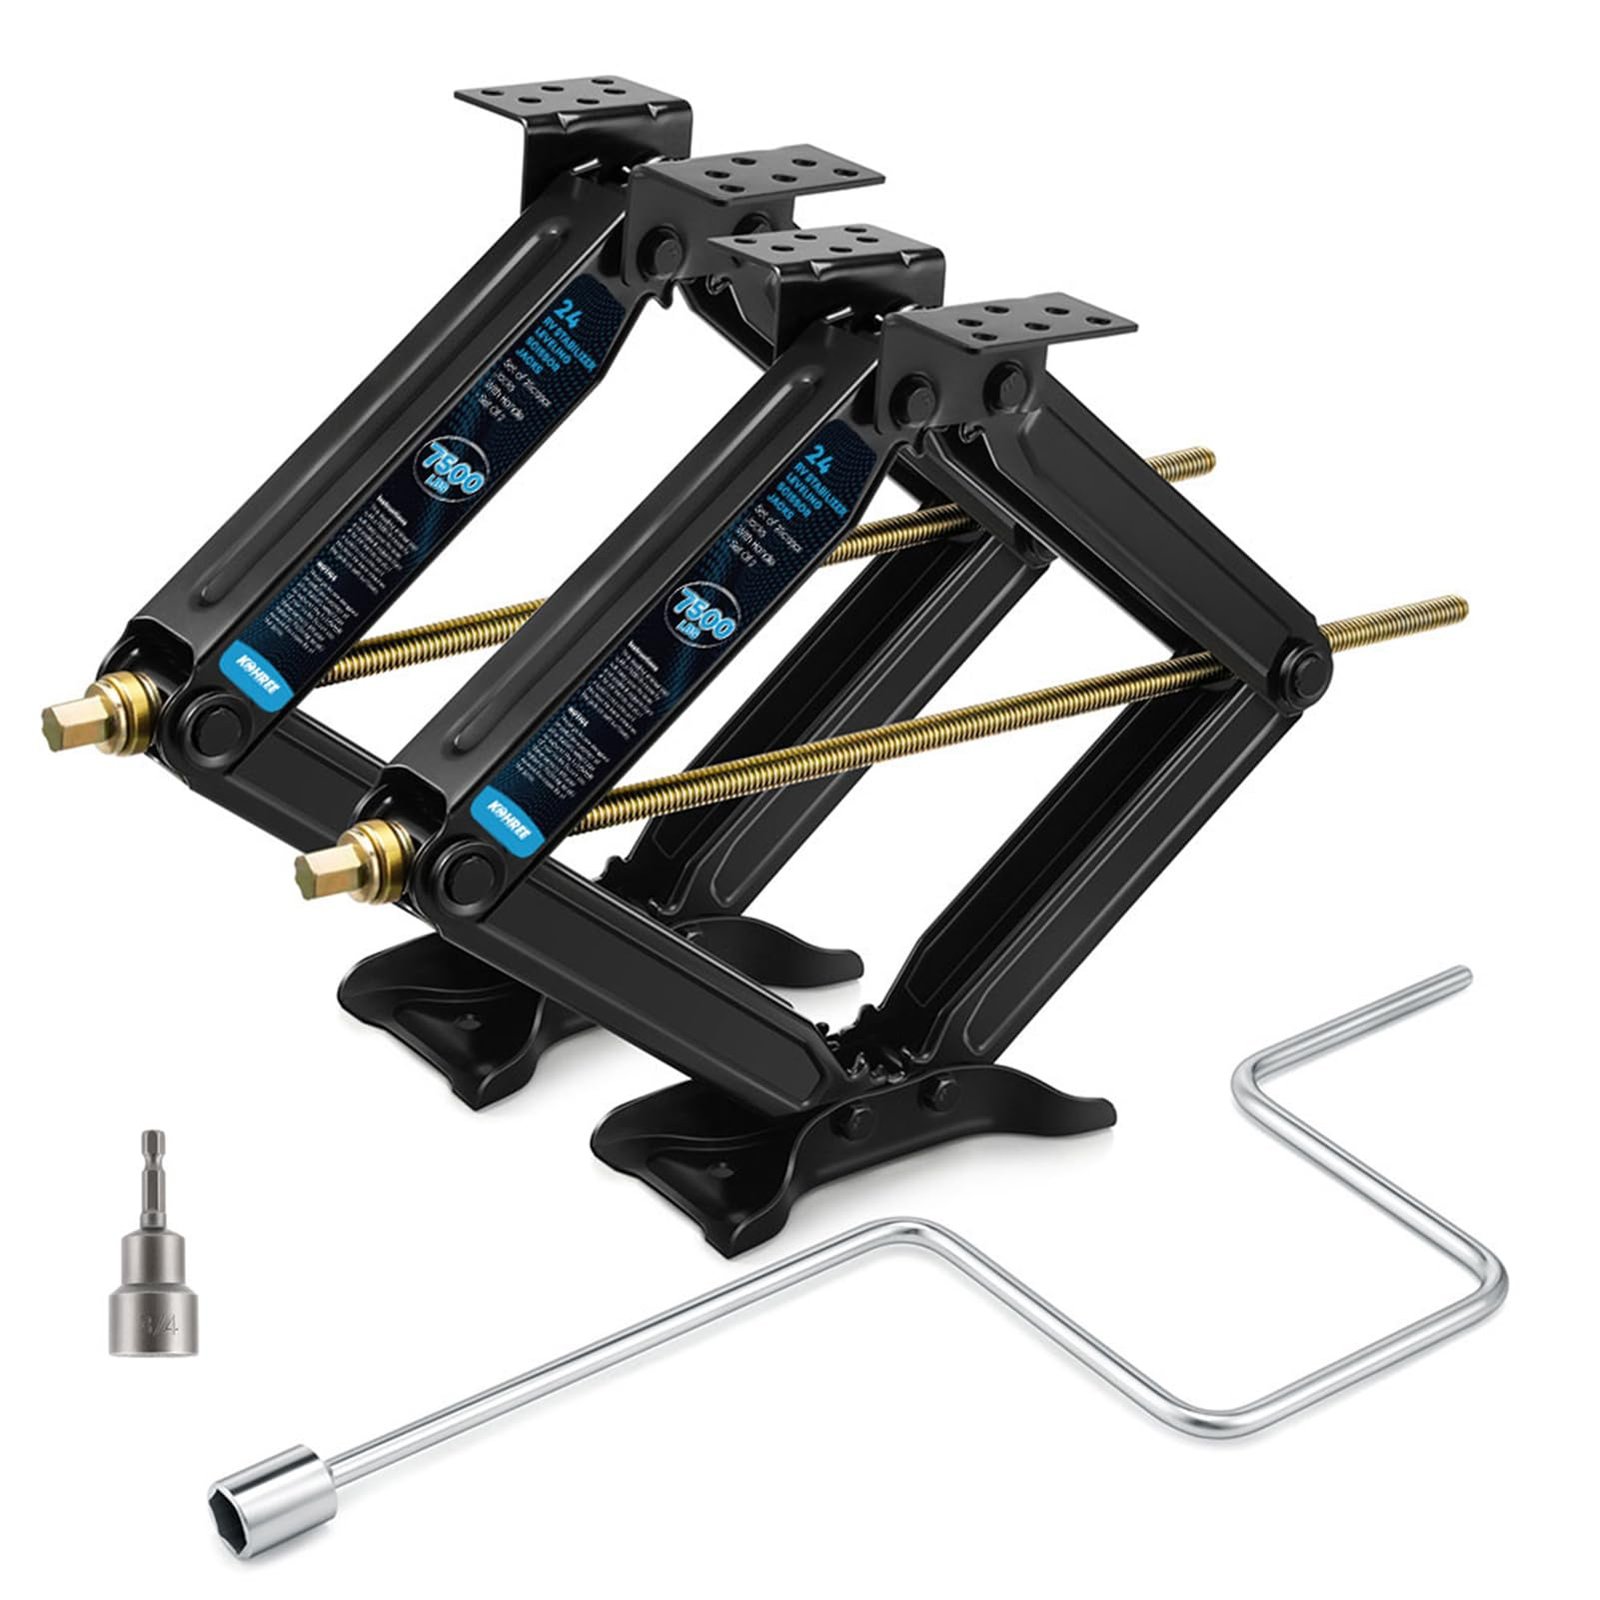
- Manual stabilizer jacks use a hand crank or power drill adapter.
- Automatic leveling systems use sensors and a control panel to level the RV with limited input.
A key safety point is that stabilizer jacks and leveling jacks do not always serve the same purpose. Stabilizers reduce movement. True leveling jacks can raise part of the RV, but they still should not be used carelessly as lifting equipment.

Before using RV leveling jacks
Good preparation makes how to use RV leveling jacks much easier. Walk around the site before you park and look for soft soil, deep gravel, roots, holes, sharp stones, and low branches.
Choose the firmest and most level area available. Avoid placing a jack on loose sand, wet grass, mud, or weak asphalt. A jack can sink or slide when the RV’s weight presses down.
Before extending the jacks, complete these checks:
- Confirm that the parking area is wide enough for the RV, awning, and slide-outs.
- Check overhead clearance for air conditioners, vents, and slide toppers.
- Look beneath the RV for low pipes, tanks, and wiring.
- Put the transmission in Park, or place the vehicle in the correct gear if it has a manual transmission.
- Set the parking brake.
- Keep people and pets away from the jack area.
- Close the entry door if the manufacturer recommends it during leveling.
- Read the control panel instructions for your exact RV model.
Do not level an RV while it is still connected to a tow vehicle unless the system instructions clearly allow it. A connected trailer may move differently from the tow vehicle, and the hitch can create unwanted stress.
How to use RV leveling jacks step by step
The exact button sequence varies by RV brand. Always give priority to the owner’s manual. Still, the general process for how to use RV leveling jacks follows the same safe order.
1. Choose and inspect the site
Park on the firmest ground you can find. If the site slopes sharply, reposition the RV instead of asking the jacks to correct a major angle.
A small slope is normal. A steep slope can make the RV unstable and may exceed the travel range of the leveling system.
2. Park the RV
Place the RV in Park and apply the parking brake. For a travel trailer, uncouple the tow vehicle only after the trailer is secure and the manufacturer’s instructions permit it.
Chock the wheels before using the jacks. Chocks stop rolling, while jacks provide support. One should not replace the other.
3. Measure the side-to-side level
Use the RV’s built-in level or place a small bubble level on the floor. Check side to side first because this correction often requires driving one side onto leveling blocks.
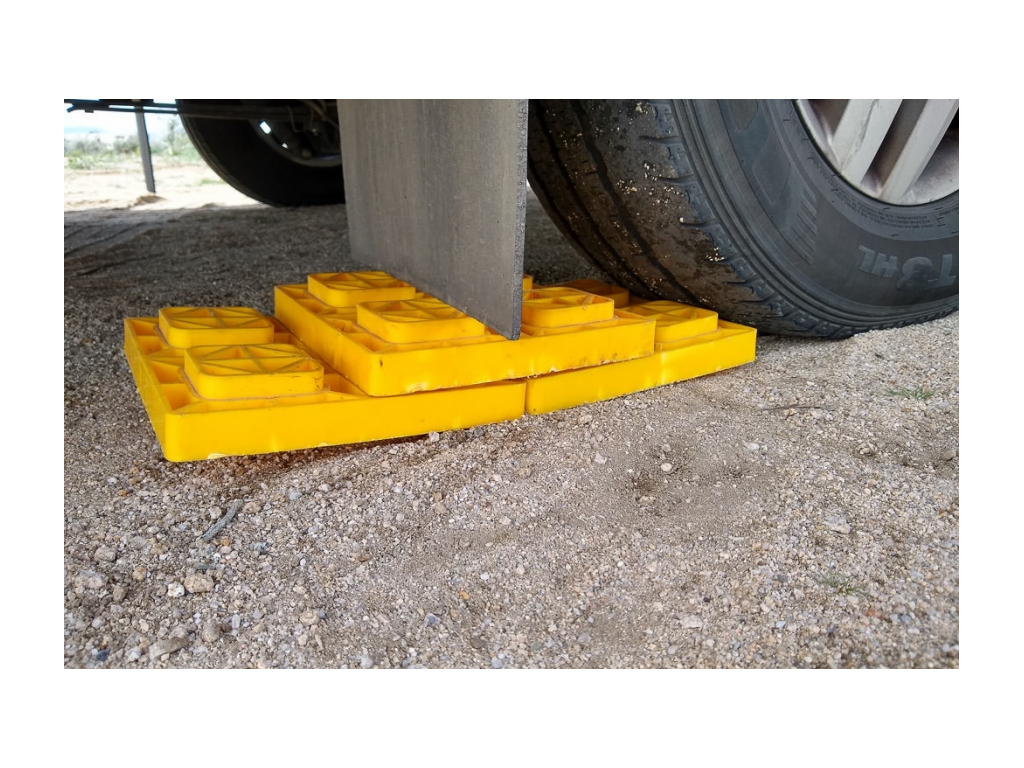
For example, if the driver’s side sits low, place suitable leveling blocks under the tires on that side. Drive onto the blocks slowly and center the tires. Do not use the jacks to perform a large side-to-side correction unless the system is specifically designed for it.
4. Measure the front-to-back level
Once the RV is level from side to side, adjust the front or rear as needed. On a motorhome, the front leveling jacks often make this correction.
On a travel trailer, the tongue jack usually adjusts front-to-back height. Then the stabilizer jacks support the trailer frame.
5. Extend the jacks in the correct order
Turn on the leveling system if required. Some systems need the engine running, while others require the engine to be off. Follow the manual because the wrong power state can damage the system or prevent operation.
Many automatic systems work in this general order:
- Select automatic leveling.
- Allow the system to lower the front or rear jacks.
- Watch the RV as the system makes small corrections.
- Stop the process if a tire lifts, the RV leans sharply, or a warning appears.
- Confirm that the system shows a level result.
For manual systems, extend the jacks in small amounts. Move from one jack to the next instead of fully extending a single corner. Slow adjustments help spread the load and reduce frame twist.
6. Check stability
Walk inside the RV and gently move across the floor. The coach should feel firm, with little side-to-side motion.
Check the refrigerator, doors, and slide-outs. If the RV still rocks, inspect the ground and jack pads. Do not keep extending the jacks without finding the cause.
7. Deploy slide-outs and accessories
Many RV manufacturers recommend leveling before extending slide-outs. A level frame helps reduce stress on slide mechanisms and seals.
After leveling, extend slide-outs one at a time if the manual advises it. Watch for trees, poles, picnic tables, and neighboring vehicles.
In my experience, rushing this step creates more problems than the leveling itself. I once saw a camper extend a slide before checking a low branch. The branch did not cause major damage, but it tore part of the slide seal and ended the weekend early.
Using manual, electric, and hydraulic systems
Manual stabilizer jacks
Manual jacks are simple and dependable. Place a firm pad under each jack foot, then turn the crank until the jack contacts the pad.
Stop when the jack is snug. Do not force the crank after the frame is supported. Excess pressure can bend hardware or place stress on the RV frame.
A cordless drill may speed up the process, but use a low torque setting. High torque can strip the jack gear or damage the drive shaft.
Electric leveling jacks
Electric systems use motors to extend and retract the jacks. They may operate from a wall control panel, handheld remote, or smartphone app.
Watch each jack as it moves. Stop immediately if you hear grinding, see a jack moving unevenly, or notice that the foot is sliding.
Keep the battery charged. Low voltage can make an electric jack move slowly or stop before reaching the correct position.
Hydraulic leveling jacks
Hydraulic systems use a pump, fluid reservoir, valves, and cylinders. They can support larger motorhomes, but they need more care.
Before use, check for:
- Hydraulic fluid leaks
- Damaged hoses
- Bent jack tubes
- Loose mounting hardware
- Warning lights on the control panel
- Low battery voltage
Never place your body beneath an RV supported only by hydraulic jacks. Hydraulic pressure can drop, and a mechanical failure can cause sudden movement. Use rated jack stands and follow approved service procedures before working underneath the vehicle.

Choosing jack pads and leveling blocks
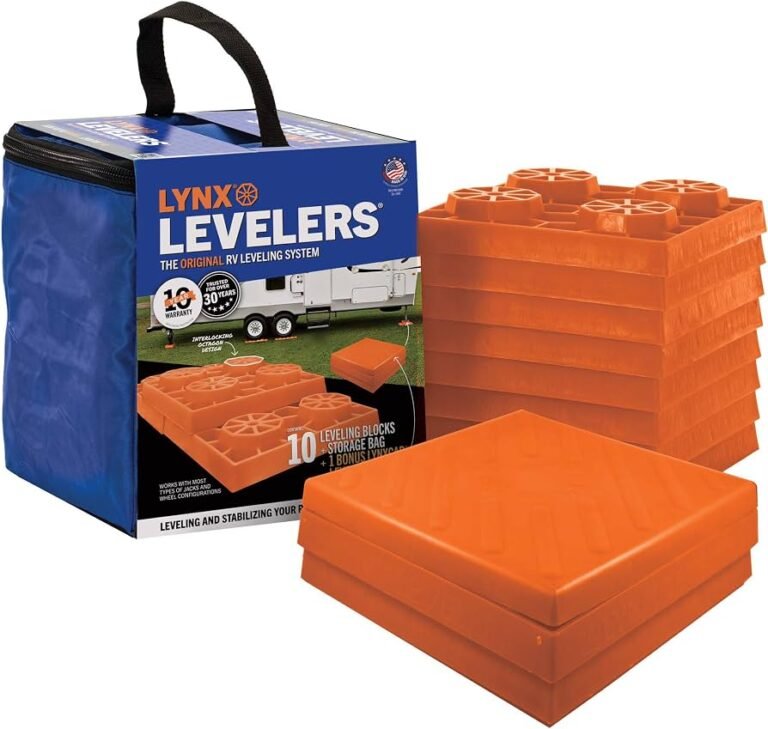
Jack pads spread weight across a larger area. They help prevent a jack foot from sinking into soil, asphalt, or soft gravel.
Good options include heavy-duty plastic pads, purpose-built jack blocks, and thick treated wood blocks that are free from cracks. The pad must be wide enough for the jack foot and strong enough for the expected load.
Avoid these unsafe choices:
- Thin boards that can split
- Loose rocks that can roll
- Wet or rotten wood
- Household bricks that may break under point loads
- Improvised objects with uneven surfaces
Leveling blocks go under the tires. Jack pads go under the jack feet. Mixing up these jobs can create an unstable setup.
Keep blocks and pads clean. Dirt or gravel between stacked pieces can make them shift. Stack them in a flat, interlocking pattern when the product allows it.
Common mistakes to avoid
Knowing what not to do is a major part of learning how to use RV leveling jacks. Most jack problems come from poor ground choice, excessive force, or skipping basic checks.
Using jacks without wheel chocks
Jacks are not a substitute for chocks. The RV can roll before the jacks carry the load, especially on a sloped site.
Lifting the tires too far
A tire that leaves the ground can reduce stability. It may also place excess weight on the jacks and frame.
If a tire begins to lift, stop. Lower the system and correct the slope with leveling blocks or a better parking position.
Leveling on soft ground
Soft ground can look firm until the jack applies pressure. Carry larger pads when you expect to camp on grass, sand, or gravel.
Extending only one jack
Fully extending one corner can twist the frame. Make small, balanced corrections instead.
Ignoring warning alarms
A warning light or alarm may indicate low voltage, an out-of-range position, a sensor fault, or a jack that did not retract fully. Do not silence the warning and continue without checking the manual.
Driving away with jacks down
This mistake can damage the jacks, frame, wiring, and campsite. Before departure, walk around the RV and confirm that every jack is fully retracted.
I recommend using a simple departure checklist. Put “jacks up” beside “steps in,” “awning closed,” and “power disconnected.” A small checklist can prevent a costly repair.

How to retract RV leveling jacks
Retracting the jacks is just as important as extending them. Keep the engine, transmission, and parking brake in the condition required by the manufacturer.
For an automatic system, press the retract or all-up button. Stay near the control panel and watch the jacks return.
For a manual system, raise each jack fully and check that the foot, pin, and handle are secure. Never assume a jack is up because the control panel light turned off.
Use this general sequence:
- Retract slide-outs if the manual requires it.
- Remove loose items from around the jack pads.
- Activate the retract function.
- Confirm each jack is fully home.
- Check that no jack foot touches the ground.
- Remove wheel chocks only after the RV is attached or ready to move.
- Walk around the RV before driving.
If a jack will not retract, do not drive. Use the emergency procedure in the manual or contact roadside assistance. Forcing the RV to move can bend the jack or tear it from the frame.

Maintenance and troubleshooting tips
Regular maintenance keeps RV leveling jacks reliable. Inspect them before long trips and after camping on muddy or sandy sites.
Clean dirt from exposed jack tubes with a damp cloth. Use only the lubricant approved by the manufacturer. Some products require a dry lubricant, while others specify a particular grease. The wrong lubricant can attract grit or harm seals.
Check the following items:
- Jack feet and pads
- Hydraulic hoses and fittings
- Electric motor wires
- Battery voltage
- Mounting bolts
- Control panel lights
- Retract sensors
- Fluid level, if the system uses hydraulics
If the system makes a clicking sound, the battery may be weak. If one jack moves slowly, inspect for binding, debris, low voltage, or hydraulic problems. If the RV levels unevenly, the sensor may need calibration.
Do not open hydraulic lines or dismantle a loaded jack unless you have the correct training and tools. Stored pressure and vehicle weight can cause serious injury.
Benefits and limits of RV leveling jacks
Correctly used jacks offer several benefits:
- They reduce movement while people walk inside.
- They help doors and drawers operate smoothly.
- They support proper slide-out alignment.
- They improve comfort during sleep and meals.
- They help maintain a more stable RV platform.
However, leveling jacks have limits. They cannot fix a dangerously steep campsite, replace wheel chocks, or make weak ground safe. They also cannot repair a bent frame, damaged suspension, or overloaded vehicle.
An RV refrigerator may need to be close to level for proper operation, but the exact limit depends on the refrigerator type and manufacturer. If you plan to remain parked for a long time, check the appliance manual rather than relying only on a small bubble level.
The safest setup is a team effort between good parking, wheel chocks, leveling blocks, jack pads, and correctly used jacks.

How to use RV leveling jacks in different weather
Rain changes the ground beneath an RV. Soil can soften, and asphalt can become less stable in hot weather. After heavy rain, inspect the jack pads and look for sinking.
In freezing weather, water can collect around jack feet and freeze them in place. Do not force the system if a jack is stuck. Warm the area safely and follow the manufacturer’s procedure.
Strong wind adds side force to the RV. Retract the awning during high winds and avoid relying on leveling jacks to resist severe weather. If conditions become unsafe, leave the site only when it is safe to move.
Heat can also affect hydraulic fluid and electrical components. Give the system time to cool if it shows an overheating warning or operates unusually slowly.
Frequently Asked Questions About How to Use RV Leveling Jacks
Can I use RV leveling jacks without wheel chocks?
No. Wheel chocks help prevent the RV from rolling, while leveling jacks provide support and stability. Use both unless your vehicle manufacturer gives a specific, safer procedure.
Should RV tires leave the ground during leveling?
Usually, no. A tire lifting off the ground can reduce stability and overload the leveling system. If this happens, stop and use leveling blocks or reposition the RV.
Do I level the RV before extending slide-outs?
Yes, in most cases. Leveling first helps keep the RV frame aligned and may reduce stress on slide-out components, but always follow your RV manufacturer’s instructions.
Can I crawl under an RV supported by leveling jacks?
No. Leveling jacks alone are not a safe support system for working underneath an RV. Use properly rated jack stands and follow professional service procedures.
How far should I extend RV leveling jacks?
Extend them only until the RV is level and stable. Avoid maximum extension unless the system requires it, and never continue if a tire lifts, a jack slips, or the RV leans sharply.
Why does my RV move after the jacks are down?
The ground may be soft, the pads may be too small, or the wheel chocks may not be secure. Check the entire setup, but do not keep extending the jacks to solve movement caused by poor ground or an uneven frame.
Can leveling jacks raise an RV for tire repairs?
No. Most leveling systems are not designed for tire service or major repairs. Use equipment rated for lifting the RV, or call a qualified technician.
Conclusion
Learning how to use RV leveling jacks is mostly about careful parking, firm support, small adjustments, and steady checks. Use wheel chocks, place each jack on a solid pad, keep the tires grounded when possible, and follow the instructions for your exact system.
Take a few extra minutes before pressing the level button. That habit can prevent frame stress, jack damage, and unsafe movement. Practice the setup at home, keep a departure checklist, and inspect the system before each trip.
Use these steps on your next camping weekend, then share your own RV leveling tips or questions with fellow travelers.