Venture RV Leveling System: Setup Guide
A Venture RV leveling system helps support and level a recreational vehicle at a campsite in the United States. The exact setup may include a tongue jack, fifth-wheel landing gear, electric stabilizers, manual stabilizer jacks, or an automatic leveling system supplied by another manufacturer.
The first step is to identify the system on your RV. “Venture” may refer to the jack or landing-gear maker, the RV brand, or a replacement-parts label. These systems are not always interchangeable. Check the jack label, RV model year, wiring, mounting pattern, and owner’s manual before ordering parts.
What Is a Venture RV Leveling System?
A Venture RV leveling system is a group of jacks and controls used to reduce side-to-side movement and help place an RV in a level position. It may also carry part of the RV’s weight when the vehicle is parked, but it should not replace the tires, wheels, axles, or proper support blocks.
Common parts include:
- Tongue jack: Supports and raises the front of a travel trailer.
- Fifth-wheel landing gear: Supports the front of a fifth-wheel trailer after it is disconnected from the tow vehicle.
- Stabilizer jacks: Reduce bounce and sway near the trailer corners.
- Leveling jacks: Raise selected parts of the RV to correct its position.
- Control switch or motor: Runs an electric jack.
- Gearbox and drive shaft: Transfer power to a mechanical jack.
- Hydraulic pump and valves: Operate some powered leveling systems.
- Manual crank or override: Allows limited operation if power fails.
Leveling jacks and stabilizer jacks are not the same
A leveling jack helps correct the RV’s position. A stabilizer jack mainly limits movement after the RV is already close to level.
Do not use small stabilizer jacks to lift an entire RV from the ground. They can bend, slip, or damage their mounts. Follow the capacity and use instructions for the exact jack model.
Venture components may be part of a larger RV system
Many RVs use parts from several suppliers. A Venture jack may connect to:
- A Lippert or other RV chassis
- A factory-installed control panel
- A trailer battery
- A separate electric motor
- A hydraulic leveling manifold
- A manual crank system
Because of this, the name on one jack does not prove that every part of the leveling system came from Venture. Read the labels on the jack, motor, control box, and replacement parts.
How to Identify Your Venture RV Leveling System
Identify the system before troubleshooting or buying a replacement. The safest method is to record the information from the hardware itself rather than relying only on the RV brand.
1. Record the RV details
Write down:
- RV make and model
- Model year
- Travel trailer or fifth-wheel design
- Dry weight and gross vehicle weight rating
- Number of axles
- Electric, manual, or hydraulic operation
- Location of each jack
- Any control-panel error code
The gross vehicle weight rating, or GVWR, is the maximum loaded weight set by the RV maker. It is not the same as the jack’s lifting capacity.
2. Photograph every label
Take clear photos of:
- The jack tube
- Motor
- Gearbox
- Control box
- Switch panel
- Wiring connectors
– Any barcode or serial-number label
A part number is more useful than a general description such as “Venture electric jack.”
3. Check the jack layout
Use the layout below as a starting point:
| RV type | Common front support | Common rear support | Typical control |
|---|---|---|---|
| Travel trailer | A-frame tongue jack | Stabilizer jacks | Switch, crank, or remote |
| Fifth-wheel trailer | Two landing-gear legs | Stabilizer or leveling jacks | Switch panel or motor |
| Motorhome | Hydraulic or electric leveling jacks | Integrated chassis system | Dash or exterior panel |
| Small trailer | Manual tongue jack | Manual stabilizers | Hand crank |
This table only describes common layouts. The actual setup can vary by year, floor plan, and factory options.
4. Find the operating instructions
Look for instructions in:
- The RV owner’s packet
- The manufacturer’s online manual library
- A sticker near the control switch
- The jack manufacturer’s service information
- The control-panel cover
- The wiring compartment
If the manual and the hardware disagree, stop and confirm the correct model. A wrong wiring diagram can damage the motor or controller.
Venture leveling system versus a complete automatic system
A Venture jack may be a single component in a manual or electric setup. A complete automatic leveling system normally includes sensors, a controller, multiple jacks, wiring, and a programmed operating sequence.
Do not assume that a Venture tongue jack can be added to an automatic system. Automatic systems depend on exact motor type, controller logic, sensor position, jack stroke, frame design, and rated capacity.
How to Level an RV Safely
The safest sequence is to park, disconnect only when stable, level from side to side, level from front to rear, and then deploy stabilizers. Use the instructions for your RV and jack system if they specify a different order.
What you need
Prepare:
- Wheel chocks
- A small level or RV leveling app
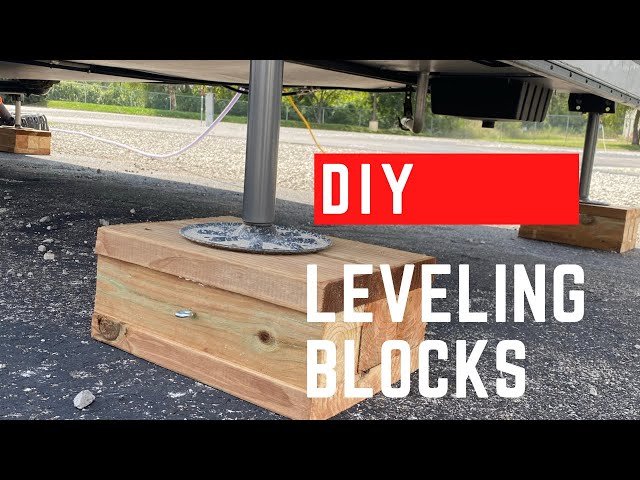
- Leveling blocks or pads
- A tape measure, if clearance is tight
- The RV manual
- A charged trailer battery or a reliable power source
- A flashlight for night setup
Use blocks that are made for RV support. Avoid loose bricks, thin scraps of wood, or unstable objects.
Step 1: Choose a safe parking position
Inspect the campsite before pulling fully into place. Avoid:
- Soft soil that may let a jack sink
- Deep holes near the wheels
- Sloped edges
- Flood-prone areas
- Low branches
- Overhead utility lines
- Unstable pavement or broken asphalt
Keep the tow vehicle and trailer aligned as much as practical. Severe side slopes can exceed the safe working range of some systems.
Step 2: Chock the wheels
Place wheel chocks on both sides of the trailer wheels before disconnecting the tow vehicle. On a slope, use additional chocking as directed by the RV maker.
A jack is not a substitute for wheel chocks. Chocks stop rolling; jacks do not reliably perform that job.
Step 3: Level from side to side
Place the level inside the RV or on a solid frame reference. If one side is low, pull forward, place leveling blocks under the low-side tires, and reposition the trailer.
Do not try to lift a whole trailer high enough to correct a large side slope with corner stabilizers. A low, stable block stack under the tires is usually the safer approach.
Step 4: Disconnect the tow vehicle when stable
For a travel trailer, lower the tongue jack onto a firm pad before removing the hitch connection. For a fifth-wheel trailer, extend the landing gear until the trailer is supported, then confirm that the kingpin is clear before pulling away.
Never stand between the tow vehicle and trailer while either vehicle may move.
Step 5: Level from front to rear
Use the tongue jack or fifth-wheel landing gear to correct the front-to-rear angle. Make small adjustments and watch the jack foot, frame, and ground contact.
Do not exceed the jack’s extension limit. A jack that is nearly fully extended has less stability and may be more vulnerable to side loads.
Step 6: Deploy stabilizers
Lower the rear and corner stabilizers until they contact firm pads. Apply only the pressure called for by the manufacturer.
The goal is to reduce movement, not to lift the trailer high into the air. If the body rises noticeably after stabilizers are extended, retract them slightly and reassess.
Step 7: Recheck the RV
Walk through the trailer and check:
- Doors and drawers
- Refrigerator position, if applicable
- Shower and sink drainage
- Slide-out clearance
- Jack foot contact
- Wheel chocks
- Frame height
- Trailer movement
A small correction is easier before slides, awnings, and utilities are deployed.
Venture RV Leveling System Troubleshooting
Start with simple and safe checks. A jack that will not move may have a power problem, overload, mechanical bind, control fault, or damaged mount.
Symptom: The jack does not move
Check these items in order:
- Confirm that the battery is connected.
- Measure battery voltage at rest and while the jack switch is pressed.
- Inspect the main fuse or circuit breaker.
- Look for loose, corroded, or damaged wires.
- Check the ground connection.
- Test the switch or remote control.
- Listen for the motor.
If the motor is silent, the fault may be in the power supply, fuse, ground, switch, controller, or motor. Do not bypass a fuse with wire or a larger fuse.
Symptom: The motor runs, but the jack does not move
A running motor with no jack movement may indicate:
- A stripped gear
- A broken shear pin
- A disconnected drive shaft
- A damaged gearbox
- A failed coupler
- A jammed or bent jack tube
Stop operating the switch. Continued running can turn a small gear problem into motor or gearbox damage.
Symptom: The jack moves slowly
Slow movement can result from:
- A weak battery
- Voltage loss through a long or damaged cable
- Corroded terminals
- Excessive load
- Dry or damaged mechanical parts
- A bent leg or tube
- Cold weather reducing battery output
Measure voltage at the battery and again at the motor while it runs. A large voltage drop suggests a cable, connection, fuse, or ground problem.
Use only the lubricant and service method specified for the jack. Do not spray an unknown product into an electric motor or sealed gearbox.
Symptom: One side moves but the other side does not
On systems with linked landing gear, inspect the connecting shaft, coupler, and gear teeth. One leg may be jammed while the motor continues to drive the other.
Do not place your hands near gears or shafts while the system is energized. Disconnect power before inspecting moving parts.
Symptom: The jack stops under load
Possible causes include:
- An overloaded jack
- A low battery
- A weak motor
- A damaged gear
- A soft or sinking pad
- Excessive side force
- A bent mounting bracket
Retract the jack if it is safe to do so. Reposition the RV with the tow vehicle or use proper blocks rather than forcing the jack to lift an excessive load.
Symptom: An automatic system shows an error
Read the exact error code in the system manual. Common causes may include:
- A jack not fully retracted
- A sensor that lost calibration
- Low battery voltage
- A disconnected motor cable
- A jack that reached its travel limit
- The RV moving during calibration
Do not repeatedly cycle the system without knowing what the error means. Some controllers can lose their reference position or store a fault.
When to stop and call an RV technician
Get professional help when:
- The frame is bent
- A jack mount is cracked
- Hydraulic fluid is leaking
- A jack is twisted
- The RV is lifted unevenly
- A fuse blows again after replacement
- Wiring is hot or melted
- The RV may fall if a jack retracts
- You need to weld, drill, or change a structural mount
Support the RV with approved stands only on suitable frame points. Never crawl under an RV supported only by hydraulic or electric jacks.
Choosing a Replacement Venture RV Jack or Leveling Part
Match the replacement by specification, not by appearance. Two jacks can look similar but differ in stroke, mounting holes, gear ratio, motor direction, capacity, or wiring.
Confirm these specifications
Before ordering, compare:
- Exact part number
- Jack type
- Rated capacity
- Extended and retracted length
- Lift or travel distance
- Mounting-hole pattern
- Tube size and shape
- Foot or pad design
- Motor voltage
- Gear direction
- Connector style
- Manual override location
- Controller compatibility
- Warranty requirements
A replacement jack with the wrong capacity may fail early or create an unsafe load balance.
Do not use total RV weight as the only sizing figure
The jack does not always carry the entire loaded RV weight by itself. The load varies with:
- Wheel placement
- Hitch load
- Number of jacks
- Ground slope
- Cargo position
- Frame stiffness
- Whether the tow vehicle remains connected
Use the RV manufacturer’s instructions and the jack maker’s rated capacity. Do not guess from dry weight alone.
Replacement decision table
| Problem | Likely replacement area | What to verify |
|---|---|---|
| Motor is burned out | Motor assembly | Voltage, shaft, connector, gear direction |
| Gearbox is stripped | Gearbox or complete jack | Gear ratio, mounting, motor fit |
| Jack tube is bent | Complete jack or leg | Stroke, length, capacity, mounting |
| Switch is damaged | Switch or control panel | Polarity, amperage, connector |
| Cable is corroded | Wiring or ground lead | Wire size, fuse rating, routing |
| Foot is missing | Foot or pad | Pin size, load rating, fit |
| Controller fails | Controller | Exact system family and calibration method |
Can a manual Venture jack be upgraded to electric?
Sometimes, but not always. An electric conversion must match the jack’s gearbox, drive shaft, mounting space, voltage, and load requirements.
A universal motor kit may not fit a specific Venture assembly. Confirm compatibility with the manufacturer or an RV parts specialist before changing the system.
Can you mix brands?
A mixed-brand repair may work when the parts share the same mechanical and electrical specifications. Brand names alone do not establish compatibility.
Do not mix a controller, motor, sensor, or hydraulic component based only on matching voltage. The control signals and mechanical limits must also match.
Care and Maintenance
Basic maintenance can reduce failures, but it cannot correct a bent jack or weak frame mount.
Before each trip
Inspect:
- Jack feet and pads
- Mounting bolts
- Welds and brackets
- Wiring and connectors
- Fuse holders
- Ground straps
- Manual override shafts
- Hydraulic hoses, if equipped
Look for rust, cracks, loose fasteners, rubbing wires, and fluid stains.
During setup
Keep the jack feet centered on firm pads. Do not allow a foot to sit partly on a block edge.
Watch for side loading. A jack should move mostly in line with its body. If it leans, stop and correct the load or position.
Before storage
Retract exposed jack tubes as directed by the manual. Clean dirt and road salt from the parts. Protect electrical connectors from water without blocking required vents.
Do not coat every part with grease unless the service instructions call for it. Excess lubricant can collect dust and may reach electrical components.
Battery care matters
Electric leveling systems depend on stable battery power. Keep the RV battery charged and inspect the terminals.
A system may appear to have a jack failure when the actual problem is low voltage under load. A battery can show acceptable voltage at rest and still drop sharply when the motor starts.
Common Mistakes to Avoid
The most costly leveling errors usually come from using the wrong jack for the job or skipping wheel restraint.
Avoid these mistakes:
- Using stabilizers to lift the whole RV
- Disconnecting before chocking the wheels
- Running a jack after it reaches full travel
- Replacing a fuse with a larger one
- Operating a bent jack
- Standing under an unsupported RV
- Mixing controllers without confirming compatibility
- Using unstable blocks
- Ignoring a cracked weld or mount
- Assuming every “Venture” part fits every Venture-labeled RV
- Relying on an app without checking the trailer frame
- Making large corrections with corner jacks
If the RV shifts, creaks sharply, leans more, or loses jack contact, stop. Move people away from the area and lower the RV safely if possible.
Frequently Asked Questions
Is a Venture RV leveling system the same as a stabilizer system?
No. A leveling system corrects the RV’s position. A stabilizer system mainly reduces movement after the RV is level. Some RVs use the same general jack area for both jobs, but the function and rated use can differ.
Can I level my RV with the stabilizer jacks?
Only for small final adjustments if the manufacturer allows it. Do not use stabilizer jacks to raise the wheels off the ground or correct a large slope. Level the tires and frame first with suitable blocks and the proper leveling equipment.
Why does my Venture electric jack click but not move?
A click may come from a relay or motor that lacks enough current to turn. Check the battery, fuse, ground, cable connections, and load. A stripped gear or seized jack can also cause the motor circuit to click without movement.
How do I find the correct Venture replacement part?
Use the exact number on the jack, motor, gearbox, or controller. Then compare the voltage, capacity, travel, mounting pattern, dimensions, connector, and manual override. If the label is missing, photograph the assembly and measure it before contacting a parts supplier.
Can I manually retract an electric Venture jack?
Many electric jacks include a manual override, but the location and tool vary. Follow the model instructions. Disconnect power before working near moving parts, and do not use a drill unless the manufacturer permits it.
Why does my RV still move after leveling?
Movement may come from soft ground, poor wheel chocking, loose stabilizers, extended slides, worn jack mounts, or an RV that is not properly supported. Check the chocks, pads, frame, and jack contact. Do not tighten stabilizers until they lift the trailer body.
Sources and Model Verification
For a correct repair, use primary documentation for the exact system:
- The RV manufacturer’s owner’s manual
- The Venture jack or component manual
- The controller manufacturer’s wiring diagram
- The RV’s parts list or build sheet
- The replacement-part manufacturer’s fitment guide
- The National Highway Traffic Safety Administration RV safety resources for general vehicle safety information
Product designs, part numbers, and support documents can change by model year. Verify the current document against the label on your RV before servicing the system.
Conclusion
A Venture RV leveling system should be identified by its exact hardware, not by the RV name alone. First separate the roles of the tongue jack, landing gear, stabilizers, and automatic leveling equipment. Then use wheel chocks, firm pads, small adjustments, and the correct operating sequence.
For troubleshooting, begin with battery power, fuses, grounds, wiring, and switches. Stop when you see a bent jack, cracked mount, hydraulic leak, hot wiring, or unsafe movement. When replacement is needed, match the part number and mechanical specifications instead of choosing a similar-looking jack.