RV Leveling Legs: Easy Setup Guide For Stability
RV leveling legs, also called leveling jacks, help make a recreational vehicle level and steady when parked. They can improve comfort, help doors and appliances work as intended, and reduce movement inside the RV.
The right setup depends on the RV type. A motorhome may use hydraulic or electric leveling jacks. A fifth wheel uses front landing gear and rear stabilizers. A travel trailer often uses tongue jacks and stabilizer jacks.
Use the RV maker’s manual first. Do not assume that a stabilizer jack can safely lift the full RV. Many are made to reduce movement, not to raise the vehicle or correct a large slope.
What Are RV Leveling Legs?
RV leveling legs are support devices that extend from an RV frame to the ground. They help adjust the RV’s height or hold it steady after parking.
The term can describe several parts:
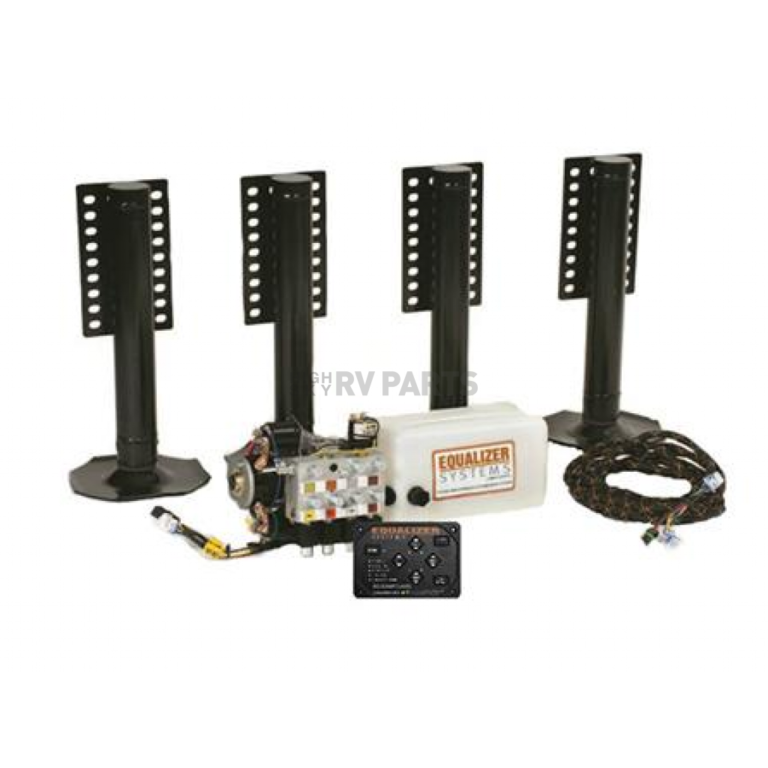
- Hydraulic leveling jacks: Use fluid pressure to extend and retract.
- Electric leveling jacks: Use motors and gears.
- Manual stabilizer jacks: Use a hand crank or drill adapter.
- Landing gear: Supports the front of a fifth wheel.
- Tongue jack: Supports and raises the front of a travel trailer.
- Scissor jacks: Fold up for travel and extend for support.
- Stabilizer jacks: Limit side-to-side and front-to-back movement.
These parts do not all serve the same purpose. A leveling jack changes the RV’s height. A stabilizer jack mainly reduces movement.
Leveling jacks versus stabilizer jacks
The difference matters for safety.
| Part | Main job | Can it level the RV? | Can it lift the RV? |
|---|---|---|---|
| Hydraulic leveling jack | Level and support | Usually yes | Only within its rated use |
| Electric leveling jack | Level and support | Often yes | Only as the manual allows |
| Landing gear | Support a fifth-wheel front | Helps with front height | Yes, within its rating |
| Tongue jack | Raise or support trailer front | Helps front-to-back level | Yes, within its rating |
| Stabilizer jack | Reduce movement | Only slightly | Usually no |
| Scissor jack | Stabilize or support | Limited | Only if rated for that use |
Many RV manufacturers warn owners not to use stabilizers as lifting devices. The frame, jack mounts, or jack gears may bend if the load is too high.
How RV Leveling Legs Work
A leveling system changes the contact points between the RV frame and the ground. It uses one or more legs to raise or lower parts of the RV until the floor is close to level.
Hydraulic systems use a pump, valves, hoses, and cylinders. Electric systems use motors, gearboxes, and threaded shafts. Manual systems use a screw mechanism or a telescoping tube with locking holes.
The system must transfer force into firm ground. Soft soil, gravel, asphalt, or hot pavement can let a foot sink. This can change the RV’s level and place extra load on one jack.
Why level matters
A level RV can provide several practical benefits:
- Cabinet doors are less likely to swing open.
- Shower water can drain more evenly.
- Refrigerator operation may be safer when the unit is level.
- Beds and tables feel more even.
- Walking inside the RV is more comfortable.
- Movement may feel less noticeable.
Absorption refrigerators are especially sensitive to being operated outside their allowed level range. Check the refrigerator manual for its exact limits. A leveling system cannot fix a refrigerator that has a separate cooling or electrical fault.
How to Level an RV With Leveling Legs
The safest process is slow and planned. Park on the best surface you can find before using the jacks.
What you need
Before you start, gather:
- The RV owner’s manual
- Wheel chocks
- A small bubble level or electronic level
- Jack pads or solid leveling blocks
- A flashlight
- Gloves, if needed
- A way to measure battery voltage if the system is weak
Use blocks made for RV jacks. Do not use loose bricks, thin boards, or unstable scraps of wood.
Step 1: Choose the best parking spot
Look for a firm, stable area with a gentle slope. Avoid soft shoulders, deep gravel, eroded ground, and places where water may collect.
Check overhead branches, low wires, curbs, and nearby objects. Make sure the jacks will not extend into a hole or onto an unstable edge.
Step 2: Place the RV in position
Center the RV as much as possible. If you are towing, keep the trailer aligned with the tow vehicle until the parking process is complete.
Do not try to correct a severe slope with long jack extensions. A better parking spot is safer than a large jack adjustment.
Step 3: Check level before extending the jacks
Place a level on a solid floor or another surface approved by the RV maker. Check both:
- Side to side
- Front to back
A small level near the axle area can give a useful starting reading. The floor may not be perfectly flat, so use the same reference point each time.
Step 4: Chock the wheels
Place wheel chocks on the wheels before disconnecting a trailer. Chock both sides when possible.
For a travel trailer or fifth wheel, do not rely on the tongue jack or landing gear to stop the trailer from rolling. Chocks hold the wheels. Jacks support the frame.
Step 5: Disconnect only when the RV is secure
For a travel trailer, lower the tongue jack before removing the hitch connection. For a fifth wheel, follow the hitch maker’s release steps and keep the landing gear in a safe position.
Keep people clear of pinch points. Never place hands, feet, or tools under a moving jack.
Step 6: Use leveling blocks when needed
Place blocks under jack feet when the ground is soft or the jack needs too much extension. Blocks spread the load and reduce sinking.
The blocks must sit flat. Each jack foot should be centered on its support. Do not stack loose pieces at an angle.
Step 7: Extend the leveling legs in the correct order
The correct order varies by system. Common patterns include:
- Level side to side.
- Level front to back.
- Extend stabilizers.
- Recheck level.
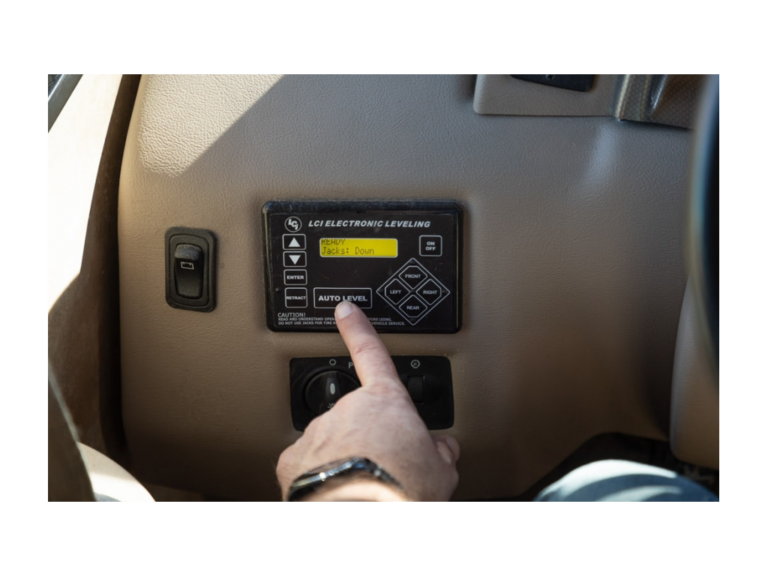
Some automatic systems use a different sequence. Follow the control panel instructions and the RV manual.
For a motorhome, keep the parking brake set and the transmission in Park. Do not crawl beneath the RV while the leveling system is active.
Step 8: Stop when the RV is level and stable
Do not keep extending a jack just to make it “extra solid.” Excess force can damage the jack, frame, floor, or mounting brackets.
Walk through the RV. Check doors, the shower, and the floor. Recheck the level after a few minutes, especially on soft ground.
Signs of a successful setup
A good setup should have:
- All jack feet resting on firm, stable pads
- No wheel lifted unless the manual specifically allows it
- No sharp frame twist
- No jack warning light
- No unusual hydraulic leak or motor noise
- A stable floor with normal door operation
- The RV close to level in both directions
How to Choose RV Leveling Legs
Choose leveling legs based on the RV’s design, weight, frame, and existing mounting points. A universal-looking jack may not fit the frame or carry the correct load.
Match the jack to the RV type
Motorhomes often use a four-point or hydraulic leveling system. Some models use powered electric jacks. The system must match the chassis and the original mounting structure.
Fifth wheels use front landing gear to support the front of the trailer. Rear stabilizers reduce movement but may not be designed to level the full unit.
Travel trailers often use a tongue jack and rear stabilizers. Some larger trailers have electric stabilizer systems or optional leveling packages.
Truck campers may use camper jacks that support the camper when it is off the truck. These are different from ordinary trailer stabilizers.
Check these specifications
Before buying or replacing RV leveling legs, verify:
- Rated capacity
- Extended and retracted length
- Lift range
- Closed height
- Mounting hole pattern
- Frame clearance
- Foot size
- Power source
- Motor voltage
- Hydraulic fitting size
- Control system compatibility
- Replacement part number
- Weather and corrosion protection
- Warranty terms
Do not select a jack based only on the RV’s total gross vehicle weight rating. The load on each jack changes with the RV layout, cargo, water tanks, passengers, and jack position.
The manufacturer’s rated capacity and installation instructions are the controlling information. If the rating is unclear, contact the RV or jack manufacturer before installation.
Automatic versus manual leveling
| Feature | Automatic system | Manual system |
|---|---|---|
| Setup speed | Usually faster | Usually slower |
| User effort | Low after setup | Higher |
| Cost | Often higher | Often lower |
| Repairs | May need electrical or hydraulic diagnosis | Often simpler |
| Precision | Depends on sensors and calibration | Depends on the user |
| Best fit | Frequent campers who want easy setup | Owners who want low complexity |
Automatic leveling is convenient, but it still needs a firm surface and proper jack pads. Sensors can lose accuracy. A system that stops on level may still have a jack on weak ground.
RV Leveling Jack Pads and Ground Support
Jack pads help spread the load over a wider area. They can reduce sinking on soil, grass, gravel, or hot asphalt.
A pad should be:
- Strong enough for the jack load
- Large enough to support the foot
- Flat on the bottom
- Resistant to cracking
- Easy to place without pinching fingers
Use blocks only as the RV maker or jack maker permits. Some systems require a specific maximum pad height. Too much stacking can make a jack less stable.
Leveling blocks under the tires serve a different purpose. They raise a wheel set before the jacks are used. A tire ramp or wheel block must support the tire and remain aligned with the axle.
Do not place a jack on a loose piece of plywood that can split or slide. Do not use concrete blocks on their side. They can crack under concentrated loads.
Common RV Leveling Leg Problems
Most leveling problems have a simple first check. Start with safety, power, and ground support before replacing parts.
| Symptom | Possible cause | Safe first check |
|---|---|---|
| Jack will not move | Low battery, blown fuse, bad switch, locked system | Check battery, master switch, and error display |
| Motor runs but jack does not extend | Stripped gears, broken shear pin, damaged drive | Stop use and inspect the manual’s service points |
| Jack sinks into ground | Soft soil or small pad | Retract, reposition, and use a stronger pad |
| RV leans after leveling | Uneven ground, sensor issue, shifting pad | Recheck the surface and system calibration |
| Hydraulic jack drips | Damaged seal, hose, or fitting | Stop and inspect; do not touch pressurized fluid |
| Jack makes grinding noise | Misalignment, dry mechanism, worn gear | Stop before the motor or frame is damaged |
| One jack moves slowly | Low voltage, load imbalance, bent part | Check battery voltage and inspect for obstruction |
| Stabilizers bend | Too much load or side force | Stop using them as lifting jacks |
If an electric jack will not move
- Set the parking brake or secure the tow vehicle.
- Confirm the battery disconnect is on.
- Check battery charge.
- Inspect the main fuse or circuit breaker.
- Check for a control-panel error.
- Look for a blocked foot or bent leg.
- Use the manual override only as the manual directs.
Do not bypass a fuse with a larger fuse. Do not run a motor through loose wires as a test.
If a hydraulic jack leaks
Hydraulic fluid can be under high pressure. Do not place your hand near a suspected leak. A small pinhole can inject fluid into skin.
Turn off the system. Keep the area clear. Use the manufacturer’s service instructions or contact a qualified RV technician. Clean fluid from the ground according to local disposal rules.
If the RV becomes uneven overnight
The pad may have sunk. The jack may have retracted. The ground may have shifted. A valve, hose, or sensor may also have a fault.
Do not keep adding jack extension without finding the cause. Retract the system if safe, improve the ground support, and inspect the system before the next trip.
RV Leveling Leg Maintenance
Maintenance needs vary by jack design. Use the lubrication type and service interval in the manual.
Basic care includes:
- Rinse off road salt, mud, and sand.
- Inspect jack tubes for dents and rust.
- Check foot pads and mounting bolts.
- Look for hydraulic fluid on hoses and fittings.
- Check electric wiring for loose or damaged insulation.
- Keep moving parts free of packed dirt.
- Retract jacks before travel.
- Store the RV with the system in the position the maker recommends.
Do not spray any lubricant on a threaded shaft unless the jack maker allows it. Some systems use a dry lubricant. Others require a specific grease. The wrong product can collect grit or damage seals.
Before each trip, confirm that every jack is fully retracted. A warning light is not the only sign of a problem. A low jack can strike the road, damage the leg, or reduce ground clearance.
RV Leveling Leg Safety Rules
Follow these rules every time:
- Read the RV and jack manuals before use.
- Keep wheels chocked when a trailer is parked.
- Use the parking brake on a motorhome.
- Keep people away from moving legs.
- Never crawl under an RV supported only by leveling jacks.
- Never use a jack beyond its rated travel.
- Never lift a wheel unless the system manual allows it.
- Do not use a stabilizer as a substitute for a lifting jack.
- Use firm jack pads on soft ground.
- Stop if the RV frame twists or the jack foot slips.
- Keep the control panel away from children.
- Do not work on hydraulic parts while they are pressurized.
If a wheel must be lifted for service, use equipment rated for that job and add properly placed jack stands. Leveling legs are not automatically a substitute for service stands.
Frequently Asked Questions About RV Leveling Legs
Can RV leveling jacks lift the tires off the ground?
Sometimes, but not always. The answer depends on the exact jack, RV frame, and manufacturer instructions. Many systems warn owners to keep the tires on the ground because lifting can overload the jacks or twist the frame.
Should the RV tires stay on the ground when leveling?
Usually, yes. Tires should remain on the ground unless the RV maker specifically permits lifting them. Use wheel chocks and proper leveling blocks to keep the setup stable.
Can I use stabilizer jacks to level my travel trailer?
Only for small corrections if the manufacturer allows it. Most stabilizer jacks are meant to reduce movement after the trailer is already level. They are not designed to raise the full trailer.
How many leveling legs does an RV need?
The number depends on the RV and the leveling system. A motorhome may use four or more points. A fifth wheel may use front landing gear and rear stabilizers. A travel trailer may use a tongue jack plus two or more stabilizers.
Why does my RV move even with the jacks down?
Possible causes include soft ground, small jack pads, loose wheel chocks, excessive jack extension, worn mounting parts, or a stabilizer that is not carrying its share of the load. Check the ground and chocks first. Do not tighten the system by forcing the jacks harder.
Key Takeaways
- RV leveling legs adjust height or reduce movement, depending on their design.
- Stabilizer jacks are not always lifting jacks.
- Use wheel chocks before disconnecting a trailer.
- Keep tires on the ground unless the manual says otherwise.
- Use solid pads on soft or uneven ground.
- Choose replacement legs by capacity, size, mounting pattern, and system compatibility.
- Stop for leaks, bent parts, grinding sounds, or sudden movement.
- Never work under an RV supported only by leveling legs.
Conclusion
RV leveling legs make campsite setup safer and more comfortable when used for their intended purpose. The best method is simple: choose firm ground, chock the wheels, use proper pads, follow the correct jack order, and stop when the RV is level and stable.
For a replacement or upgrade, begin with the RV manufacturer’s part number and the jack maker’s load and installation data. If the frame, hydraulic system, or mounting points are damaged, have the repair checked by a qualified RV technician before travel.