How To Use RV Auto Leveling System: Easy Setup Guide
Park level, extend jacks, check the coach, and let the system confirm a stable, safe setup.
Learning how to use an RV auto leveling system is easier than it first seems. Most systems use hydraulic or electric jacks to steady and level your motorhome after you park. The key is to choose a safe site, follow the correct button sequence, and know when to stop the system.
After working through many RV setup routines, I have found that small habits make the biggest difference. A quick site check, a level starting position, and a careful look at the jacks can prevent damage, reduce stress, and make your campsite feel like home.
What an RV Auto Leveling System Does
An RV auto leveling system uses powered jacks to reduce side-to-side and front-to-back slope. The control panel reads the coach position through sensors. It then lowers the jacks in a set order until the RV reaches a level position.
Most systems fall into two main groups:
• Hydraulic leveling systems use a pump, fluid reservoir, hydraulic lines, and powered jacks.
• Electric leveling systems use motor-driven jacks with gears, screws, or electric actuators.
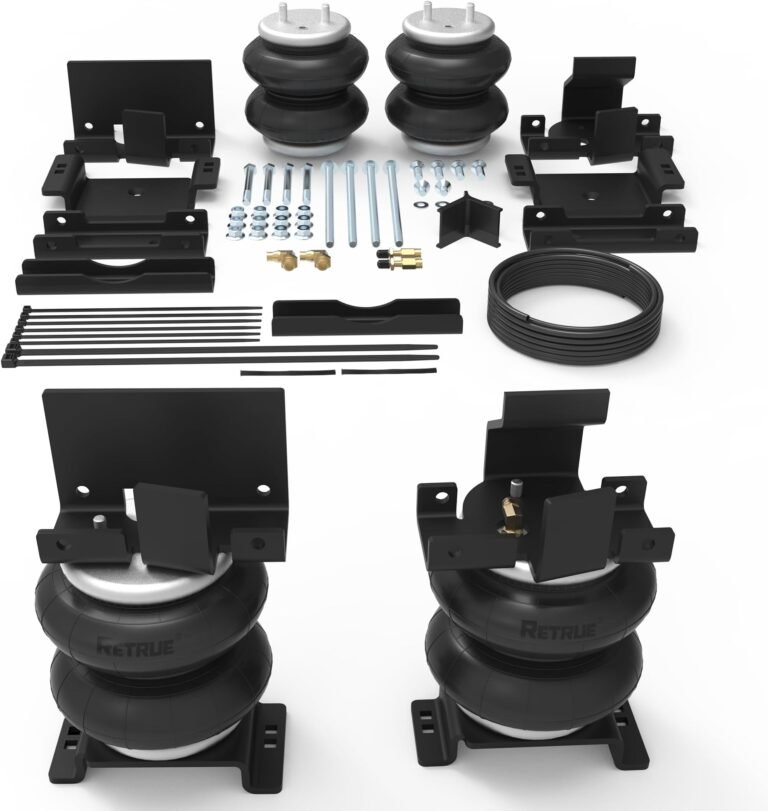
• Air leveling systems use air bags and compressors rather than ground jacks. These are common on some high-end motorhomes and buses.
The system does more than make your RV feel comfortable. A level coach helps refrigerator cooling, improves door and cabinet operation, and reduces movement when people walk inside. It also gives slide-outs and other systems a more stable base.
An RV auto leveling system is not designed to replace safe parking habits. It should not be used to lift the entire vehicle, correct a dangerous slope, or hold up a wheel that is off the ground.

Before You Turn On Auto Leveling
Good leveling starts before you press the “Auto” button. Walk around the site and look for hazards. Check for soft soil, deep gravel, holes, tree roots, steep slopes, and low branches.
Your RV should sit on firm ground. A level concrete pad is ideal, but packed gravel can also work well. Wet grass, loose sand, and muddy soil may let the jacks sink or slide.
Complete these checks before using the RV auto leveling system:
• Park the RV in the center of the site.
• Keep the front of the RV pointed in the direction recommended by your campground or site layout.
• Make sure there is enough room for slide-outs, awnings, steps, and storage doors.
• Confirm that the jacks will not land over a drain, soft patch, or buried utility cover.
• Apply the parking brake.
• Place the transmission in Park, or use the gear selected by your owner’s manual.
• Close the entry door if your system manual requires it.
• Remove people and pets from areas near the jacks.
• Check that the battery has enough charge.
The parking brake matters because many systems use it as a safety signal. If the brake is not set, the controls may not work. Never bypass this safety feature.
If the site has a strong slope, consider moving to another spot. A leveling system can adjust a moderate slope, but it cannot turn an unsafe parking area into a safe one.

How to Use an RV Auto Leveling System Step by Step
The exact buttons vary by brand and model. Some common systems include Lippert Ground Control, Power Gear, HWH, BigFoot, and Equalizer Systems. Always use your RV’s manual as the final authority.
The basic steps below apply to many motorhomes.
1. Park and secure the RV
Drive onto the site and stop in the best position. Keep the wheels as straight as possible. Set the parking brake and place the transmission in the correct gear.
Do not begin leveling while the vehicle is still moving. Turn off the engine only if your manufacturer allows it. Some systems need the engine running during the leveling cycle to protect battery voltage.
2. Check the control panel
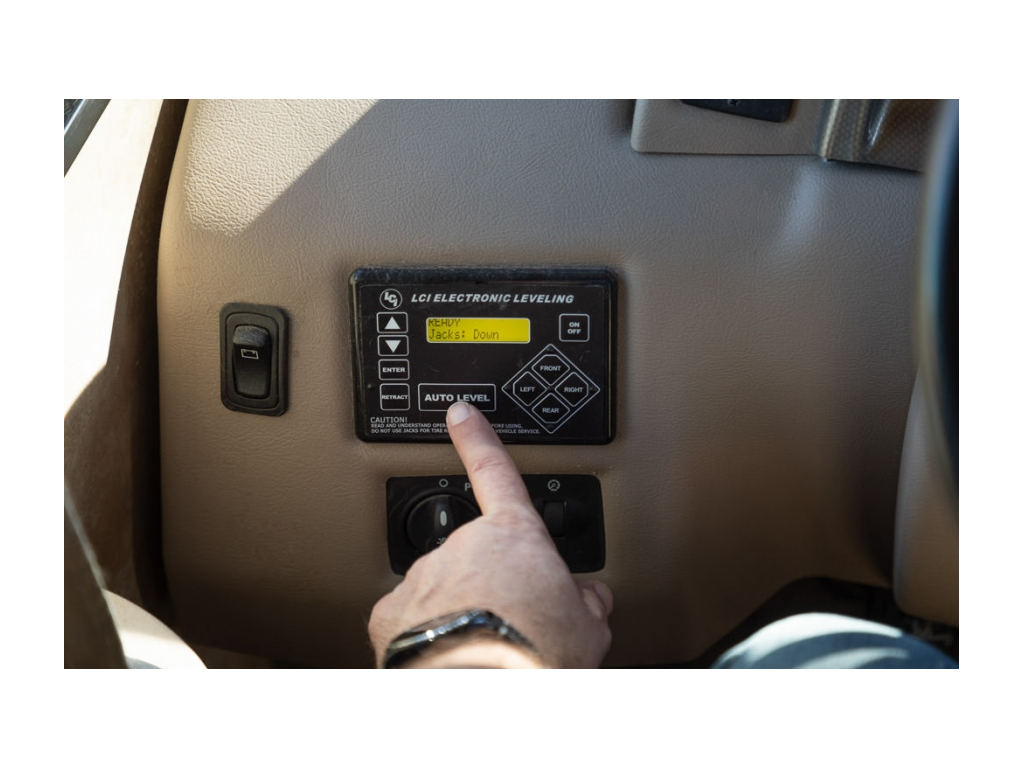
Turn on the leveling control panel. Look for warning lights, error codes, or messages such as “Not in Park” or “Jacks Down.”
If the panel does not power on, check the coach battery, ignition setting, parking brake, and system fuse. Do not keep pressing buttons if the system shows a fault.
3. Lower the front jacks if required
Many systems first extend the front jacks until they touch the ground. They may then raise or lower the front of the coach to reach the correct position.
Watch the jacks as they move. Make sure each foot lands flat and stays on firm ground. If a foot begins to sink, stop the cycle and add a suitable leveling pad.
4. Start the automatic cycle
Press the button marked “Auto,” “Automatic,” or a similar label. The system will usually extend the jacks in stages.
Stand outside where you can see the coach and the jacks. Do not rely only on the control panel. Listen for unusual grinding, fluid leaks, loud motor strain, or movement that looks uneven.
5. Let the system finish
Do not interrupt the cycle unless there is a safety problem. The system may pause between steps while it measures the coach.
When the panel says the cycle is complete, check the RV from outside. Look for:
• Jacks that are fully supported on solid ground
• A coach body that appears stable
• Wheels that remain in contact with the ground
• No jack foot that is twisted or partly supported
• No hydraulic fluid or unusual debris below the coach
6. Check the inside of the RV
Walk through the coach. Use a small bubble level on the floor, countertop, or refrigerator shelf if desired.
Open a cabinet and the main entry door. Check that the refrigerator is reasonably level according to its manual. Your RV does not need laboratory-level accuracy, but it should not feel tilted or unstable.
7. Extend the slide-outs
Most RV makers recommend leveling before extending slide-outs. This helps the slide mechanisms operate from the position they were designed to use.
However, some manufacturers give different instructions. Follow your specific RV and slide-out manuals. Never assume every coach uses the same order.
8. Recheck the coach after a few minutes
Soft soil can compress after the jacks take weight. Look at the coach again after five to ten minutes.
If the RV has shifted, stop and correct the problem. You may need larger pads, a different parking site, or manual adjustment.
This step-by-step process explains how to use an RV auto leveling system without treating it like a set-and-forget device. Automation helps, but the driver still has to supervise the setup.
How to Use Manual Leveling Mode
Automatic mode works well on many sites, but manual mode can help when the system stops with a slight tilt. It is also useful when one jack needs a small correction.
Use manual mode carefully:
-
Confirm that the parking brake is set.
-
Read the control panel instructions.
-
Adjust one jack or one pair of jacks at a time.
-
Make small changes.
-
Watch the coach and the jack feet while they move.
-
Recheck the floor level after each adjustment.
Never make large corrections with one corner alone. Raising one corner too far can twist the frame or place too much stress on the body.
A common mistake is trying to level the RV by lifting one wheel off the ground. The wheels should normally stay on the ground unless the manufacturer clearly states otherwise. If a wheel leaves the ground, stop the process and ask a qualified RV technician for help.
Manual mode is a correction tool, not a shortcut around a poor site. If the RV needs a major lift to become level, move the coach or use approved blocks under the wheels and jack pads as directed by the manufacturer.

Safe Use of Leveling Pads and Blocks
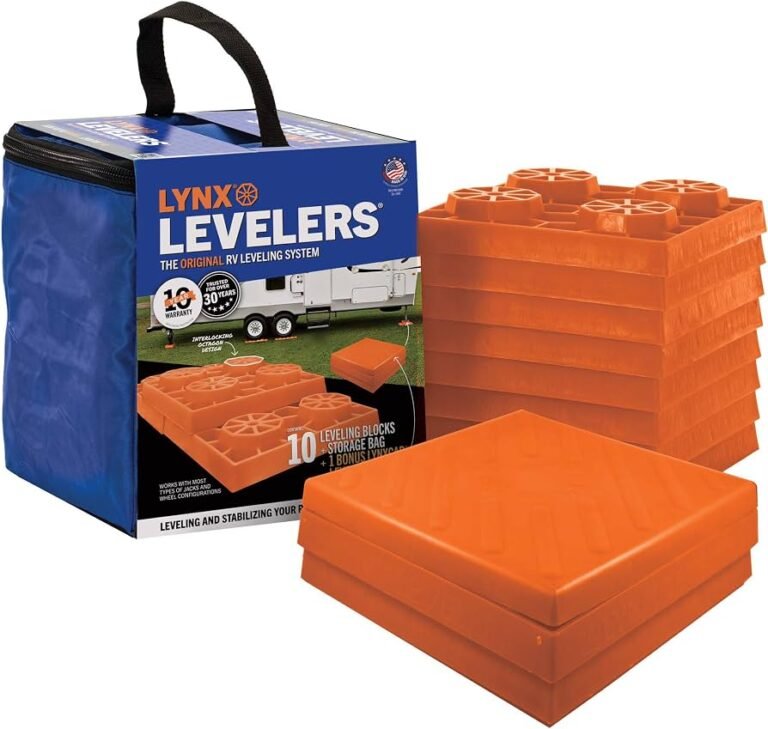
Leveling pads spread weight across a larger area. They can reduce sinking on soft ground and help protect the jack feet.
Use products rated for your RV’s weight. Plastic pads, hardwood blocks, and commercial jack pads may all be suitable when approved by the manufacturer. Avoid cracked boards, loose bricks, thin plywood, or random objects found at a campsite.
Place pads before the jacks extend if you know where each foot will land. The pads should sit flat on stable ground.
Keep these safety points in mind:
• Use one solid pad or an approved stacked system.
• Do not build tall, unstable towers.
• Keep the pad centered under the jack foot.
• Avoid placing pads on a steep side slope.
• Replace pads that are cracked, warped, or crushed.
• Keep hands and feet away from moving parts.
A pad does not increase the safe lifting capacity of a jack. It only spreads the load and may reduce sinking. The jack rating and RV manufacturer’s limits still apply.

Common Problems With an RV Auto Leveling System
Even a good system can stop working when one small condition is wrong. The control panel may show an error, or the jacks may move unevenly.
The system will not start
Check the basics first:
• Is the engine or ignition in the required position?
• Is the parking brake fully set?
• Is the transmission in Park?
• Is the house battery charged?
• Is the control panel receiving power?
• Is a fuse or circuit breaker open?
If these checks do not solve the issue, stop cycling the controls. A technician can test the control board, wiring, motor, pump, and safety switches.
One jack will not extend
A stuck jack may have a damaged motor, low hydraulic fluid, blocked wiring, bent hardware, or a control problem. Look for obvious damage, but do not crawl under the RV while the jacks support its weight.
Use only the emergency retraction procedure listed in your manual. Do not force a jack with a pry bar or operate it with disconnected safety parts.
The RV is not level after automatic mode
The sensor may need calibration, or the RV may have moved during the cycle. The site may also be too uneven for the available jack travel.
Try a small manual adjustment only if the system manual allows it. If the problem happens at every campsite, the level sensor may need professional calibration.
The jacks sink into the ground
Stop the process and retract the jacks if safe. Move to firmer ground or use larger, approved pads.
Do not keep extending a jack that is sinking. It may become difficult to retract and could place the coach in an unstable position.
The pump or motor sounds different
A short burst of noise is normal. Grinding, rapid clicking, hissing, or repeated motor cycling is not something to ignore.
Stop the system and inspect it from a safe position. Hydraulic systems may also show a fluid leak, while electric systems may show a hot wire, weak motor, or low battery.

How to Retract the Leveling Jacks
Retract the jacks before moving the RV. Even one partly extended jack can strike the ground, damage the jack, or create a serious road hazard.
Use this general process:
-
Remove people and objects from around the jacks.
-
Retract the slide-outs if your manual requires them to move first.
-
Close awnings and storage doors.
-
Press “Store,” “Retract All,” or the correct retraction button.
-
Watch each jack rise completely.
-
Check the control panel for a “Jacks Down” warning.
-
Walk around the RV and visually confirm that every jack is fully retracted.
-
Check that the jack pads have not stuck to the ground.
-
Release the parking brake only when you are ready to drive.
Some hydraulic systems need the engine or ignition on during retraction. Others use a dedicated pump or battery. Follow the instructions for your exact system.
Never drive away based only on the display. A visual walk-around takes less than a minute and can prevent expensive damage.

Maintenance Tips for Reliable Leveling
Routine care helps an RV auto leveling system work smoothly. Inspect the system at the start of the travel season and before long trips.
For hydraulic systems, check the fluid level and inspect hoses, fittings, cylinders, and the pump area. A wet or oily area may indicate a leak. Use only the fluid type listed by the manufacturer.
For electric systems, inspect wiring, connectors, motors, gears, and jack tubes. Look for corrosion, loose wires, damaged insulation, or dirt packed around moving parts.
Helpful maintenance habits include:
• Clean dirt from exposed jack parts.
• Lubricate components only when the manual calls for it.
• Keep electrical connections dry and protected.
• Test the system before a major trip.
• Keep a record of error codes and repairs.
• Inspect jack pads for cracks.
• Check the house battery and charging system.
Do not spray lubricant or water into an electric motor or control panel. Too much grease can also attract dust and create a gritty paste around moving parts.
Professional service is wise when the system leaks, lifts unevenly, repeatedly loses calibration, or shows electrical faults. A leveling system supports a heavy vehicle, so guesswork is not worth the risk.

Mistakes to Avoid When Using Auto Leveling
Many leveling problems come from rushing. The most common mistakes are simple but costly.
• Do not use the jacks to change a tire or perform repairs unless the RV is also supported by properly rated jack stands.
• Do not place your body under the coach while the leveling jacks support it.
• Do not level on loose soil without approved pads.
• Do not extend slide-outs before leveling unless your manufacturer says to do so.
• Do not ignore a warning light or error code.
• Do not lift the wheels off the ground during normal leveling.
• Do not leave the system running while you walk away.
• Do not bypass the parking brake or ignition safety switch.
• Do not assume a system marked “automatic” needs no supervision.
The most useful lesson is to treat the system like a helpful assistant. It can perform the adjustment, but you still need to watch the work.

Benefits and Limits of an RV Auto Leveling System
An RV auto leveling system offers several clear benefits:
• Faster campsite setup
• Better comfort inside the coach
• Less manual measuring
• Improved stability when walking
• Easier slide-out operation when used correctly
• A more consistent setup at different campsites
Still, the system has limits. It cannot fix unsafe ground, replace wheel chocks, repair a damaged frame, or compensate for a faulty sensor.
It also adds weight, cost, electrical demand, and maintenance needs. Hydraulic systems can develop leaks. Electric systems can suffer from motor, wiring, or gear problems. Air systems need proper compressor and suspension care.
A level RV is not automatically a safe RV. Check the ground, keep the wheels supported, use the parking brake, and follow the coach manufacturer’s instructions.
Expert Tips for Faster, Safer Setup
After you learn how to use an RV auto leveling system, you can make the routine quicker without skipping safety checks.
Create a simple arrival checklist and keep it near the control panel. Include parking brake, slides, awning, power, water, leveling, and wheel checks.
Use a small bubble level in the same place each time. This gives you a consistent reference. The refrigerator may have its own level requirement, so check that appliance separately.
Mark the location of your jack pads in the storage compartment. This helps you find them quickly at night or during rain.
If your RV rocks after leveling, do not keep raising the jacks. Check the pads, ground, tires, stabilizer condition, and system calibration. Rocking may also come from suspension movement rather than poor leveling.
A useful real-world habit is to pause after the automatic cycle. Walk inside, open a cabinet, and stand still for a few seconds. You will notice movement or tilt more easily when the RV is quiet.
Frequently Asked Questions About How to Use an RV Auto Leveling System
Should I level my RV before extending the slide-outs?
In most cases, yes. Leveling first helps the slide-out mechanism operate from the position intended by the manufacturer. Always check your RV and slide-out manuals because some models have different instructions.
Should the wheels stay on the ground during auto leveling?
Yes, the wheels should normally remain in contact with the ground. If a wheel lifts, stop the process and correct the setup because the coach may be unstable.
Can I use an RV auto leveling system on gravel?
You can use it on firm, compact gravel with approved jack pads. Avoid loose, deep, wet, or shifting gravel because the jack feet may sink or slide.
Why does my RV auto leveling system stop before the coach is level?
The system may have reached its travel limit, detected an uneven load, or need sensor calibration. Move to a better site or use only the manual correction allowed by your owner’s manual.
Can leveling jacks support my RV during repairs?
No. Leveling jacks are not a substitute for properly rated jack stands during repairs. Never work beneath an RV supported only by leveling jacks.
How often should I inspect my leveling system?
Inspect it before the travel season, before long trips, and whenever you notice unusual sounds or movement. Check for leaks, damaged wiring, bent parts, and cracked jack pads.
Conclusion
Using an RV auto leveling system is a simple process when you combine automation with good judgment. Park on firm ground, secure the coach, use approved pads, supervise the automatic cycle, keep the wheels supported, and inspect the jacks before driving away.
Your system should make camping easier, not create new risks. Practice the routine at home, keep your owner’s manual nearby, and fix small problems before they become campsite emergencies. Share your best leveling tips or explore your manufacturer’s service resources before your next trip.