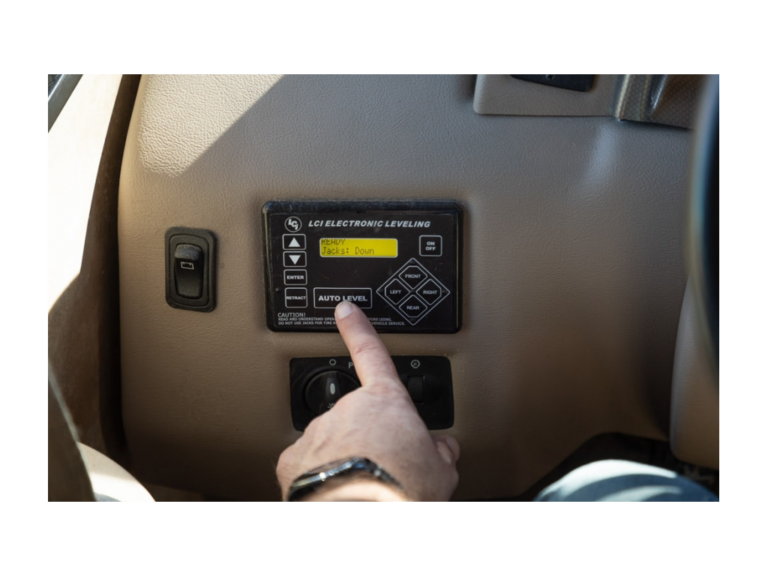
Sprinter RV Leveling System: Best Setup Guide
Introduction
A Sprinter RV leveling system helps keep a camper van stable and close to level when parked. The best choice depends on the van layout, the ground, the vehicle’s weight, and how much setup time you accept.
For most Mercedes-Benz Sprinter camper vans, the practical options are:
- Leveling blocks or ramps
- Manual stabilizer jacks
- Electric or hydraulic leveling jacks
- Air-suspension leveling systems
- A mix of blocks and stabilizers
A leveling system does not make an unsafe parking spot safe. It also should not be used to lift a wheel off the ground unless the system maker and vehicle maker clearly allow it. A solid parking surface, a set parking brake, wheel chocks, and the correct weight limits still matter.
This guide explains how Sprinter RV leveling works, which system fits each use, how to set it up, and when professional help is needed.

What Is a Sprinter RV Leveling System?
A Sprinter RV leveling system is equipment that reduces the van’s tilt and movement while it is parked. It may use blocks, jacks, hydraulic cylinders, electric motors, or air bags.
The system has two main jobs:
-
Level the living area.
This helps with sleep, cooking, shower drainage, and the use of some RV appliances. -
Reduce movement.
Stabilizers limit rocking when people walk inside the van.
These jobs are related but not the same. A stabilizer can reduce motion without making the van level. A leveling jack can change the van’s height, but it must be mounted to a strong part of the chassis and used within its rated limits.
Leveling versus stabilizing
Leveling changes the van’s angle.
Stabilizing reduces side-to-side or front-to-back movement.
Many small camper vans use leveling blocks for height and separate stabilizer jacks for support. Some larger Class B motorhomes use an automatic hydraulic or electric system that can do both tasks.
Why level matters in a camper van
A level van can make daily use easier. It may help with:
- Sleeping comfort
- Shower and sink drainage
- Refrigerator operation, depending on the appliance
- Door movement
- Cabinet and drawer use
- Interior comfort during long stays
Modern compressor refrigerators can often work at modest angles. Absorption refrigerators are more sensitive to off-level operation. Always follow the refrigerator maker’s instructions for the actual model in the van.

Main Types of Sprinter RV Leveling Systems
The right system depends on whether you want low cost, fast setup, strong stability, or automatic control.
Leveling blocks and ramps
Leveling blocks are the simplest option. You drive the low side of the van onto a stack of blocks until the body is close to level.
Common types include:
- Interlocking plastic blocks
- Curved leveling ramps
- Heavy-duty composite ramps
- Wooden blocks made for vehicle support
Best for: weekend trips, light camper builds, and owners who want low cost and easy replacement.
Advantages:
- Low purchase cost
- Little vehicle modification
- Easy to store
- Low risk of chassis damage when used correctly
- Useful even if the van has no built-in jacks
Limits:
- The driver must position the van carefully
- The van can still move or rock
- Blocks may sink on soft soil
- They do not hold the van as firmly as a mounted jack system
use blocks on firm, stable ground. Do not use loose bricks, narrow scraps of wood, or damaged blocks.
Manual stabilizer jacks
Manual stabilizer jacks attach near the rear or side of the van. A hand crank lowers each jack to the ground.
They are meant to reduce movement. They are not always designed to lift the full vehicle.
Best for: camper vans that need more stability after leveling with blocks.
Manual jacks are often simple and reliable. They also need less wiring than powered systems. Their main drawback is setup time and the need to reach each jack.
Never assume a stabilizer jack can support a wheel or an entire axle. Check its rating and the installation instructions.
Electric leveling jacks
Electric systems use motors to lower the jacks. Some systems include a control panel, wireless remote, or leveling sensors.
Best for: owners who want quick setup without hydraulic fluid or a hand crank.
Electric systems can work well on a Sprinter RV, but the exact kit must match:
- The Sprinter generation
- Wheelbase
- Body length
- Two-wheel-drive or four-wheel-drive layout
- Rear axle design
- Underbody equipment
- Finished vehicle weight
- Ground clearance
A system made for a different van may not fit the frame or may interfere with fuel, brake, exhaust, or electrical parts.
Hydraulic leveling systems
Hydraulic systems use a pump, valves, hydraulic lines, and cylinders. They can offer strong support and fast leveling.
Best for: larger Class B motorhomes, heavier conversions, and owners who want automatic or powered leveling.
Hydraulic systems can be costly and add weight. Installation also requires careful routing of hydraulic lines and electrical wires. A leak can reduce system performance and may require professional repair.
The key question is not whether a hydraulic system is powerful. It is whether the system is approved for that exact Sprinter RV and installed at approved mounting points.
Air suspension and air-leveling systems
Air systems change the pressure in air bags or air springs. Some systems adjust ride height from inside the van or through a control module.
Best for: ride-height control, rear-load support, and some advanced camper layouts.
Air suspension may improve ride height, but it is not always a complete parking stabilizer. Air bags can compress or change pressure. That means the van may still move when people walk inside.
Air suspension also needs careful attention to:
- Air-line routing
- Pressure limits
- Suspension travel
- Ride-height sensors
- Load limits
- Compressor operation
- Emergency pressure loss
Do not treat air bags as a substitute for properly rated parking support unless the system instructions say they are designed for that use.
Comparison table
| System | Main purpose | Setup speed | Vehicle changes | Stability | Best use |
|---|---|---|---|---|---|
| Blocks or ramps | Leveling | Medium | None | Low to medium | Occasional camping |
| Manual stabilizers | Stability | Slow to medium | Moderate | Medium | Simple camper builds |
| Electric jacks | Leveling and stability | Fast | Moderate to high | Medium to high | Frequent camping |
| Hydraulic jacks | Leveling and stability | Fast | High | High | Heavy or larger Class B RVs |
| Air suspension | Ride height and some leveling | Fast | High | Varies | Advanced conversions |

How to Choose a Sprinter RV Leveling System
Choose the system by starting with the van, not the product name. A system that works on one Sprinter RV may not fit another.
1. Confirm the exact Sprinter platform
Record these details before you shop:
- Model year
- 2500, 3500, or other chassis rating
- Standard or extended body
- Standard, high, or super-high roof
- 144-inch, 170-inch, or extended wheelbase
- Rear-wheel drive or four-wheel drive
- Single or dual rear wheels
- Factory or aftermarket suspension parts
- Fresh water, batteries, and interior equipment
The chassis rating affects axle load and mounting choices. The body length affects leverage and rocking. Underbody parts can block common mounting areas.
2. Check the loaded weight
A camper van changes weight as you add:
- Cabinets
- Batteries
- Solar equipment
- Water
- Fuel
- Refrigerators
- Awnings
- Motorcycles or other cargo
- Passengers
Use the actual travel weight when comparing a leveling system. Do not use an empty-van weight if the van normally carries a full water tank and camping gear.
A public scale can help. Weigh the van by axle when possible. Compare the result with the vehicle’s gross vehicle weight rating and gross axle weight ratings shown on the vehicle information label and in the owner documentation.
3. Decide how much leveling you need
A small correction may only require blocks. A powered system makes more sense when you often camp on uneven sites or want a quick setup.
Use this basic guide:
- Small tilt and occasional use: blocks
- Rocking after block leveling: add stabilizers
- Frequent uneven-site camping: electric or hydraulic system
- Rear sag from a heavy build: inspect suspension and weight first
- Ride-height adjustment: consider air suspension, but do not confuse it with full parking support
4. Check ground clearance
A Sprinter has wiring, brake lines, fuel parts, exhaust parts, tanks, and other equipment under the body. A leveling jack must clear these parts through its full range.
Ask the installer or manufacturer:
- Where does the jack mount?
- Does it reduce ground clearance?
- Can it strike the ground on steep roads?
- Does it affect departure angle?
- Does it work with factory skid plates or aftermarket tanks?
- Can it reach the ground on a high or low side?
A jack that fits in a driveway may not fit safely after suspension movement.
5. Review the control method
Powered systems may use:
- A wired control panel
- A handheld remote
- An automatic leveling mode
- Manual jack controls
- A phone app
A simple control panel may be easier to repair. An app may add convenience but can depend on a phone, Bluetooth, software, or a separate control module.
Ask whether the system can be operated manually if a sensor, remote, or motor fails.
6. Check service and warranty support
A leveling system is a vehicle-mounted system. Look for clear support for:
- Replacement motors
- Hydraulic seals
- Control boards
- Sensors
- Wiring diagrams
- Emergency retraction
- Approved service centers
- Warranty terms
Do not select a system based only on the number of jacks or the word “automatic.”

How to Level a Sprinter RV With Blocks
Blocks are often the best first step for a Sprinter camper van. They are simple, light, and easy to remove.
What you need
Prepare:
- A bubble level or digital RV level
- Properly rated leveling blocks
- Wheel chocks
- A flat parking area
- A spotter, when possible
- The vehicle owner’s manual
Place the level on the floor or on a surface that matches the living area. A level on the dashboard may not show the angle of the bed or kitchen floor.
Step-by-step method
-
Inspect the parking site.
Avoid soft shoulders, deep gravel, sharp rocks, and areas with poor drainage. -
Estimate the low side.
Check the van from front to back and side to side. -
Place the blocks.
Build a wide, smooth ramp for the tires. Align the blocks with the tire path. -
Drive onto the blocks slowly.
Use a spotter if the blocks are behind or beside the van. -
Set the parking brake.
Put the transmission in Park or the correct gear for the vehicle. -
Check the level again.
Adjust the block height if needed. Do not make a tall, narrow stack. -
Install wheel chocks.
Place them on the downhill side of the tires. Use the chock maker’s instructions. -
Test movement inside.
Walk through the van. If it rocks, use approved stabilizers or improve the block setup.
Signs of a good setup
The setup is more likely to be sound when:
- All tires remain supported
- The blocks sit flat
- The blocks do not bend, crack, or slide
- The van is close to the desired level
- The parking brake is set
- Wheel chocks are tight
- Doors and cabinets work normally
- The van does not shift when people move inside
Never use a bottle jack, leveling jack, or stabilizer as a substitute for wheel chocks.

How to Use Electric or Hydraulic Leveling Jacks
Powered leveling systems need a careful sequence. Automatic mode does not remove the need for a safe site.
Before lowering the jacks
Check that:
- The ground can support the jack pads
- The van is clear of traffic
- The parking brake is set
- The transmission is in Park
- Doors and slide-outs are in the position required by the system
- No person is under the van
- The jack pads will not contact a drain, pipe, curb, or soft edge
- The system has enough battery power
- The jacks and hydraulic lines show no damage or leaks
Follow the system manual if its sequence differs.
General operating steps
- Park on the firmest practical surface.
- Keep the van aligned as straight as possible.
- Set the parking brake and place the transmission in Park.
- Turn on the leveling system.
- Use automatic leveling only if the site and manual permit it.
- Watch each jack as it extends.
- Stop if a pad sinks, tilts, slips, or contacts an obstacle.
- Check that no tire is lifted unless the system documentation specifically allows it.
- Recheck the interior level.
- Use the system’s retract function before driving away.
Do not walk under a van supported only by leveling jacks. For work under the vehicle, use a properly rated lift or jack stands placed at approved support points. A jack can lose pressure or shift without warning.
What if one jack will not retract?
Stop and identify the fault. Do not drive with a jack partly down.
Useful checks include:
- Battery voltage
- System power switch
- Hydraulic fluid level, if applicable
- Blown fuse
- Loose connector
- Damaged wire
- Obstruction near the jack
- Hydraulic leak
- Manual override instructions
Use only the emergency retraction method provided by the system maker. If the jack cannot retract, contact the manufacturer or a qualified RV service shop.

Installation: DIY or Professional?
A block system is usually the easiest DIY option. A powered Sprinter RV leveling system often needs professional installation.
DIY may be reasonable when
You are installing:
- Portable blocks
- Wheel chocks
- A simple removable level
- A manufacturer-approved accessory with no structural changes
You still need to follow the instructions and keep the equipment clear of tires and suspension parts.
Professional installation is often safer when
The job includes:
- Drilling or welding near the chassis
- Hydraulic lines
- High-current wiring
- Frame-mounted jacks
- Air bags or compressors
- Automatic leveling sensors
- Fuel tanks or underbody water tanks
- Brake, exhaust, or suspension clearance
A qualified installer should inspect the final system at full suspension travel. The van should also be checked at its actual loaded weight.
Questions to ask an installer
Before work begins, ask:
- Is this kit approved for my exact Sprinter model?
- Where will each jack mount?
- What parts must be moved or protected?
- Will the installation change ground clearance?
- What is the rated capacity of each jack?
- How will the system work if power fails?
- Does the warranty require approved installation?
- Will the finished van remain within axle ratings?
- How will the installer test the system?
Get the answers in writing when the installation is complex.

Common Sprinter Leveling Problems and Fixes
A symptom can have more than one cause. Start with the safest and simplest checks.
| Symptom | Likely causes | First checks |
|---|---|---|
| Van still rocks | Soft blocks, poor chocks, stabilizers not set, suspension movement | Check block contact, chocks, and stabilizer instructions |
| Van is level at first, then leans | Block settlement, soft soil, air loss, hydraulic leak | Inspect the ground, pads, air lines, and fluid |
| One jack stops early | Obstruction, sensor fault, low power, mechanical damage | Stop operation and inspect without placing any body part under the van |
| Jack sinks into the ground | Soft soil or small pad | Use approved larger pads or move to firmer ground |
| System will not power on | Low battery, fuse, disconnect, control fault | Check the manual’s electrical steps |
| Jack will not retract | Low power, valve issue, bent part, obstruction | Use the approved emergency procedure |
| Van feels unstable | Tire off the ground, uneven support, excessive height | Retract and reset; do not stay in the van if movement is severe |
| Rear of van sits low while driving | Excess load, weak springs, suspension problem | Weigh the axles and have the suspension inspected |
Avoid these mistakes
Do not:
- Use a leveling jack to change a tire
- Crawl under a supported van
- Stack loose blocks into a tall tower
- Place a jack on soft soil without approved support
- Lift a tire without clear system approval
- Ignore a hydraulic leak
- Route wires near hot exhaust parts
- Drill into a frame area without knowing what is behind it
- Level the van beyond the jack’s travel
- Leave the system extended while driving
When to stop and call for help
Get professional help if:
- The van shifts after leveling
- A tire leaves the ground unexpectedly
- A jack bends or makes a new grinding sound
- Hydraulic fluid leaks
- A brake line, fuel line, or wire is damaged
- The system will not retract
- The van exceeds a weight rating
- The installation changes suspension behavior
- You are unsure whether a frame point can carry the load

Sprinter RV Leveling System Maintenance
Maintenance helps prevent small faults from becoming roadside problems.
Before each trip
Inspect:
- Jack feet and pads
- Bolts and mounting brackets
- Hydraulic hoses and fittings
- Air lines and air bags
- Electrical wires and connectors
- Control panels
- Wheel chocks
- Leveling blocks
- Signs of rust, cracking, or fluid loss
Keep mud and road salt away from moving parts. Do not spray a pressure washer directly at electrical connectors, seals, or sensors.
During seasonal service
Check the system according to its manual. This may include:
- Tightening approved fasteners
- Lubricating parts listed by the maker
- Checking hydraulic fluid
- Testing manual overrides
- Checking battery condition
- Inspecting ground connections
- Confirming that the jacks fully retract
Do not add hydraulic fluid by guesswork. The wrong fluid can damage seals or affect system operation.
Store an emergency plan
Keep these items in the van:
- System manual
- Manufacturer phone number
- Correct fuse sizes
- Wheel chocks
- A flashlight
- Approved jack-pad supports
- Basic hand tools
- A record of the system model and serial number
Do not carry random replacement fuses with a higher rating. A larger fuse can allow wiring to overheat.

Cost and Value: What Should You Expect?
The total cost depends on the equipment and the installation.
Portable blocks and chocks usually cost far less than a powered system. Manual stabilizers cost more because they require mounting. Electric and hydraulic systems add the cost of hardware, wiring, sensors, labor, and future service.
A useful cost comparison includes:
- Purchase price
- Installation
- Added vehicle weight
- Lost ground clearance
- Battery or hydraulic maintenance
- Replacement parts
- Emergency service
- Storage space
- Setup time
For many Sprinter owners, blocks are the best value when they camp only a few times each season. A powered system may offer better value for frequent travelers who use uneven sites and want faster setup.
The most expensive system is not automatically the best. The best match is the one that supports the van’s actual load, fits the chassis, and solves the problem you have.

Key Takeaways
- A Sprinter RV leveling system can level the van, reduce movement, or do both.
- Blocks are simple and affordable for occasional camping.
- Stabilizer jacks reduce rocking but may not be made to lift the vehicle.
- Electric and hydraulic systems need exact chassis compatibility.
- Air suspension controls ride height but may not replace parking stabilizers.
- Keep all tires supported unless the system maker clearly permits otherwise.
- Use wheel chocks and the parking brake every time.
- Never work under a van held only by leveling jacks.
- Check the loaded weight, axle ratings, ground clearance, and service plan before buying.
- Stop using the system if it leaks, bends, slips, or will not retract.
Frequently Asked Questions
What is the best leveling system for a Sprinter camper van?
There is no single best system for every Sprinter camper. Blocks are often enough for occasional trips. Frequent travelers may prefer electric or hydraulic jacks. The choice should match the exact chassis, loaded weight, ground clearance, and camping style.
Can I use leveling jacks to lift a Sprinter RV tire?
Only if the leveling system and its instructions clearly allow it. Many stabilizer systems are not designed to lift a wheel or support the van for service. Use approved lifting points and proper jack stands for tire or underbody work.
Do I need stabilizer jacks if I already use leveling blocks?
Maybe. Blocks can level the van but may not stop movement. If the van rocks when people walk inside, approved stabilizers may help. Some owners accept minor movement to avoid the weight, cost, and installation work of jacks.
Are automatic leveling jacks worth it on a Sprinter van?
They may be worth it for owners who camp often, use uneven sites, or want faster setup. They may not be worth the added weight, cost, ground-clearance loss, and repair needs for occasional use.
Can air suspension level a Sprinter RV at a campsite?
Air suspension can change ride height and may help level some vans. It does not always provide the same stability as a ground-supported jack system. Check the air-suspension maker’s parking instructions and load limits.
How level does a Sprinter RV need to be?
The required level depends on the van layout and appliances. A small correction may be enough for comfort. Refrigerator makers may set stricter limits, especially for absorption units. Follow the appliance manual instead of relying on a general angle.
Conclusion
The safest Sprinter RV leveling system is the one that fits the exact van and supports the way you camp. Start with the loaded weight, axle ratings, ground clearance, and desired setup time.
For many small camper vans, quality blocks and wheel chocks are the sensible starting point. Add stabilizers if movement is the main problem. Choose electric or hydraulic leveling only after confirming chassis fit, mounting strength, service support, and safe operation.
Before your next trip, inspect the system, test it on firm ground, and practice the emergency retraction method. A few minutes of preparation can prevent a costly or unsafe problem at the campsite.