Bigfoot RV Leveling System: Easy Setup Guide
Introduction
A Bigfoot RV leveling system is a hydraulic jack system that helps level and stabilize a motorhome or other compatible RV at a campsite. In the United States, the name usually refers to systems made by Quadra Manufacturing, not to Bigfoot-brand truck campers.
The system uses hydraulic cylinders, a pump, fluid, valves, and a control panel. When you press the controls, the jacks extend to support the RV and reduce movement. The system can make setup faster, but it does not replace safe parking, wheel chocks, proper ground support, or the RV manufacturer’s instructions.
What Is a Bigfoot RV Leveling System?
A Bigfoot leveling system is a powered hydraulic system fitted to an RV chassis. It uses jacks mounted near the frame to adjust the coach from side to side and front to back.
Most systems include:
- Hydraulic leveling jacks
- An electric hydraulic pump
- A fluid reservoir
- Hydraulic hoses and fittings
- Solenoid valves
- A control panel
- Jack-position sensors or warning switches
- A warning buzzer or dashboard light
The exact layout depends on the RV and the system model. A Class A motorhome may use four or more jacks. A smaller motorhome may use a different layout.
Bigfoot versus other RV leveling systems
“Bigfoot” can mean two different things:
- Bigfoot hydraulic leveling systems, commonly associated with Quadra Manufacturing.
- Bigfoot truck campers, a separate RV brand.
The two names do not automatically refer to the same company or product. Check the label on the control panel, pump, or hydraulic reservoir before ordering parts.
Bigfoot systems also differ from:
- Manual stabilizer jacks, which are turned by hand or with a drill
- Electric screw jacks, which use motors and threaded shafts
- Air leveling systems, which use air bags
- Hydraulic leveling systems from other brands, such as HWH or Equalizer Systems
The main advantage of a hydraulic system is strong, quick movement. The trade-off is that it needs fluid, electrical power, seals, hoses, valves, and regular inspection.
How a Bigfoot Leveling System Works
The control panel sends power to the hydraulic pump and valve system. The pump pushes hydraulic fluid through selected valves to one or more jacks.
A typical cycle works like this:
- The RV is parked on a suitable surface.
- The parking brake is set.
- The transmission is placed in park, or the vehicle is secured as directed by the chassis maker.
- The operator turns on the leveling system.
- The control panel opens the needed valves.
- The pump sends fluid to the selected cylinders.
- The jacks extend until the RV reaches the desired position.
- The system holds pressure while the RV remains supported.
When the jacks retract, the pump or return circuit sends fluid back to the reservoir. Springs, stored hydraulic pressure, or the jack design help the cylinders return to their travel position.
Leveling and stabilizing are not the same
Leveling corrects the RV’s angle. Stabilizing reduces rocking and movement.
The jacks may do both jobs, but they are not designed to replace the vehicle’s suspension. They also should not be used to raise a wheel off the ground unless the specific RV and system manual clearly allows that operation.
If a tire leaves the ground during normal leveling, stop and reassess the site. A different parking position or properly rated leveling block may be safer.
Why the RV may move during leveling
Some movement is normal. A tall motorhome can shift as the jacks take weight from the suspension. Movement can increase when:
- The ground is soft
- The RV is parked on a steep slope
- The jacks sit on small contact areas
- The tires are not properly chocked
- The jacks are placed on uneven blocks
- The RV is loaded unevenly
A level display shows angle. It does not prove that the ground can safely support the load.
How to Use a Bigfoot RV Leveling System Safely
Always follow the manual for your exact system and RV. The steps below describe a common operating method, not a replacement for model-specific instructions.
1. Choose a safe parking site
Look for firm, stable ground. Avoid:
- Soft soil
- Loose gravel with poor support
- Deep grass
- Unstable shoulders
- Areas with buried utilities or hidden voids
- Locations where a jack could slide downhill
Check overhead clearance before extending slide-outs or raising the coach.
2. Position the RV
Place the RV where you want it before deploying the jacks. Do not plan to drive with a jack extended.
Set the parking brake. Put the transmission in park, or use the gear and brake setting specified by the chassis manufacturer.
3. Chock the wheels
Chock the wheels before leveling. Chocks help prevent movement while the jacks transfer weight.
Do not depend on hydraulic jacks to stop the RV from rolling. A hydraulic system is not a substitute for wheel chocks.
4. Check the control panel
Look for warning lights, low-voltage warnings, error codes, or a “jacks down” alert. If the system shows that a jack is not fully retracted, do not drive until you find the cause.
5. Extend the jacks in the correct order
Some systems use automatic leveling. Others use front, rear, left, and right controls. Use the sequence shown in the system manual.
If the manual allows manual leveling, make small corrections. Large, fast corrections can make the RV shift more than expected.
6. Watch every jack
Never walk away while the jacks are moving. Watch for:
- Jack feet sinking
- Blocks shifting
- A tire lifting
- A jack twisting
- Hose movement
- Unusual noise
- The RV leaning in the wrong direction
Stop the system if any of these signs appear.
7. Confirm the final position
Check the RV with a small bubble level or a built-in level display. Many owners check the refrigerator, floor, or counter, but the best reference is a level point chosen for the RV.
Do not chase perfect level if doing so creates an unsafe jack position. A small angle may be safer than a large correction on poor ground.
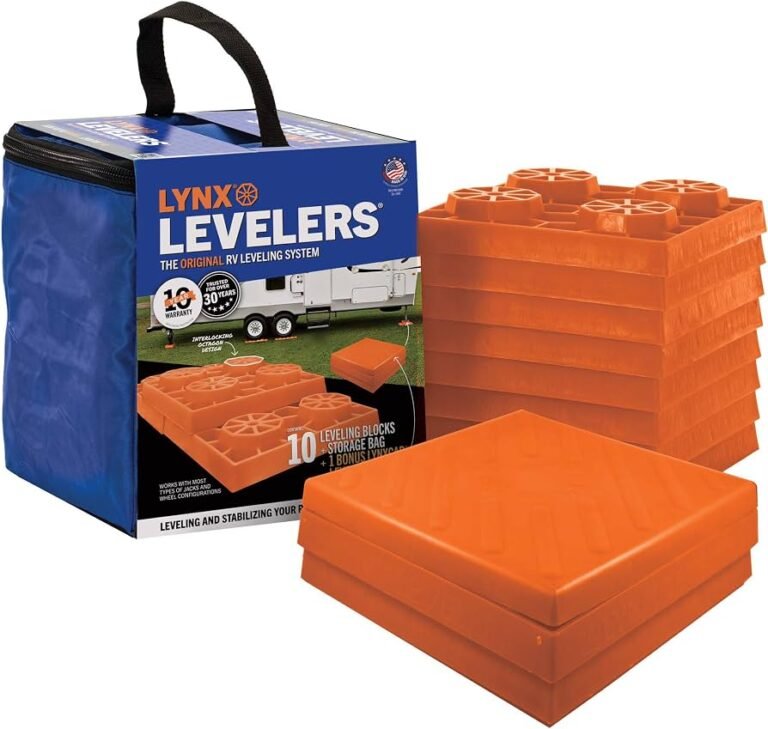
Choosing Blocks and Pads for Bigfoot Leveling Jacks
Jack pads and blocks spread the load over a larger area. They can reduce sinking on soil, but they do not make weak ground safe.
Use blocks that are:
- Rated for the expected load
- Wide enough for the jack foot
- In good condition
- Resistant to splitting or crushing
- Stable when stacked
Avoid loose scraps of wood, broken pallets, thin plastic, or uneven stones. Never stack materials in a way that can slide apart.
A simple ground-pressure calculation
Ground pressure can be estimated with this formula:
Ground pressure = load on the jack ÷ pad area
For example, this hypothetical case uses:
- 4,000 pounds on one jack
- A 100-square-inch pad
The estimated pressure is:
4,000 ÷ 100 = 40 pounds per square inch
A larger pad lowers the pressure on the ground. This is only a rough calculation. The actual load may not be equal at each jack, and dynamic movement can increase the force.
Use the jack and RV manufacturer’s rated limits. Do not assume that a larger pad increases the jack’s lifting capacity.
Bigfoot RV Leveling System Maintenance
Routine inspection helps find small problems before they cause a failed setup.
Check the hydraulic fluid
Inspect the reservoir according to the system manual. The correct fluid type and level depend on the model and installation.
Do not mix fluids without confirmation. Using the wrong fluid may damage seals or affect system operation.
Low fluid can indicate:
- A visible leak
- A cylinder seal problem
- A loose fitting
- An incorrectly filled reservoir
- Fluid trapped in the system after service
A fluid level that keeps dropping needs diagnosis. Do not simply keep adding fluid.
Inspect hoses and fittings
Look for:
- Wet spots
- Cracked hoses
- Abrasion
- Bulges
- Damaged fittings
- Fluid near a cylinder rod
- Fluid sprayed around the pump
Hydraulic fluid under pressure can penetrate skin. Never use your hand to search for a leak. Use a piece of cardboard or have a qualified technician inspect the system.
Clean the jack rods
Dirt and road salt can damage seals when the cylinders retract. Clean exposed rods with a suitable method listed by the system maker.
Avoid sanding, grinding, or applying an unapproved lubricant. Some products can harm seals or collect grit.
Inspect electrical connections
Check the battery condition, grounds, fuses, and connectors. A weak battery may make the pump run slowly or cause a control panel reset.
Look for corrosion, loose terminals, melted insulation, and damaged wires. Disconnect power before repairing wiring, and use the correct fuse rating.
Keep the jacks fully retracted for travel
Before moving the RV, confirm that every jack is fully up and that the warning light or alarm has cleared. A partially retracted jack can strike the road, damage the cylinder, or cause a loss of control.
Bigfoot RV Leveling System Troubleshooting
Start with the safest and simplest checks. Do not bypass safety switches or replace a fuse with a larger fuse.
The system does not turn on
Possible causes include:
- Low coach-battery voltage
- A blown fuse
- A failed control-panel switch
- A poor ground
- A disconnected battery
- An active ignition or parking-brake interlock
Check the battery voltage and connections first. Then inspect the system fuse and the ground connection. If the fuse blows again, stop replacing it and find the short or overload.
The pump runs but the jacks do not move
Possible causes include:
- Low or empty hydraulic fluid
- A closed or failed valve
- A failed pump
- A blocked hydraulic line
- A mechanical problem at the jack
- A suction-side issue at the reservoir
Check the fluid level only when the system is in the position required by the manual. If the pump sounds normal but no jack moves, the issue may be hydraulic rather than electrical.
Do not hold the controls for long periods while the system makes no progress. This can overheat the motor.
One jack moves slowly
Possible causes include:
- A restricted hose
- A sticking valve
- A damaged cylinder
- A bent mounting point
- Excess load on that corner
- Cold or contaminated fluid
Compare the affected jack with the others. If the jack binds, twists, or shows fluid around the rod, stop using it until it is inspected.
A jack retracts slowly or stays down
Possible causes include:
- Dirt or corrosion on the rod
- A damaged seal
- A weak return spring, where fitted
- A valve that is not opening
- Low or contaminated fluid
- A bent cylinder or mount
Do not drive with the jack down. Follow the manual’s emergency retraction procedure. If the jack cannot be secured safely, arrange professional service or a tow provider familiar with RV hydraulic systems.
The jacks sink into the ground
This is usually a support problem, not a pump problem. Retract the jacks if safe, reposition the RV, and use larger rated pads on firm ground.
If a jack has sunk deeply or the RV is leaning, do not stand beneath the vehicle while trying to correct it. Ask for help from a qualified RV technician.
The system loses pressure
A jack that slowly drifts down may point to:
- An internal cylinder leak
- A valve problem
- A loose connection
- A damaged hose
- Contaminated hydraulic fluid
Pressure loss is not a normal reason to keep cycling the system. A technician may need to isolate the cylinder and valve circuits.
When to Repair a Bigfoot Leveling System Yourself
Owner-level checks are usually limited to inspection, fluid-level checks, battery checks, fuse checks, and cleaning. Hydraulic repairs require more care.
Seek qualified RV service when:
- A hose leaks
- A cylinder leaks
- A jack bends or twists
- The pump runs continuously
- A fuse repeatedly blows
- The RV cannot retract all jacks
- The system lifts a tire
- The control panel gives an unexplained fault
- The mounting bracket appears damaged
Never work beneath an RV supported only by hydraulic jacks. Use properly rated mechanical supports on suitable frame points, and follow the chassis service instructions.
Hydraulic pressure can remain in a line even after the pump stops. Do not loosen fittings until the system has been made safe according to the service manual.
Bigfoot Versus Manual Leveling: Which Is Better?
A Bigfoot hydraulic system is useful for owners who want powered setup and stronger adjustment than manual stabilizers provide. It is especially helpful for larger motorhomes and frequent travel.
Manual jacks may make more sense when:
- The RV is small
- The owner camps only a few times each year
- There is little room for hydraulic components
- Repair simplicity matters more than speed
- The RV already has reliable stabilizers
Hydraulic systems cost more to install and repair. They also add hoses, fluid, valves, wiring, and a pump. The right choice depends on the RV’s weight, chassis, use pattern, available mounting space, and service support.
What to Check Before Buying or Installing a Bigfoot System
Compatibility is more important than the brand name. Before buying, confirm:
- RV type and chassis
- Vehicle weight and axle ratings
- Frame design
- Jack mounting points
- Ground clearance
- Electrical capacity
- Control-panel location
- Manual or automatic operation
- Replacement-part availability
- Warranty terms
- Installation requirements
Use the RV’s actual weight when possible. A system must match the vehicle and its frame. Do not choose a kit based only on the number of jacks or a general weight estimate.
Professional installation is often the safer choice because the installer must position the jacks correctly, protect hydraulic lines, route wiring, and verify that the frame can handle the loads.
Bigfoot RV Leveling System: Key Takeaways
- A Bigfoot RV leveling system is usually a powered hydraulic jack system.
- The system levels and stabilizes the RV, but it does not replace wheel chocks.
- Never use hydraulic jacks as the only support while working beneath an RV.
- Use firm ground and properly rated jack pads.
- Watch the jacks during every operation.
- Check hydraulic fluid, hoses, rods, wiring, and battery condition.
- Do not drive until every jack is fully retracted.
- Stop if a tire lifts, a jack twists, a hose leaks, or the RV shifts sharply.
- Use the exact manual for the installed model before servicing or ordering parts.
Frequently Asked Questions
Can I use a Bigfoot leveling system to change a tire?
No. Do not assume the leveling system can safely lift a wheel for tire service. Use the RV manufacturer’s approved jack points and procedures, or call a qualified roadside service provider.
Do I need to use blocks under Bigfoot jacks?
Blocks may help spread the load and reduce sinking, especially on soil or gravel. They do not replace firm ground, and they do not increase the rated capacity of the system.
Why does my Bigfoot pump keep running?
The system may be trying to reach its pressure or position limit, or it may have low fluid, a leak, a failed switch, or a hydraulic fault. Stop the pump if it runs without moving a jack and inspect the system before continuing.
What hydraulic fluid does a Bigfoot leveling system use?
Use only the fluid specified for the exact system and installation. The correct type may vary. Check the owner’s manual, reservoir label, or manufacturer service information before adding fluid.
Can I drive with one Bigfoot jack slightly extended?
No. A jack that is not fully retracted can hit the road or damage the system. Resolve the warning or retraction problem before driving.
How do I find the correct replacement part?
Record the system brand, model, serial number, RV make and model, chassis, and the part’s markings. Photos of the control panel, pump, valve block, and jack can also help a qualified supplier identify the correct component.
Conclusion
A Bigfoot RV leveling system can make campsite setup easier and help reduce movement inside the RV. Its safe use depends on more than pressing an automatic-level button. The surface, wheel chocks, jack pads, battery, hydraulic fluid, and frame mounting all matter.
Use the system within its rated limits, inspect it before travel, and treat leaks or unusual movement as service issues. When the exact model is unknown, the safest next step is to locate the system label and obtain the matching manual before adding fluid, bypassing a fault, or ordering parts.