RV Manual Leveling: Easy Step-By-Step Setup Guide
RV manual leveling uses blocks, jacks, and careful checks to create a safe, stable, and comfortable campsite.
RV manual leveling may look simple, but small mistakes can strain jacks, twist the coach, or create safety risks. With the right order, tools, and patience, you can level most travel trailers, fifth wheels, and motorhomes with confidence. This guide explains how RV manual leveling works, which tools help, common errors to avoid, and how to tell when your RV is truly level.
What Is RV Manual Leveling?
RV manual leveling is the process of making a recreational vehicle stable and nearly level by using hand-operated jacks, leveling blocks, wheel chocks, and a bubble level or electronic level. It does not rely on a fully automatic leveling system.
The goal is not always perfect laboratory-level accuracy. Instead, you want a firm, balanced setup that protects your RV, supports daily comfort, and allows appliances such as a propane refrigerator to operate within their safe limits.
Manual leveling is common with:
• Travel trailers with stabilizer jacks
• Fifth wheels with landing gear and rear stabilizers
• Class C motorhomes with manual leveling jacks
• Older Class A motorhomes
• Small campers without built-in hydraulic systems
A key point is often misunderstood: stabilizer jacks support an RV after it is level, but they may not be designed to lift the entire RV. Your owner’s manual should always control how the jacks are used.

Why Proper RV Manual Leveling Matters
A level RV feels better, works better, and places less stress on its structure. A coach that sits at an angle can cause doors to swing open, cabinet parts to shift, and people to feel slightly off balance.
Some RV systems are also sensitive to tilt. Absorption refrigerators, for example, depend on gravity to move fluids through their cooling system. A severe or long-lasting tilt may reduce cooling performance and can damage the unit in some cases.
Proper RV manual leveling also helps with:
• Stable walking inside the RV
• Better sleep and fewer rolling sensations
• Smooth operation of slide-outs
• Correct drainage in sinks and showers
• Proper door and cabinet alignment
• Reduced movement when people walk inside
• Safer use of steps and entry doors
Leveling does not replace safe parking. You still need the parking brake, transmission in park or gear, wheel chocks, and a solid surface. Think of leveling as building a stable base, much like setting a table before placing a full meal on it.

Tools You Need for RV Manual Leveling
Good tools make RV manual leveling faster and safer. You do not need an expensive kit, but each item should match the weight and design of your RV.
Essential leveling tools
• Bubble levels or a digital level
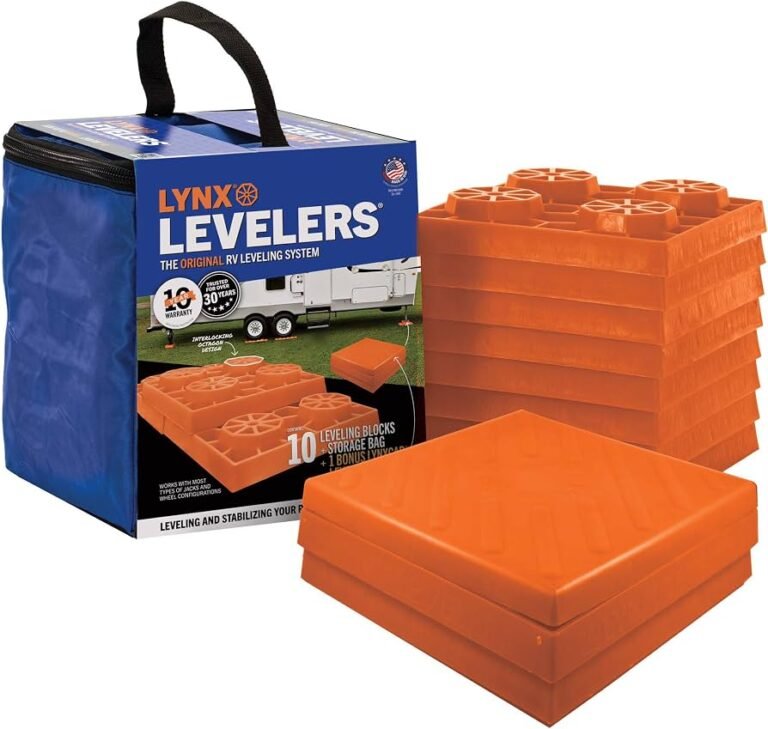
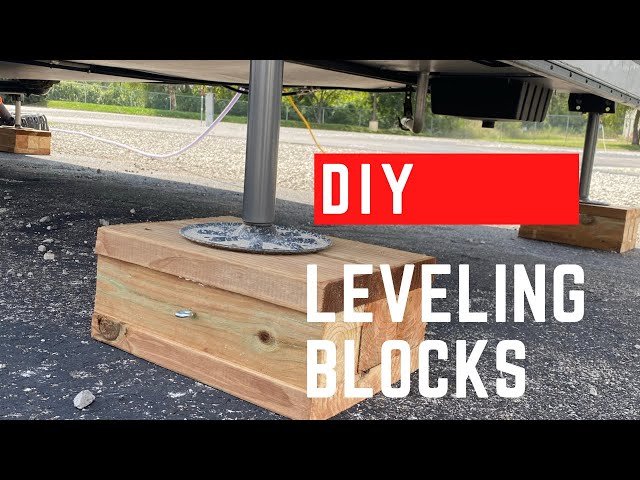
• Wooden leveling boards or commercial leveling blocks
• Heavy-duty wheel chocks
• A tape measure for checking block placement
• A flashlight for evening arrivals
• Work gloves
• A small shovel for loose soil
• A socket, crank handle, or drill approved for your jacks
• A tire pressure gauge
Place one small level near the front-to-back centerline and another where you can check side-to-side position. Some owners mount levels near the driver’s seat and beside the main entry door.
A digital level can show a more precise reading, but it is not essential. A basic bubble level works well when it is placed on a flat, reliable surface. Test your level at home first by turning it around in the same spot. If the bubble changes position, the level may not be accurate.
Never use random scraps of weak wood. Blocks should be strong, dry, and wide enough to spread the load. The correct size depends on your RV and jack design, so check the jack manufacturer’s instructions and your RV owner’s manual.

How to Level a Travel Trailer Manually
Travel trailers usually require a clear order. The basic sequence is side to side first, then front to back.
1. Choose the best parking spot
Before unhitching, inspect the site. Look for firm ground, good drainage, enough room for slide-outs, and clearance from trees, posts, and utility equipment.
Avoid soft mud, deep sand, sharp rocks, and ground that slopes toward a drop-off. A small slope is manageable. A poor surface can make even excellent RV manual leveling unsafe.
2. Check side-to-side level
Place a level on the trailer floor or use the side-to-side level mounted on the trailer. If one side is low, pull the low-side tires onto leveling blocks.
Drive forward slowly. Use a spotter when possible. Stop when the side-to-side bubble is centered or close to centered.
Do not try to raise one side by placing a leveling jack under the frame unless the jack is specifically rated and approved for that purpose. For most travel trailers, drive-up blocks are the safer way to correct side-to-side tilt.
3. Chock the wheels
Once the trailer is side to side, set the parking brake in the tow vehicle and place wheel chocks tightly against the trailer tires. Use chocks on both sides when possible.
Chocks should touch the tires, not sit several inches away. Loose chocks may allow movement before they take effect. For extra stability, some owners use an approved X-chock between tandem tires, but this does not replace standard wheel chocks.
4. Disconnect from the tow vehicle
Lower the tongue jack onto a solid pad. Disconnect the safety chains, breakaway cable, electrical plug, and weight-distribution equipment as required by your setup.
Move the tow vehicle clear only after the trailer is secure. Keep people away from the hitch area during this step.
5. Level front to back
Use the tongue jack to raise or lower the front of the trailer until the front-to-back level is centered. Keep the jack foot on a strong pad to prevent sinking.
Avoid excessive tongue-jack extension. If the jack must extend far, place approved blocks beneath the foot to reduce the unsupported length.
6. Lower the stabilizer jacks
Lower the rear stabilizer jacks until they contact solid pads. Extend them evenly and only enough to remove excess movement.
Stabilizer jacks should not normally lift the trailer tires from the ground. If a tire leaves the ground during RV manual leveling, stop and review the setup. You may need to adjust the blocks or reposition the trailer.
7. Recheck everything
Walk inside and check the floor, doors, refrigerator, and shower drain. Recheck the level after the trailer settles.
If you use slide-outs, follow the manufacturer’s instructions. Many RV makers recommend leveling and stabilizing before extending slides, but some systems have special instructions.

How to Level a Fifth Wheel Manually
Fifth-wheel leveling has a few extra steps because the front landing gear carries a large share of the trailer’s weight.
Start by leveling the trailer from side to side while it remains connected to the tow vehicle. Use blocks under the low-side tires. Then chock the wheels firmly before disconnecting.
Next, lower the landing gear onto solid pads. Disconnect the fifth-wheel hitch only after the trailer is safely supported. Use the landing gear to level the trailer front to back, but extend it gradually and evenly.
After the trailer is level, lower the rear stabilizers. These jacks reduce movement. They are not usually intended to lift the rear of the fifth wheel or replace proper tire support.
A common fifth-wheel mistake is placing the landing gear on soft ground without pads. The legs may sink overnight, changing the trailer angle and putting stress on the frame. Large wood pads or rated leveling blocks help spread the load.

How to Level a Motorhome Manually
Manual leveling for a motorhome depends on whether it has built-in hydraulic jacks, mechanical screw jacks, or separate portable equipment.
Park the motorhome in the best available position. Keep the transmission in park, set the parking brake, and follow the chassis manufacturer’s instructions. Confirm that the jacks will not contact sewer lids, underground covers, soft soil, or obstacles.
For a motorhome with manual hydraulic controls:
- Center the steering wheel if instructed by the manufacturer.
- Place pads under the jack feet.
- Extend the jacks in the recommended order.
- Bring the low side up gradually.
- Adjust the front-to-back angle.
- Check the level inside the coach.
- Confirm that all tires remain supported unless the system is specifically designed otherwise.
Do not crawl under a motorhome supported only by hydraulic or mechanical jacks. Jacks can leak, shift, or sink. If you must work beneath the vehicle, use properly rated jack stands and follow safe lifting procedures.
Some motorhomes require the slides to remain retracted during leveling. Others allow slides to extend after the coach is stable. Always follow the exact instructions for your chassis and leveling system.

The Correct Order for RV Manual Leveling
The right order prevents movement and reduces stress. While layouts differ, this general sequence works for many towable RVs:
- Inspect the site and choose the safest parking position.
- Check side-to-side level.
- Place leveling blocks under the low-side tires.
- Drive onto the blocks slowly.
- Set the parking brake and place the transmission in park or gear.
- Install wheel chocks.
- Disconnect the trailer or prepare the motorhome.
- Level front to back.
- Place jack feet on solid pads.
- Lower stabilizer or leveling jacks gradually.
- Recheck side-to-side and front-to-back level.
- Extend slides only as directed by the manufacturer.
This sequence gives the tires, frame, and jacks a clear job. Tires and blocks correct the basic position. Jacks then stabilize the RV.

Common RV Manual Leveling Mistakes
Even experienced campers make leveling mistakes, especially when arriving late or during bad weather. These errors are easy to prevent when you know what to watch for.
Using stabilizer jacks to level the RV
Many stabilizers are designed to reduce movement, not raise the RV. Lifting the trailer with them can bend brackets, damage the frame, or unload the tires.
Skipping wheel chocks
A trailer can roll before the jacks are fully deployed. Chock the wheels as soon as the trailer reaches its side-to-side position.
Using weak or narrow blocks
Small blocks may crack, tip, or sink. Use blocks rated for the expected load and keep the jack foot centered.
Leveling on soft soil
Rain can turn firm-looking ground into a weak surface. Add large pads, move to firmer ground, or ask the campground for a safer site.
Extending jacks too far
Long jack extensions can increase flex and reduce stability. Use stacked blocks when approved, and keep the final jack extension as short as practical.
Ignoring the slide-out instructions
A slide can change the RV’s weight balance. Extending it before leveling may stress the slide mechanism or frame.
Trusting only the outside level
An exterior level may move, break, or become inaccurate. Check a stable surface inside the RV as well.
Leaving tires unsupported
In many towable setups, the tires should remain on the ground. If your leveling method lifts a tire, stop and check the manufacturer’s instructions.

How to Improve RV Manual Leveling on Uneven Ground
Uneven campsites are common. The goal is to work with the site rather than force the RV into position.
For a travel trailer, place more blocks under the low-side tires. Build a short, wide ramp instead of a tall, narrow stack. Drive onto the ramp slowly and keep the tires centered.
For front-to-back correction, use the tongue jack or landing gear on a broad pad. If the slope is severe, consider another site. A few extra minutes spent choosing a better location can prevent a night of movement and a morning of repairs.
On soft ground, place large pads under every jack. Check the setup after rain, after people move through the RV, and after slides are extended. If a pad begins to sink, retract the slide if safe, remove weight from the area, and correct the base.
I have found that the best manual leveling habit is to slow down at the start. Rushing the first two minutes often creates ten minutes of corrections later. A spotter also helps because the driver cannot see every tire and block from the cab.
How to Know When Your RV Is Level
Use more than one sign. A centered bubble is helpful, but comfort and function matter too.
Check these areas:
• The refrigerator is within the angle range stated in its manual.
• Interior doors stay in the position where you leave them.
• Cabinet doors do not swing open by themselves.
• The floor feels stable when you walk.
• Shower water drains normally.
• Slides operate without unusual noise or resistance.
• The entry steps feel steady.
• The RV does not rock heavily when people move inside.
Do not chase perfect precision if doing so requires unsafe jack extension or lifting the tires. A safe, stable RV with a small reading difference is better than a perfectly centered bubble on a weak base.
RV Manual Leveling Safety Tips
Safety should come before comfort. Jacks and blocks can support thousands of pounds, but only when used correctly.
Follow these rules:
• Read the RV, chassis, and jack manuals before your first trip.
• Use only blocks and pads rated for the load.
• Keep hands and feet away from moving jack parts.
• Never place your body under an unsupported RV.
• Keep children away while leveling.
• Do not move the tow vehicle while anyone stands between it and the trailer.
• Inspect jacks for bends, leaks, rust, and loose hardware.
• Stop if the RV shifts, creaks sharply, or sinks.
• Keep the breakaway cable connected when towing.
• Recheck the setup after heavy rain or strong wind.
Jack capacity is not the same as the RV’s total weight. The load may not be shared equally, and a jack rating does not make an unstable surface safe. Manufacturer guidance always takes priority over general advice.
Manual Leveling Blocks vs. Hydraulic Leveling Systems
Manual leveling is affordable, simple, and easy to repair. Blocks and mechanical jacks have fewer parts than an automatic hydraulic system, and they do not depend on an electric pump or control panel.
The main disadvantages are time and effort. You must inspect the site, place blocks, make several adjustments, and confirm the result yourself.
Hydraulic or automatic systems may offer:
• Faster setup
• Push-button operation
• Better repeatability
• Less physical effort
• Integrated leveling sensors
However, automatic systems still need a suitable site and regular inspection. A hydraulic jack can sink just as easily as a manual jack if the ground is weak. Automatic leveling is convenient, but it does not replace good judgment.
For many campers, RV manual leveling is the better choice because it costs less and teaches you how the vehicle behaves. It is also a useful backup skill when an automatic system fails.
Maintaining Your Manual Leveling Equipment
Clean and inspect your equipment before and after trips. Dirt on jack tubes can damage seals or make movement rough. Wipe exposed parts and use only lubricants approved by the jack manufacturer.
Inspect blocks for cracks, splitting, warping, and crushed edges. Replace damaged blocks rather than placing them at the bottom of a stack. Check wheel chocks for sun damage and loss of grip.
For manual crank jacks, look for bent handles, loose bolts, worn gears, and unusual resistance. Do not force a jack with a long pipe or unapproved power drill. Extra torque can damage the jack or frame.
Keep leveling gear in a low, secure storage area. Heavy blocks should not slide while the RV is moving. A simple storage bin can keep the gear dry and easy to find when you arrive at camp.
A Simple RV Manual Leveling Checklist
Save this checklist on your phone or print it for your RV.
Before parking
• Check the slope and ground strength.
• Confirm slide-out and utility clearance.
• Decide where the low side should sit.
• Place a spotter outside if available.
During setup
• Correct side-to-side level with tire blocks.
• Chock the tires tightly.
• Disconnect safely.
• Correct front-to-back level.
• Place jack feet on solid pads.
• Lower stabilizers without lifting the tires.
After setup
• Check both levels inside the RV.
• Test doors, steps, and slides.
• Confirm refrigerator guidance.
• Check that utilities are not stretched.
• Inspect for sinking or movement.
This checklist becomes automatic after a few trips. It also helps when someone else sets up the RV while you handle water, power, or campsite rules.
Frequently Asked Questions About RV Manual Leveling
Can I level my RV with the stabilizer jacks?
Most travel trailer stabilizer jacks are meant to reduce movement, not lift and level the entire trailer. Use tire blocks for side-to-side leveling, then use the stabilizers to support the settled trailer according to the owner’s manual.
Should RV slides be extended before leveling?
Many manufacturers recommend leveling and stabilizing before extending slide-outs because slides can shift the RV’s weight. The correct order varies by model, so follow the instructions for your specific RV.
How level does an RV need to be?
An RV should be stable and close to level, with special attention to the refrigerator’s stated limits. Avoid lifting tires or overextending jacks just to center a bubble perfectly.
Can I use a cordless drill on manual RV jacks?
Only use a cordless drill when the jack manufacturer approves it and gives a suitable torque or speed limit. Too much power can strip gears, damage the jack, or create a sudden movement.
Why does my RV still rock after leveling?
Rocking may come from loose chocks, soft ground, long jack extension, weak pads, or overloaded stabilizers. Tighten the setup, improve the base, reduce unsupported extension, and inspect the jacks for damage.
Do I need wheel chocks if the RV has leveling jacks?
Yes. Leveling jacks are not a substitute for wheel chocks. Chocks prevent rolling while you disconnect, level, and use the RV.
Conclusion
RV manual leveling is a practical skill built on the right order: choose firm ground, correct side-to-side position with tire blocks, chock the wheels, adjust front to back, and use stabilizers only as directed. Strong pads, accurate levels, and regular rechecks make the process safer and easier.
Take your time during the next campsite setup. Follow your RV and jack manuals, keep your tires supported when required, and treat every unusual shift or sinking pad as a warning. Save this guide, share your own leveling tips in the comments, and keep learning before your next trip.