Equalizer RV Leveling System: Setup Guide
Introduction
An equalizer RV leveling system helps stabilize and level a recreational vehicle at campgrounds, RV parks, and home sites across the United States. The system uses hydraulic jacks, a pump, sensors, and a control panel to reduce coach movement and help create a more comfortable living space.
Most Equalizer systems are installed on Class A motorhomes, larger Class C motorhomes, and some specialty RVs. Exact controls vary by model, so the owner’s manual for your coach remains the final authority.
This guide explains how the system works, how to use it safely, and what to check when the jacks will not move, retract, or hold pressure.

What Is an Equalizer RV Leveling System?
An Equalizer RV leveling system is a hydraulic or electric-hydraulic jack system that supports and levels an RV when it is parked. A hydraulic pump sends fluid to individual jacks. The jacks then extend until the coach reaches a level position or the operator stops the cycle.
The system usually includes:
- Hydraulic leveling jacks
- A hydraulic pump and fluid reservoir
- A control panel
- Level sensors
- Hydraulic hoses and fittings
- Solenoid valves
- Wiring, fuses, and relays
- Manual or automatic controls
The jacks do more than hold the RV still. They can also correct some side-to-side and front-to-rear slope. They are not meant to replace the RV suspension, change tire height, or support the coach during repairs.
Hydraulic jacks versus electric jacks
A hydraulic system uses pressurized fluid to move the jacks. An electric motor drives the pump, but the jacks themselves move through hydraulic pressure.
An electric jack system uses a motor and screw or gear assembly at each jack. The two systems have different service needs. Hydraulic systems often need fluid, hose, valve, and pump checks. Electric systems need close attention to motors, gears, wiring, and ground connections.
The Equalizer name is used on more than one RV system. Identify the exact model before buying parts or following a repair procedure.
Manual and automatic operation
A manual system lets the driver control each jack or jack pair. An automatic system uses a level sensor and programmed sequence to extend the jacks.
Automatic leveling is convenient, but it still needs supervision. The RV may be parked on a slope, soft ground, or a surface that falls outside the sensor’s normal operating range. Watch the coach during the full cycle.

How to Use an Equalizer RV Leveling System
Use the system only after the RV is parked on a suitable surface. Keep people away from the jack areas, and never place hands or feet near a moving jack.
Before leveling
- Park the RV on firm ground.
- Apply the parking brake.
- Place the transmission in Park, or use the gear selected by the RV manual.
- Turn off the engine if the system instructions require it.
- Keep the RV connected to the proper electrical power source.
- Remove items that could move inside the coach.
- Check for curbs, rocks, drainage covers, or other objects below the jacks.
- Place jack pads or blocks on the ground when the system manual allows or recommends them.
Do not assume every Equalizer panel uses the same startup sequence. Some systems need the ignition on. Others use a separate power switch. Use the sequence printed on the panel or in the manual.
Automatic leveling procedure
A common automatic process looks like this:
- Press the system power button.
- Confirm that the parking brake and transmission conditions are met.
- Press the automatic level button.
- Watch the front and rear jacks as they extend.
- Confirm that the RV is stable and the panel shows a level result.
- Stop the cycle if a jack contacts an unsafe object or the coach moves in an unexpected way.
The automatic cycle may lift one end before the other. That does not always indicate a fault. The system follows its programmed order and sensor readings.
Manual leveling procedure
Manual leveling requires more care because the operator controls the correction.
- Find the low side with a level placed on a solid floor or counter.
- Extend the jack pair on the low side in small steps.
- Recheck the level after each short adjustment.
- Correct the front-to-rear angle.
- Recheck side-to-side level.
- Stop when the coach is stable and reasonably level.
Avoid large, sudden corrections. Raising one corner too far can twist the coach body, bind doors, or increase stress on the jack mounts.
Signs of a successful setup
A properly leveled RV should show most of these signs:
- The control panel indicates level, if equipped with that function.
- Doors and cabinet doors work normally.
- The floor feels stable when people walk inside.
- The RV does not rock sharply when someone moves.
- The jacks remain firmly planted.
- No jack is close to full extension unless the manual permits it.
- No hydraulic fluid is visible around the pump, hoses, or jacks.
A leveling system is designed to reduce movement. It cannot make every RV perfectly still on soft soil, loose gravel, or a steep slope.

How to Choose Stable Ground and Jack Pads
The ground under the jack pads often matters as much as the leveling system itself. A jack can work correctly and still sink if the soil cannot support the load.
Firm surfaces include:
- Concrete
- Asphalt in good condition
- Compacted gravel
- Dense, dry soil
Use caution on:
- Wet grass
- Mud
- Loose sand
- Fresh gravel
- Soft shoulders
- Areas near drainage channels
Jack pads spread the load over a larger area. They can reduce sinking, but they do not turn weak soil into a strong base. Use pads that fit the jack and comply with the RV and Equalizer instructions.
Do not stack unstable objects under a jack. Avoid loose rocks, hollow blocks, scrap wood, or materials that can shift or split. If you use wood or composite blocks, place them flat and inspect them for cracks.
Never use the leveling jacks as a substitute for a properly rated jack stand during service. If a person must work beneath the RV, use approved support equipment and follow the chassis manufacturer’s procedure.

Equalizer RV Leveling System Troubleshooting
Start with simple and safe checks. Do not open hydraulic lines while the system is pressurized. Hydraulic fluid can penetrate skin and cause a serious injury.
The control panel has no power
Possible causes include:
- A weak or disconnected chassis battery
- A blown fuse
- A tripped circuit breaker
- A poor ground connection
- The parking brake not being detected
- The ignition or system switch being off
- A loose connector
Check the RV battery voltage and the fuse or breaker listed in the system manual. Inspect connectors for corrosion or loose pins. Do not replace a fuse with a larger rating.
If the panel remains dark after the basic checks, the system may have a wiring, relay, controller, or ground fault.
The pump runs but the jacks do not extend
Possible causes include:
- Low hydraulic fluid
- A failed hydraulic pump
- A blocked or closed valve
- A leaking hose
- A damaged solenoid
- Air or contamination in the hydraulic system
- A mechanical problem at the jack
Check the fluid level only as the manual directs. Some reservoirs are checked with the jacks retracted, while others use a different position. Adding fluid in the wrong jack position can overfill the reservoir.
Use only the fluid type listed for your exact system. Do not assume that all Equalizer systems use the same fluid. Clean the area before removing a reservoir cap so dirt does not enter the hydraulic system.
One jack does not move
One inactive jack often points to a local problem rather than a full pump failure. Inspect:
- The electrical connector at that jack
- The hydraulic hose
- The jack mount
- The related solenoid valve
- Bent or damaged parts
- Dirt or ice around the jack foot
Do not swap hoses or electrical wires as a first test. Incorrect connections can create a new fault or cause unexpected jack movement.
The jacks extend but the RV does not level
Check the surface before blaming the system. A steep site may exceed the available jack travel. Soft ground may allow one pad to sink. A jack may also be near full extension.
Retract the jacks, reposition the RV if possible, and try a firmer, more level site. Use proper pads. Do not keep extending a jack after it reaches its safe travel limit.
If the RV repeatedly stops at the same incorrect angle on a known level surface, the level sensor may need calibration. Calibration steps vary by controller and should come from the model manual.
The jacks slowly retract or the RV settles
Possible causes include:
- A hydraulic leak
- A leaking valve
- A damaged cylinder seal
- A loose fitting
- A cracked hose
- A fluid problem
- A jack that is not fully seated or supported
Look for wet fluid around the jack body, fittings, hoses, and pump. A small leak can become a serious failure under pressure.
If the RV loses support, retract the system only when it is safe and the coach is properly supported. Do not crawl under an RV that is held up only by hydraulic jacks.
The jacks will not retract
Check:
- Battery power
- The pump motor and fuse
- The retract control
- The fluid level
- The return valves
- Obstructions around the jack legs
- Cold or contaminated hydraulic fluid
Some systems use springs to help retract the jacks. A weak, broken, or disconnected spring can prevent full retraction. Other systems use hydraulic pressure for both directions.
Do not drive with a jack partly extended. Confirm that every jack is fully retracted and that the warning light or alarm has cleared.
| Symptom | First checks | Possible next step |
|---|---|---|
| No panel power | Battery, fuse, breaker, ground | Test wiring and controller |
| Pump does not run | Power, parking brake signal, switch | Check relay, motor, or control fault |
| Pump runs, no jack movement | Fluid level, valves, leaks | Test pump and hydraulic circuit |
| One jack fails | Connector, hose, local obstruction | Inspect solenoid and jack |
| RV settles | Leaks, valves, cylinder seals | Stop use and arrange repair |
| Jacks remain down | Obstruction, springs, retract valve | Do not drive; inspect safely |

Hydraulic Fluid, Leaks, and Maintenance
Regular inspection can find problems before a leveling failure at a campsite.
Check the following before long trips:
- Hydraulic fluid level
- Reservoir cap and filter area
- Hoses and fittings
- Jack cylinders
- Electrical connectors
- Jack mounting bolts
- Springs, if fitted
- Warning lights and alarms
- Jack pads and blocks
Look for oily dirt. A wet, dirty area near a fitting may indicate a slow leak. Do not tighten fittings while the system is pressurized.
Use the fluid specified by the Equalizer manual for your model. The correct fluid can vary by system design, climate, and revision. Mixing fluids without confirmation may damage seals or create an unclear service condition.
Keep jack rods clean. Remove road salt, mud, and grit before retracting the jacks. Do not spray lubricant on the jack rod unless the manufacturer specifies a product and method.
Cold weather can slow hydraulic movement. If a jack moves slowly only in freezing conditions, check the fluid specification and battery condition. Do not heat hydraulic parts with an open flame.

Equalizer Level Sensor Calibration
A system that levels consistently in the wrong position may need sensor calibration. Calibration should be done on a surface that is genuinely level, not merely one that feels flat.
Before calibration:
- Retract all jacks.
- Park on a firm, level surface.
- Set the parking brake.
- Confirm that the battery is adequately charged.
- Keep the RV in its normal travel condition.
- Read the exact controller instructions.
Calibration methods differ. Some controllers use a hidden button combination. Others use a separate “null” or “level” setting. Do not guess at the sequence, because the wrong setting can store an incorrect reference position.
After calibration, run a complete automatic cycle. Check the floor and a second stable surface inside the RV. If the result remains wrong, the sensor may be mounted incorrectly, damaged, or affected by a wiring fault.

When to Repair an Equalizer Leveling System Yourself
Simple checks are reasonable when they involve the owner’s manual, visible wiring, fuses, battery condition, fluid level, and obvious obstructions.
Professional service is the safer choice when:
- A hydraulic hose or fitting leaks
- A jack mount is bent or cracked
- The pump runs continuously
- The RV drops after leveling
- A cylinder needs a seal repair
- A controller shows an unknown error
- The system needs hydraulic pressure testing
- A jack must be removed
- The coach must be supported during repair
Hydraulic systems can store energy even when the pump is off. A technician has the tools to isolate pressure, support the vehicle, test valves, and verify the repair.
Use the Equalizer manual, RV manufacturer documentation, and the system identification label when ordering parts. A jack, solenoid, sensor, or controller that looks similar may not be compatible.

Equalizer RV Leveling System Versus Alternatives
An integrated hydraulic leveling system offers fast setup and strong support, but it adds weight, cost, and maintenance. Manual leveling blocks cost less and are easy to replace, but they take more time and may not provide the same stability.
| Option | Main benefit | Main limitation |
|---|---|---|
| Integrated hydraulic system | Fast, built-in leveling | Needs power, fluid, and service |
| Electric jack system | No hydraulic fluid | Motors and gears need service |
| Leveling blocks | Low cost and simple design | Requires manual placement |
| Stabilizer jacks | Helps reduce movement | Usually does not level the RV |
| Air suspension leveling | Can adjust ride height | More complex and model-specific |
A stabilizer is not always a leveler. Some RVs use separate stabilizer jacks after leveling. Follow the coach maker’s sequence so one system does not fight the other.
The best choice depends on the RV’s weight, chassis, travel pattern, storage conditions, and repair access. A system that works well on a large motorhome may not be suitable for a lighter trailer.

Common Mistakes to Avoid
Avoid these mistakes when using an Equalizer RV leveling system:
- Driving away before checking that all jacks are retracted
- Using the jacks on soft ground without suitable pads
- Treating a hydraulic leak as normal seepage
- Adding unapproved fluid
- Overextending a jack to correct a steep site
- Using the system while people stand near the jack legs
- Working under the RV with only the leveling jacks supporting it
- Recalibrating the sensor on an uneven surface
- Replacing a fuse with a higher-rated fuse
- Ignoring a low-voltage warning
- Assuming every Equalizer controller has the same buttons or error codes
The safest habit is simple: watch the system while it operates, stop when anything looks abnormal, and use the manual for the exact model.

Key Takeaways
- An Equalizer RV leveling system uses jacks, a pump, sensors, and controls to level and stabilize an RV.
- Firm ground and proper jack pads help prevent sinking.
- Automatic mode still needs supervision.
- Check battery power, fuses, fluid, connectors, and obstructions before assuming a major failure.
- Never work beneath an RV supported only by leveling jacks.
- Use only the fluid, parts, and calibration method approved for the exact system.
- Do not drive until every jack is fully retracted.
FAQs
Can I level my RV with the slides extended?
Follow the RV manufacturer’s instructions. Some coaches require the slides to remain retracted during leveling. Others allow a specific order. The wrong sequence can place extra stress on the frame or slide mechanisms.
Should the tires leave the ground during leveling?
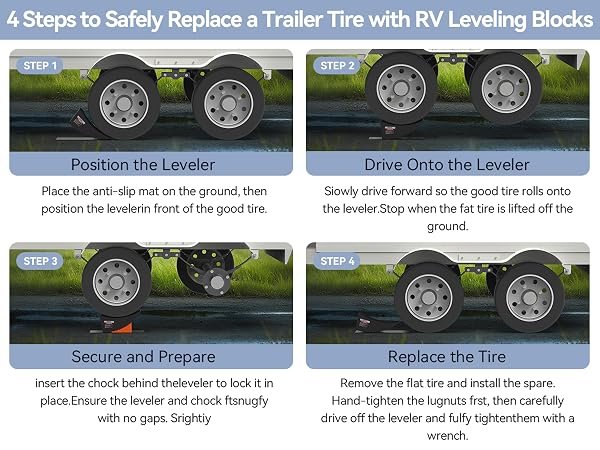
Usually, the tires should remain on the ground unless the vehicle manufacturer and leveling-system instructions clearly allow otherwise. Do not use the leveling system to lift the RV for tire changes or underbody work.
Why does my Equalizer system beep?
A beep may indicate low voltage, an active leveling cycle, a jack that is not retracted, a parking-brake condition, or a system fault. The meaning depends on the controller. Check the display and model manual rather than ignoring the alarm.
How often should I check the hydraulic fluid?
Inspect the level before trips and during routine RV maintenance. Use the checking position listed in the manual. A falling level may indicate a leak, not normal consumption.
Can I use leveling blocks under hydraulic jacks?
Use only stable, load-rated pads or blocks that fit the system instructions. They should sit flat on firm ground. Never use loose objects or unstable stacks.
What should I do if the RV begins to lean after leveling?
Stop using the RV until you identify the cause. Check for a sinking pad, a leaking hose, a retracting jack, or an uneven site. If the coach is unstable, move people away and contact a qualified RV service provider.
Conclusion
An Equalizer RV leveling system can make a U.S. campground stay more stable and comfortable when it is used on firm ground and maintained correctly. The key steps are to follow the model-specific operating sequence, watch every jack during movement, inspect fluid and wiring, and treat any leak or loss of support as a safety issue.
Start by finding the system model number and downloading the matching owner’s manual. Keep that manual with the RV, carry suitable jack pads, and arrange professional service when the fault involves pressurized hydraulics, damaged mounts, or support beneath the coach.