Leveling RV On A Slope: Easy Safe Guide
Level your RV on a slope by choosing a safe direction, using strong leveling blocks, and securing every wheel before setup.
Leveling RV on a slope takes more than driving onto a few blocks and hoping the coach feels steady. The slope angle, RV type, tire position, suspension, refrigerator, and ground strength all matter. I have learned that a calm, measured setup is safer than trying to correct a poor position with extra blocks. This guide explains how to level your RV on a slope, avoid common mistakes, and create a stable campsite.

Why Leveling an RV on a Slope Matters
A small slope can make an RV feel uncomfortable. Doors may swing open, water may drain poorly, and beds can feel tilted. A larger slope can place stress on the frame, suspension, tires, slide-outs, and leveling jacks.
Leveling RV on a slope also helps your appliances work as designed. Absorption refrigerators use gravity to move coolant through their system. Many manuals warn against running them while the RV is far out of level. The exact limit depends on the model, so always follow the refrigerator and RV manufacturer’s instructions.
An uneven RV can also affect:
• Sleep and comfort
• Shower and sink drainage
• Slide-out operation
• Cabinet doors and drawers
• Propane appliance performance
• Jack and suspension loads
• Stability when people walk inside
Think of your RV as a small house on wheels. A house needs a firm foundation. Your RV needs the same kind of support, even if that support comes from leveling blocks on a campsite.
Check the Slope Before You Park
The best way to level an RV on a slope is to reduce the slope before you stop. A few minutes of planning can prevent a difficult setup later.
Before pulling fully into the site, inspect the ground. Look for soft soil, deep ruts, tree roots, large rocks, water channels, and sharp changes in grade. A site may look flat from the road but slope toward a ditch or drain.
Walk the area if possible and ask these questions:
• Which direction does the ground slope?
• Is the surface firm enough for blocks and tires?
• Will the RV door open safely?
• Can the slide-outs extend without hitting trees or posts?
• Will the awning have enough clearance?
• Is there room to pull out if the site becomes unsafe?
Use a small bubble level, a smartphone level, or an RV leveling app to check the site. Smartphone tools are useful, but they should not replace a visual inspection. Place a level on the RV floor or in a fixed location after parking, since counters and tables may not sit perfectly square.

Choose the Best Direction on the Slope
Parking direction has a major effect on leveling RV on a slope. In many cases, it is easier to correct a front-to-back slope than a side-to-side slope.
For a towable RV, place the trailer so the front is slightly higher or lower as needed, then adjust the tongue jack. The exact direction depends on the site and the trailer design. Keep the trailer as level from side to side as possible because side-to-side correction often requires lifting one full side with blocks.
For a motorhome, try to park with the front and rear at similar heights. If one end is much lower, the leveling system may need to raise a heavy section of the coach. That can increase jack extension and reduce stability.
A good parking position should:
• Keep the RV away from the steepest part of the slope
• Reduce side-to-side tilt
• Leave space for slides and awnings
• Keep tires on firm, even ground
• Allow the leveling system to work within its rated range
Do not choose a position only because it gives you a better view. A pretty view is not worth parking one tire near a soft edge or placing the RV across a sharp side slope.

How to Level an RV on a Slope Step by Step
The process changes slightly between a travel trailer, fifth wheel, and motorhome. Still, the basic order remains the same.
1. Park and inspect
Stop in the position that requires the least correction. Keep the steering wheel straight on a motorhome. For a trailer, keep the tow vehicle and trailer aligned before unhitching.
Place your level inside the RV. Check both side-to-side and front-to-back readings.
2. Level side to side first
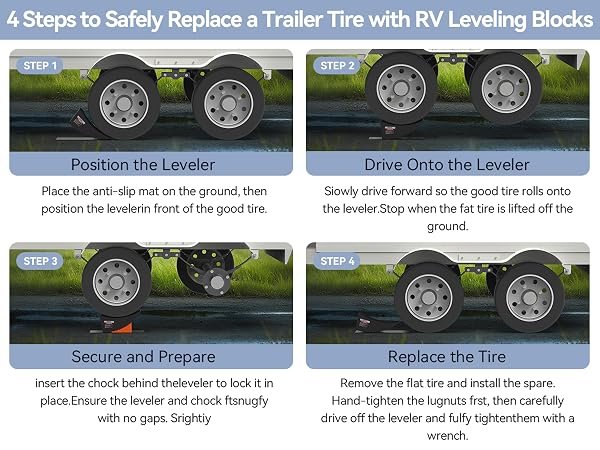
Side-to-side leveling usually requires driving one side onto blocks. Place leveling blocks in a ramp or stair pattern. The ramp should support the full tire tread, not just one small point.
Drive slowly onto the blocks. Stop when the side-to-side reading is close to level. Avoid spinning the tires, since spinning can dig holes and damage the blocks or campsite.
For dual wheels, use blocks designed to support the complete wheel group. Never place a narrow block under only one tire in a dual-wheel set unless the manufacturer specifically allows it.
3. Secure the wheels
Once the RV is level from side to side, set the parking brake on a motorhome. For a trailer, keep the tow vehicle attached until the trailer is safely supported and the wheels are chocked.
Place heavy-duty wheel chocks on both sides of the tires when possible. On a slope, chock the downhill side first. Chocks should touch the tires firmly, but do not force them under a moving wheel.
4. Disconnect the trailer safely
For a travel trailer, lower the tongue jack only after the trailer wheels are secured. On a fifth wheel, lower the landing gear according to the hitch and landing gear instructions.
Never stand between the tow vehicle and trailer while someone is moving the vehicle. Use clear hand signals or a reliable communication system.
5. Level front to back
Adjust the tongue jack on a travel trailer or the landing gear on a fifth wheel. Make small changes and check the level after each adjustment.
For a motorhome, follow the exact order in the leveling system manual. Some systems require the parking brake to be set. Others ask the operator to extend certain jacks first.
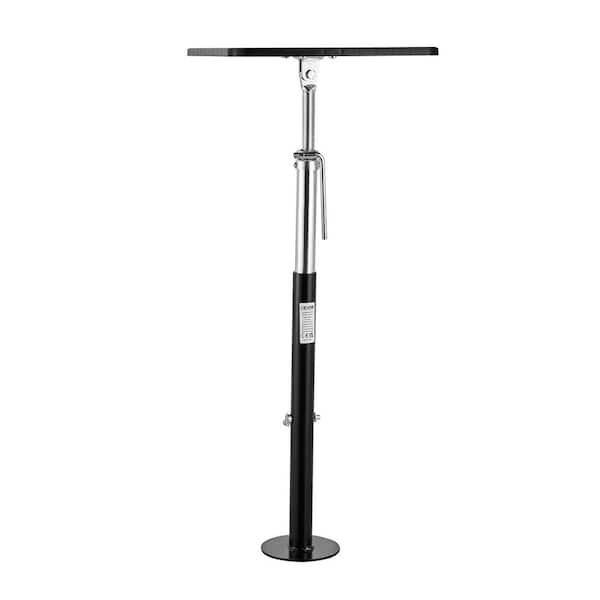
6. Deploy stabilizers or leveling jacks
Stabilizers reduce movement, but they are not always designed to lift the entire RV. Use only the equipment approved for leveling and support.
Place jack pads or wood pads under the feet when the ground is soft. Make sure each pad sits flat. If a jack foot starts to sink, stop and reset the support.
7. Recheck the RV
Walk inside and check both levels again. Open a cabinet door and observe whether it swings. Check the refrigerator display or manual if the RV uses an absorption refrigerator.
Inspect the tires, blocks, jacks, and chocks before you settle in. A second check is especially important after people enter the RV or after the ground becomes wet.
Leveling a Travel Trailer on a Slope
Travel trailers often need more care because their wheels support most of the trailer’s weight during side-to-side leveling. The tongue jack handles front-to-back adjustment, but it should not be used to correct a large side slope.
A useful setup order is:
-
Position the trailer on the firmest part of the site.
-
Check the side-to-side level.
-
Pull forward or backward onto leveling blocks.
-
Set the parking brake on the tow vehicle.
-
Chock the trailer wheels.
-
Disconnect the trailer if the site allows safe separation.
-
Adjust the tongue jack.
-
Lower the stabilizer jacks.
When leveling RV on a slope with a travel trailer, avoid placing the tongue jack at an extreme angle. A long jack extension can reduce stability. If the slope requires a large correction, reposition the trailer instead of forcing the jack to do all the work.
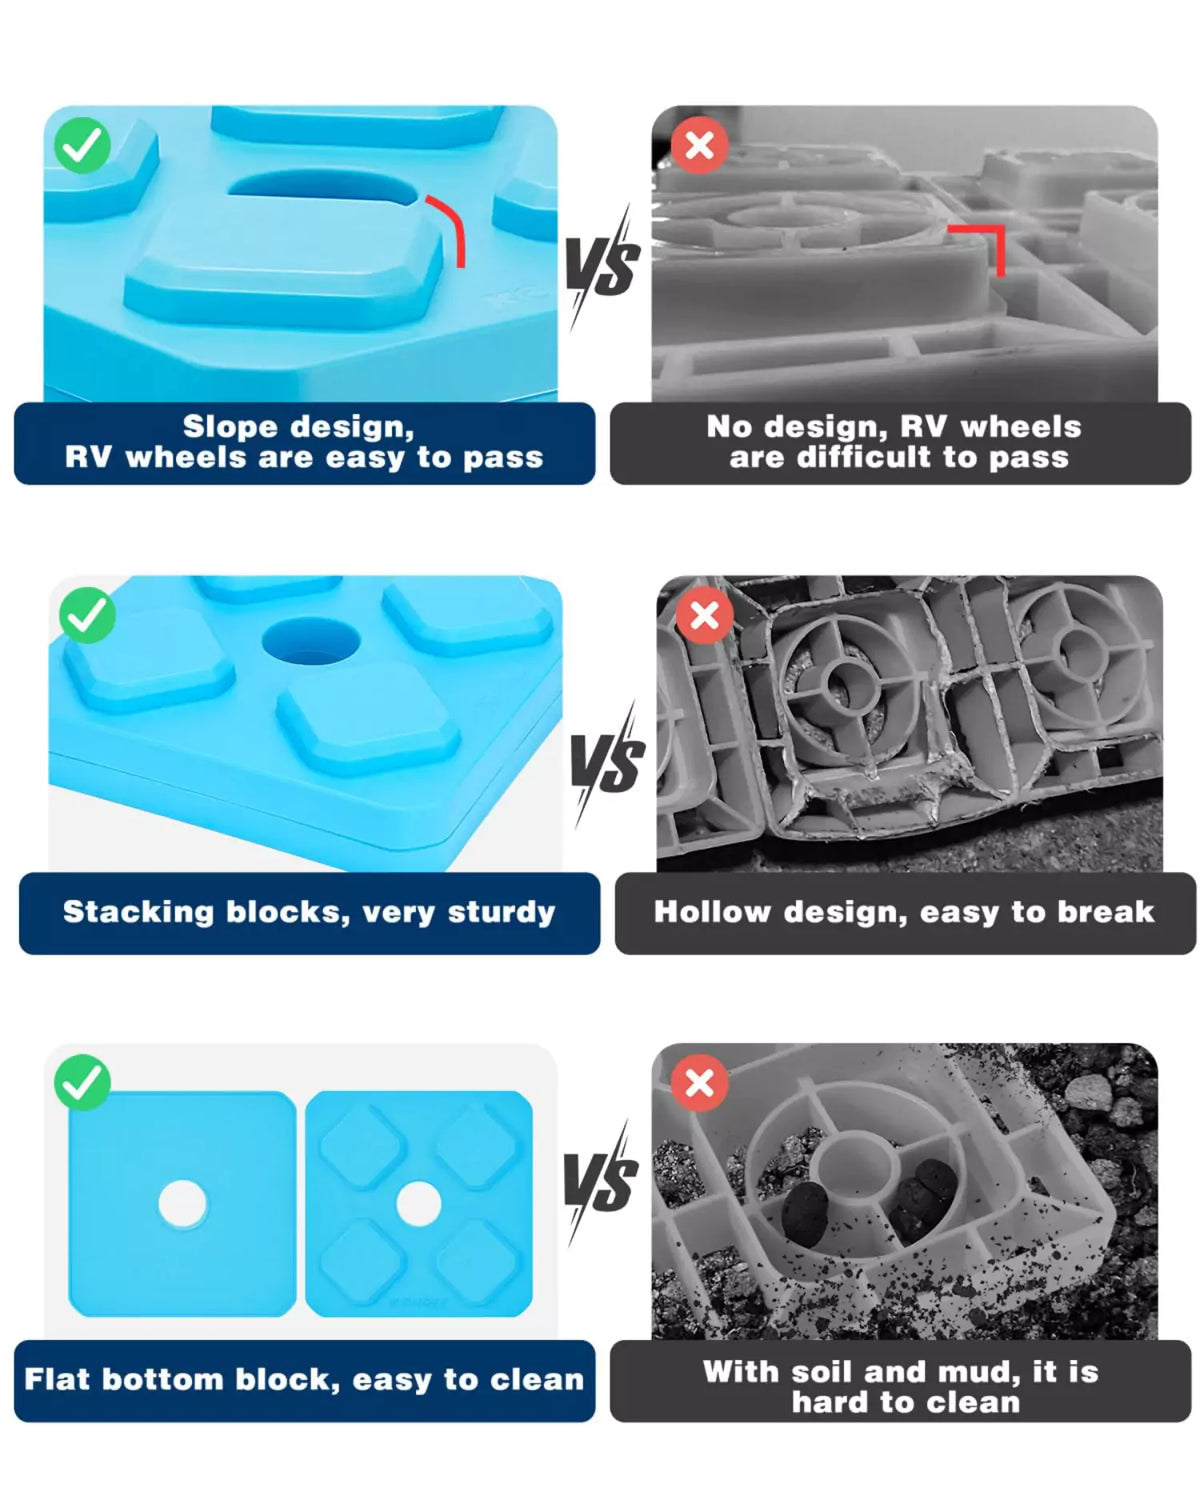
A common mistake is to place one small block under a trailer tire and then drive up at an angle. This can damage the block, strain the tire, or let the tire roll off. A wide ramp made from connected leveling blocks is safer and easier to use.
Leveling a Fifth Wheel on a Slope
Fifth wheels can feel stable, but their high center of gravity makes poor leveling choices more serious. The landing gear supports the front section, while the tires and rear stabilizers support the back.
When leveling RV on a slope with a fifth wheel, keep the trailer as close to side-to-side level as possible before unhitching. If the trailer is badly tilted, the landing gear may carry an uneven load.
Follow these steps:
• Place the lower side wheels on a wide, strong block system.
• Chock the wheels tightly before unhitching.
• Keep the truck aligned with the kingpin during the early setup.
• Lower the landing gear evenly.
• Disconnect only after the trailer is stable.
• Use approved rear stabilizers after front-to-back leveling.
Do not use the landing gear as a substitute for wheel chocks. Landing gear can support the trailer, but it does not stop tire movement as well as properly placed chocks.
On a steep site, the truck may sit at a different angle from the fifth wheel. Take extra care when reconnecting. The kingpin, hitch jaws, and landing gear must align correctly before you move the truck.

Leveling a Class A, B, or C Motorhome
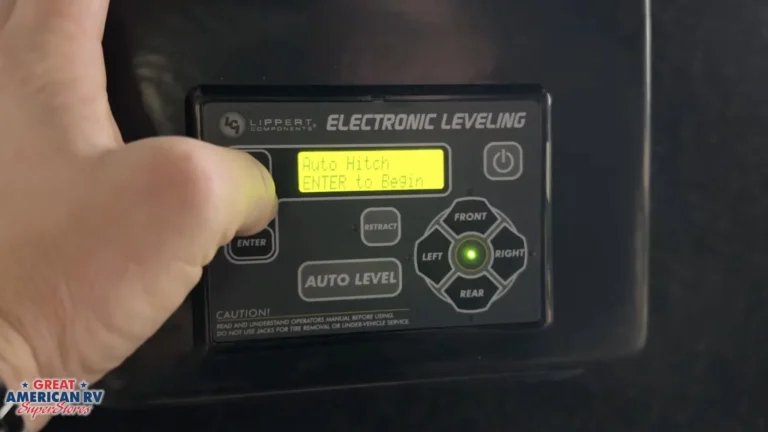
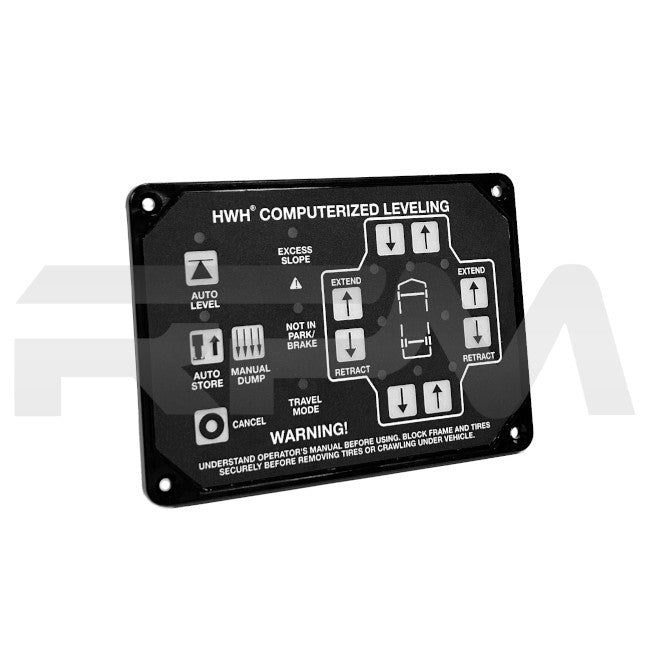
Motorhomes use either manual jacks or an automatic hydraulic or electric leveling system. Automatic systems are convenient, but they still need a suitable parking position.
Start by placing the motorhome on the firmest and most level section available. Set the parking brake and follow the control panel’s instructions. Keep people away from the outside jack areas while the system is operating.
Before using the jacks, check:
• Whether all tires will stay in contact with the ground
• Whether the jacks have enough solid support
• Whether the slope exceeds the system’s limits
• Whether the coach has enough clearance underneath
• Whether doors, slides, and awnings can operate safely
A motorhome should not be lifted so high that its tires lose contact with the ground unless the manufacturer specifically designs the system for that use. Tires provide a wide support base. Removing that support can make the RV less stable.
If the system displays a warning, stops partway, or keeps trying to correct the coach, stop and read the manual. Repeatedly cycling the jacks may overheat the pump or place excess stress on the system.
The Best Tools for Leveling RV on a Slope
Good tools make leveling faster and safer. You do not need every product on the market, but you do need strong, correctly sized equipment.
Useful items include:
• Heavy-duty leveling blocks
• Wide jack pads
• Reliable wheel chocks
• A long bubble level
• A small torpedo level
• A measuring tape
• A rubber mallet
• Work gloves
• A flashlight
• A board for testing soft ground
Use blocks that match the weight rating of your RV. Plastic blocks are light and easy to clean, while wood can provide strong support when it is dry, sound, and thick enough. Never use cracked wood, loose bricks, scrap roofing pieces, or unstable stones.
For a slope, a connected block ramp is better than a single tall stack. Keep the blocks interlocked when the product design allows it. The goal is to spread weight across a broad area.
How Much Slope Is Too Much?
There is no single safe slope limit for every RV. The answer depends on the vehicle, leveling equipment, tire position, ground condition, and manufacturer instructions.
As a practical rule, reposition the RV when you need a large stack of blocks or when one side must be raised dramatically. A small correction is normal. A setup that makes the RV look perched is not.
Pay close attention to the refrigerator. Many absorption refrigerator manuals use approximate limits near 3 degrees side-to-side and 6 degrees front-to-back, but models differ. Some newer RV refrigerators and compressor refrigerators have different requirements.
Also consider the leveling system. Hydraulic jacks may have a maximum extension, and electric stabilizers may not be designed to lift the coach. The owner’s manual is the most reliable source for those limits.
If the site is steep enough that you feel uneasy standing outside the RV, choose another site. Instinct is useful here. A difficult site rarely becomes safer just because the setup takes longer.
Common Mistakes to Avoid
Many leveling problems come from rushing. The most common errors are simple, but they can cause expensive damage.
• Using stabilizer jacks to lift the entire RV: Stabilizers reduce movement. They may not be rated to raise the RV.
• Skipping wheel chocks: Leveling blocks do not replace chocks.
• Stacking unstable materials: Loose wood, rocks, and bricks can shift under weight.
• Leveling only by eye: A site can look flat while the RV remains tilted.
• Leaving tires partly supported: The full tread and wheel group need proper support.
• Extending jacks too far: Long extension can reduce stability and increase bending forces.
• Keeping slides open during major leveling corrections: Slide weight can affect balance and system strain.
• Ignoring soft ground: Rain can turn a firm-looking site into a hazard.
• Parking near a drop-off: A tire or jack can move toward the edge under load.
• Forgetting the exit plan: A level RV is not useful if you cannot leave the site safely.
One mistake I have seen often is correcting a bad parking position with more and more blocks. The better answer is usually to pull out, change direction, and start again.
Safety Tips for a Stable Setup
Safety comes before comfort. Never crawl beneath an RV supported only by jacks. If work must be done underneath, use properly rated jack stands and follow the vehicle manufacturer’s procedures.
Keep children and pets away from the wheels, jacks, and hitch during setup. A moving tire or jack can cause serious injury without much warning.
Use these safety habits:
• Keep the tow vehicle attached until the trailer is chocked and ready.
• Chock wheels before disconnecting.
• Keep hands clear of jack feet and pinch points.
• Check that blocks sit flat and fully support the tires or jack pads.
• Do not exceed the rated capacity of blocks or jacks.
• Stop if a block cracks, shifts, sinks, or tilts.
• Recheck the setup after heavy rain, strong wind, or movement inside the RV.
• Store leveling gear where it cannot become a projectile during travel.
Wind matters on a slope. A tall fifth wheel or motorhome can act like a sail. If strong wind is expected, retract the awning, secure loose items, and consider whether the site offers enough protection.
Personal Lessons From Leveling RV on a Slope
The biggest lesson I have learned is to spend more time choosing the parking position and less time fighting the equipment. When I first began camping, I treated leveling blocks like building blocks. If the RV was not level, I simply added another layer. That worked until a block shifted on soft ground.
Now I check the slope before the RV enters the site. I also carry more chocks than I think I need and use a wide support pad under every jack foot. This small habit makes setup calmer, especially after rain.
Another lesson is to check the RV again after the slides extend. Slide-outs can change the feel of the coach and add weight to one side. If the RV moves, the jacks sink, or a door suddenly changes position, stop and inspect the setup.
The best setup is not the fastest one. It is the one that still looks sound after you walk around the RV twice.
When You Should Choose Another Campsite
Some slopes are not practical to correct. A new site is the safest choice when the ground is soft, the slope is severe, or the RV needs excessive jack extension.
Leave or ask for another site if:
• A tire sits close to an edge or ditch
• The blocks sink as soon as weight reaches them
• The RV cannot remain within the leveling system’s limits
• The refrigerator cannot operate within its specified range
• The leveling jacks lift tires off the ground
• The site has deep ruts or hidden holes
• The door, slide, or awning cannot operate safely
• You cannot create a stable exit path
Campground staff can often suggest a better site. It may feel inconvenient to move, but relocating before unhitching is far easier than recovering a leaning RV later.
Frequently Asked Questions About Leveling RV on a Slope
Can you level an RV on a steep slope?
You can correct a mild slope with suitable blocks, jacks, and chocks. A steep slope may exceed the limits of the RV, leveling system, or refrigerator, so repositioning or choosing another site is safer.
Should you level an RV side to side or front to back first?
Level side to side first because this often requires driving onto blocks. Then correct front to back with the tongue jack, landing gear, or approved leveling system.
Can RV leveling jacks lift the tires off the ground?
Some systems may be designed for limited lifting, but many RV manufacturers recommend keeping the tires firmly supported. Check the owner’s manual, and do not use stabilizers as lifting devices unless they are rated for that purpose.
How do you stop an RV from rolling on a slope?
Set the parking brake on a motorhome and use heavy-duty wheel chocks on the downhill side of trailer tires. For trailers, keep the tow vehicle attached until the wheels are chocked and the trailer is safely supported.
Is it safe to run an RV refrigerator on a slope?
It depends on the refrigerator type and its manufacturer’s limits. Absorption refrigerators are sensitive to being far out of level, so check the manual and correct the RV before operating the appliance.
Are leveling blocks better than wood?
Both can work when they are strong, stable, and correctly rated. Purpose-made blocks are light and easy to connect, while thick, sound wood can provide strong support; never use cracked or unstable materials.
Should slides be extended before leveling an RV?
Most owners should level the RV first and then extend the slides, unless the manufacturer gives different instructions. Leveling first helps reduce stress on slide mechanisms and keeps the coach stable.
Conclusion
Leveling RV on a slope is safest when you begin with a smart parking position, correct side to side first, use strong blocks, secure every wheel, and follow the RV manufacturer’s limits. Stabilizers, jacks, and leveling systems are helpful tools, but none can replace firm ground and careful judgment.
Take a few extra minutes to inspect the site and recheck the RV after setup. If the slope feels unsafe or requires extreme correction, choose another site. Use these steps on your next trip, and share your own leveling tips or campsite lessons with fellow RV travelers.