RV Leveling Sensor: Setup And Troubleshooting Guide
Introduction
An RV leveling sensor tells an automatic leveling system whether your recreational vehicle is level. In the United States, this sensor is common in motorhomes, fifth wheels, and travel trailers with electric or hydraulic automatic leveling jacks. The system uses the sensor reading to decide how far each jack should move.
If the sensor is out of calibration, the RV may stop while still tilted, show a level warning, or raise one side too far. The best first step is to place the RV on a safe, reasonably level site, confirm that the jacks are fully retracted, and follow the exact zero-point calibration steps for the leveling system installed in your RV.
What Is an RV Leveling Sensor?
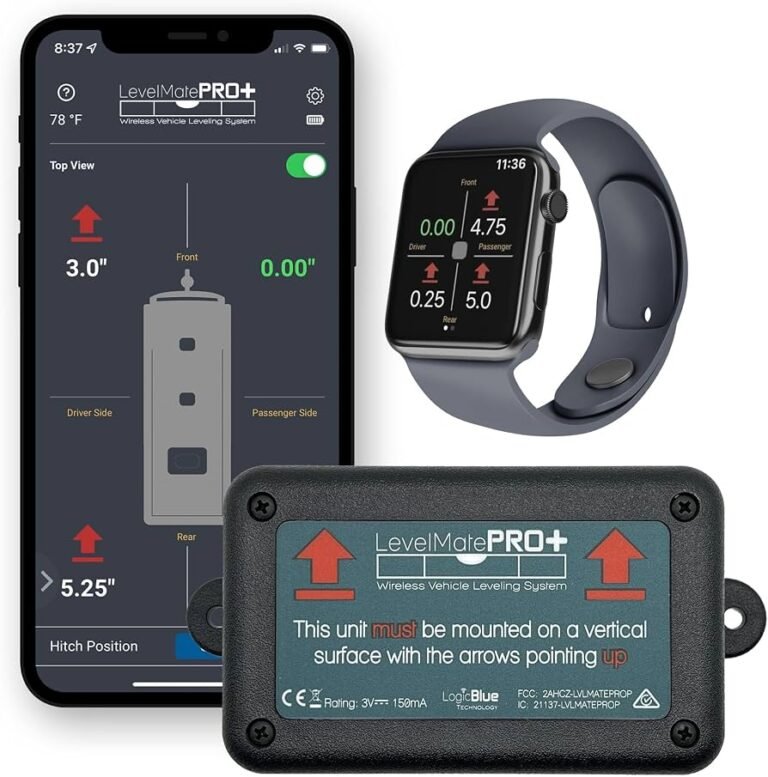
An RV leveling sensor is an electronic device that measures the coach’s angle from level. The leveling control panel or control module uses that information to operate the jacks.
The sensor may be called:
- Level sensor
- Leveling sensor
- Tilt sensor
- Zero-point sensor
- Leveling system sensor
- Electronic leveling sensor
The names differ by brand. The job is similar: measure the RV’s position and send that information to the leveling controller.
Most systems have these main parts:
- Level sensor — Measures the RV’s angle.
- Control panel — Lets the owner select automatic or manual leveling.
- Control module — Processes the sensor signal.
- Jacks or landing gear — Support and level the RV.
- Wiring and connectors — Carry power and sensor data.
- Hydraulic pump or electric motors — Move the jacks.
The sensor does not usually move the jacks by itself. It provides data. The controller then uses that data to decide what the system should do.
Where Is the Sensor Located?
The exact location depends on the RV and leveling system. It is often mounted:
- Near the center of the frame
- Inside a protected compartment
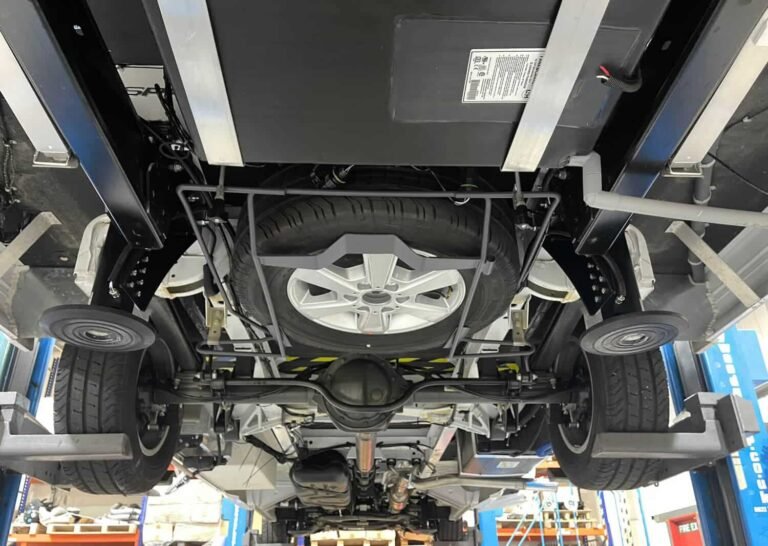
- Beneath the coach
- Near the control module
- On a crossmember or solid frame section
The sensor must be mounted in a known position. A loose sensor, bent bracket, water-damaged connector, or changed mounting angle can create false readings.
Do not assume the sensor is at the geometric center of the RV. The manufacturer’s wiring diagram and service manual are the best sources for its location.
How an RV Leveling Sensor Works
An RV leveling sensor detects pitch and roll.
- Pitch is the front-to-back angle.
- Roll is the side-to-side angle.
The system compares the current angle with its stored level position. This stored position is often called the zero point or level point.
For example, if the coach is tilted down toward the driver’s side, the controller may extend the jacks on that side or adjust the opposite side. The exact movement depends on the system design and the programmed settings.
Automatic Leveling Versus Manual Leveling
In automatic mode, the controller uses sensor data to operate the jacks in a programmed sequence.
In manual mode, the driver controls individual jacks or jack groups. The sensor may still show the coach’s position, but it may not command the complete leveling process.
This difference matters during troubleshooting. A system that levels correctly in manual mode but fails in automatic mode may have a calibration, control, or sensor problem. A system that does not move in either mode may have a power, motor, hydraulic, wiring, or safety interlock problem.
What the Sensor Does Not Measure
An RV leveling sensor does not normally measure:
- Tire pressure
- Jack pressure
- Hydraulic fluid level
- Vehicle weight
- Suspension height
- Road slope in a direct distance measurement
It measures position or angle. Other sensors and switches may monitor jack extension, fluid level, ignition status, or travel position.
How to Calibrate an RV Leveling Sensor
Calibration stores the position that the leveling system should treat as level. Many manufacturers call this zero-point calibration.
The exact button sequence varies by brand and model. Read the owner’s manual or service manual before starting. Do not use a procedure from another RV unless the control system matches.
What You Need Before Calibration
Prepare the RV and site first:
- Park on firm ground.
- Keep clear of traffic and other vehicles.
- Use a site that is as level as practical.
- Keep people away from the jack movement area.
- Make sure the jacks can extend without hitting objects.
- Secure loose items inside the RV.
- Confirm that the parking brake is set when required.
- Keep the engine, ignition, and battery condition within the system’s instructions.
- Retract the jacks fully unless the manual says otherwise.
A calibration error begins with a bad reference. If the RV is tilted during calibration, the system may later create the same tilt every time it runs.
General Calibration Steps
Use these as a general guide only:
-
Park the RV in the chosen reference position.
Use a site that you consider level for normal camping. -
Keep the coach stable.
Do not calibrate while people move around inside the RV or while a slide-out is changing the load. -
Confirm the jack position.
Many systems require all jacks to be fully retracted before calibration. -
Use a separate level to check the coach.
Place a carpenter’s level or digital level on a firm, repeatable surface. Check both front-to-back and side-to-side. -
Enter the calibration mode.
This may involve holding two control-panel buttons or using a service menu. The required buttons are system-specific. -
Store the zero point.
Follow the panel instructions. Do not press extra buttons while the value is being saved. -
Exit calibration mode.
Turn the system off if the manual directs you to do so. -
Test the result.
Retract the jacks, reposition the RV if needed, and run the automatic level function.
How to Check Whether Calibration Worked
Calibration likely worked if:
- The system completes its normal sequence.
- The coach is level in both directions.
- The control panel does not show a sensor fault.
- The system does not repeatedly correct the same side.
- The jacks retract and store normally.
- The level warning clears when the coach is within the system’s accepted range.
A small difference may result from the site, tire position, suspension movement, or the accuracy of the reference level. If the RV is clearly tilted after calibration, repeat the process only after checking the sensor mount and the manufacturer’s instructions.
How to Tell If the RV Leveling Sensor Is Bad
A faulty sensor is only one possible cause of leveling trouble. Check the simple and safe causes first.
Common Symptoms and Likely Causes
| Symptom | Possible cause | Useful first check |
|---|---|---|
| RV stops while visibly tilted | Bad calibration, loose sensor, uneven site | Recheck the zero point and sensor mount |
| Leveling works in the wrong direction | Incorrect calibration or wiring issue | Stop using automatic mode and inspect the manual |
| Control panel shows a sensor error | Sensor fault, connector problem, low voltage | Check battery voltage and visible connectors |
| System works sometimes | Loose wire, corroded connector, weak power supply | Inspect connectors for movement or corrosion |
| One jack will not move | Motor, solenoid, valve, wiring, or mechanical issue | Test manual operation if the manual allows it |
| Jacks retract but warning remains | Travel sensor, limit switch, or sensor data problem | Confirm all jacks are fully stored |
| Coach levels differently each time | Unstable ground, changing load, loose mount | Use firm ground and inspect the mount |
| System will not start | Parking brake, ignition, battery, fuse, or control issue | Check the required safety conditions |
These symptoms overlap. A control panel error does not prove that the sensor itself has failed.
Safe Troubleshooting Order
1. Stop if the RV is unstable
If a tire leaves the ground, a jack slips, the coach shifts, or a jack looks bent, stop the system. Keep people out from beneath the RV.
Never place your body under a coach supported only by hydraulic or electric leveling jacks. Use properly rated support equipment and follow the RV and jack manufacturer’s instructions.
2. Check the site
Soft soil, loose gravel, pavement edges, and sloped ground can change the result. Use suitable jack pads when the system instructions allow them. Pads help spread the load, but they do not correct a poor sensor calibration.
3. Check power and operating conditions
Automatic leveling systems may require:
- Adequate battery power
- The parking brake to be set
- The transmission in the required position
- The ignition in a specific state
- Slides to be in a specific position
- The jacks to be fully retracted
The exact requirements vary. A low battery can cause motors, solenoids, and control modules to behave poorly.
4. Inspect the sensor mount
Look for:
- A loose mounting screw
- A bent bracket
- A sensor that has rotated
- Impact damage
- Water intrusion
- Pinched wires
- Chafed insulation
- Loose or corroded connectors
Do not move the sensor before recording its original position. Moving it may create a new calibration problem.
5. Recalibrate the zero point
If the sensor and wiring appear secure, use the correct calibration procedure for the system. A reset or recalibration may solve a stored reference error.
6. Test manual operation
If the system supports manual control, test each jack only as described in the manual. Manual operation can help separate a sensor or automatic-control problem from a motor or hydraulic problem.
Do not bypass a safety interlock just to make the system run.
7. Use electrical testing only with the correct diagram
A multimeter can help check power, ground, and continuity. However, sensor circuits can use different signal types and voltage ranges. Never apply battery voltage to a sensor wire unless the manufacturer specifically says to do so.
A wiring diagram is essential. Wire colors are not a safe substitute because RV builders and leveling-system makers may use different harnesses.
RV Leveling Sensor Replacement
Replace the sensor only after basic checks and calibration fail. A loose connector or damaged bracket can look like a failed sensor.
Signs Replacement May Be Needed
A replacement becomes more likely when:
- The sensor has visible physical damage.
- The sensor fails the manufacturer’s electrical test.
- The control module reports a confirmed sensor fault.
- The wiring and connectors test correctly.
- Recalibration does not hold.
- The sensor output changes erratically while the RV remains still.
The correct replacement must match the leveling system, not just the RV brand. One motorhome manufacturer may install several different leveling systems across its model years.
General Replacement Process
The steps vary, but the process often includes:
- Park and secure the RV.
- Turn off power as directed by the service manual.
- Photograph the existing wiring and mounting position.
- Label each connector if more than one is present.
- Remove the failed sensor or bracket.
- Install the correct replacement in the specified orientation.
- Secure the wiring away from heat, sharp edges, and moving parts.
- Restore power.
- Perform the required zero-point calibration.
- Test automatic and manual functions from a safe position.
Do not install the sensor backward or at a random angle. Orientation is part of the system’s design.
When to Use an RV Technician
Ask a qualified RV technician for help when:
- The RV has shifted or become unstable.
- A jack, frame part, or mounting bracket is bent.
- Hydraulic fluid is leaking.
- The system has repeated electrical faults.
- You cannot identify the system or sensor.
- The sensor requires a factory scan tool or special test procedure.
- The coach must be lifted or supported for access.
A sensor replacement may be simple, but access beneath a heavy RV can create serious crush hazards.
RV Leveling Sensor Types and System Differences
The phrase “RV leveling sensor” can describe different designs.
Internal Electronic Sensors
Some systems use a compact electronic sensor with an internal circuit board. It may measure angle through an accelerometer or another electronic method.
These sensors are sensitive to:
- Mounting position
- Orientation
- Vibration
- Moisture
- Wiring quality
- Calibration
They may have no visible moving parts.
External or Mechanical Sensors
Some older or different systems may use mechanical switches, pendulums, or separate position sensors. Their adjustment method may involve mounting position rather than a digital zero-point command.
Do not apply an electronic calibration process to a mechanical system without checking the manual.
Hydraulic and Electric Leveling Systems
The sensor does not tell you whether the jacks are hydraulic or electric. Both system types can use an electronic level sensor.
The main difference is how the controller moves the jacks:
- Hydraulic systems use a pump, valves, cylinders, and fluid.
- Electric systems use motors and screw mechanisms or electric actuators.
A leveling problem may therefore come from the sensor, or from the separate hydraulic or electric parts.
Motorhome and Trailer Differences
Motorhomes often use chassis-mounted leveling systems. Fifth wheels and travel trailers may use landing gear at the front and stabilizers or leveling jacks at the rear.
A trailer’s hitch or kingpin position can affect setup. A motorhome’s suspension and axle load can affect it as well. The same calibration idea applies, but the jack sequence and safety rules may differ.
How Accurate Should an RV Leveling Sensor Be?
An RV leveling sensor is designed to help the system reach a usable level position. It is not the same as a precision surveying instrument.
The result can change because of:
- A sloped campsite
- Soft or settling ground
- Tire pressure differences
- Suspension movement
- Slide-out position
- Water, fuel, or cargo load
- Jack pad compression
- Sensor movement
- Measurement error from a small bubble level
For normal RV use, the practical goal is a stable coach that meets the needs of the occupants and appliances. Some refrigerators have specific operating limits. Follow the refrigerator manufacturer’s instructions rather than relying only on the leveling panel.
A digital level can offer a useful check, but it does not replace the system’s service procedure. Use the same reference surface each time. Comparing different surfaces can create a false impression that the sensor has changed.
A Simple Example
Suppose a digital level shows:
- Front-to-back: 0.5 degrees low at the front
- Side-to-side: 0.2 degrees high on the passenger side
That reading may help you understand the coach’s position. It does not tell you which jack to extend unless the leveling system manual gives that instruction. The controller’s jack sequence depends on the system design.
Common RV Leveling Sensor Mistakes
Several mistakes can create a fault that looks like a bad sensor.
Calibrating on a Poor Surface
If the RV is calibrated on a steep slope, the system will treat that slope as level. Choose a firm and reasonably level reference area.
Moving the Sensor Without Recalibrating
Even a small change in sensor angle can change the stored reading. If the bracket moves, inspect it and recalibrate according to the manual.
Testing With Slides in Different Positions
Slide-outs change the load on the coach. If you calibrate with slides extended and later level with them retracted, the coach may settle differently.
Use the manufacturer’s recommended slide position during calibration and operation.
Ignoring Low Voltage
Electric motors and hydraulic pumps draw substantial current. Low battery voltage or poor connections may cause partial movement, resets, or fault codes.
Check the system’s power requirements. Do not assume that a normal interior light proves the leveling system has enough power.
Using the Wrong Calibration Procedure
A button sequence from a similar-looking control panel may not apply to your system. Identify the brand, model, and revision first.
Treating a Leveling System as a Long-Term Support System
Leveling jacks are meant to level and support the RV as designed. They are not a reason to ignore the manufacturer’s storage, blocking, or chassis-support instructions.
Do not work beneath the RV unless it is supported by equipment suitable for the load and approved for that use.
RV Leveling Sensor Quick Reference
| Your situation | Best next action |
|---|---|
| The RV is level in one direction but not the other | Check the zero point and the sensor mount |
| The system stops with a level warning | Confirm jack retraction, power, and sensor data |
| The coach is tilted after every automatic cycle | Recalibrate on firm, reasonably level ground |
| The sensor was recently replaced | Confirm part compatibility, orientation, wiring, and calibration |
| A jack will not move | Check safety conditions, power, motor, hydraulic parts, and wiring |
| The RV shifts during leveling | Stop, clear the area, and inspect the ground and jack setup |
| The system works manually but not automatically | Focus on calibration, sensor data, and control logic |
| The system fails in both modes | Focus first on power, wiring, motor, hydraulic, and mechanical faults |
Key Takeaways
- An RV leveling sensor measures the coach’s pitch and roll.
- The control system uses the sensor to find the programmed zero point.
- Incorrect calibration is a common cause of poor automatic leveling.
- A loose mount, damaged wire, low battery, or unstable campsite can mimic sensor failure.
- Identify the exact leveling-system brand and model before testing or replacing parts.
- Never work beneath an RV supported only by leveling jacks.
- Recalibrate only after placing the RV on firm, reasonably level ground.
- Use the manufacturer’s service manual for wire tests, button sequences, and replacement parts.
Frequently Asked Questions
Can I use a regular bubble level to calibrate an RV leveling sensor?
You can use a bubble level as a reference check, but the leveling system’s calibration procedure controls how the zero point is stored. Place the level on a firm, repeatable surface and follow the system manual.
Why does my RV level in manual mode but not in automatic mode?
This often points toward calibration, sensor data, or automatic-control logic. It does not prove the sensor is defective. Check the zero point, sensor mount, stored fault codes, and system power.
Can a bad battery cause an RV leveling sensor error?
Yes. Low voltage or a weak connection can affect the control module, motor, pump, or sensor circuit. Check battery condition and the manufacturer’s required operating voltage before replacing the sensor.
Does an RV leveling sensor need to be replaced after every recalibration failure?
No. Recalibration failure can result from a loose bracket, wrong procedure, low voltage, wiring damage, or an unstable surface. Replacement makes sense only after those causes are checked.
Can I drive with an RV leveling sensor warning?
Do not drive until the jacks are fully retracted and the system confirms a safe travel state. A warning may indicate that a jack, sensor, or travel switch has not reached its required position. Inspect the system and follow the manufacturer’s travel instructions.
Where can I find the correct calibration instructions?
Look for the leveling-system brand and model on the control panel, pump assembly, jack label, or owner documents. Then use the system manufacturer’s manual or contact an RV service center. The RV model alone may not identify the correct procedure.
Conclusion
An RV leveling sensor is the part that helps an automatic jack system understand the coach’s position. When the RV does not level correctly, start with the safest and simplest checks: ground conditions, power, jack position, sensor mounting, wiring, and calibration.
Do not assume the sensor is bad because the control panel shows an error. Verify the exact system, use its documented procedure, and stop if the RV becomes unstable. If the fault remains after calibration and basic inspection, a qualified RV technician can test the sensor and the rest of the leveling system safely.